
Installing indirect ambient lighting is one of the most effective ways to make a compact condominium feel spacious, modern, and inviting. Unlike traditional bulky fixtures, strip light moulding integrates seamlessly into ceilings and walls, casting a soft, glare-free glow that elevates your interior design. However, mounting these profiles in a high-rise unit presents unique challenges, from handling solid concrete walls to managing cables neatly without major structural alterations.
Achieving a professional, flush-mount finish requires selecting the right materials, planning a precise layout, and following safe installation practices. Whether you want a cozy warm white glow for your living area or dynamic color-changing capabilities for an entertainment zone, this step-by-step guide will walk you through the entire process. By understanding the structural and electrical requirements of your unit, you can successfully complete this upgrade while keeping your installation clean, secure, and fully compliant with building regulations.
Preparation and Tools for Condo Moulding Installation
Before purchasing your lighting components, you must verify the specifications of your chosen system. Ensure that the voltage of your LED strip matches the output of your LED driver (typically 12V or 24V) and that the driver is rated for your local 220V to 230V electrical supply. Check for recognized safety certifications on all electrical parts to ensure long-term reliability. Additionally, confirm that the physical dimensions of the LED strip fit comfortably inside the inner channel of your selected moulding profile.
Products mentioned in this guide
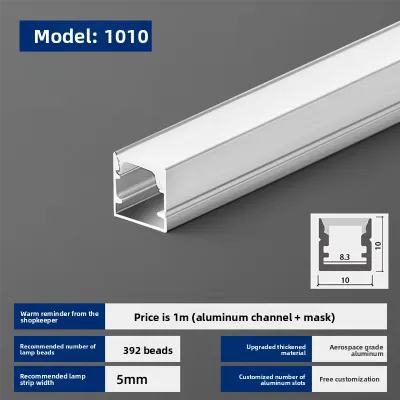
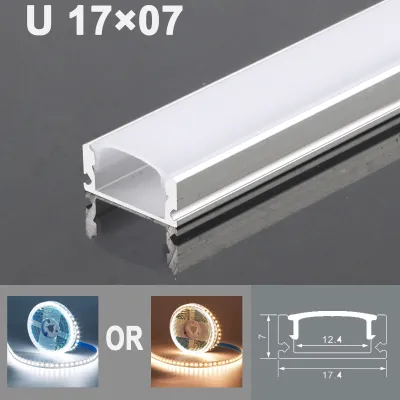
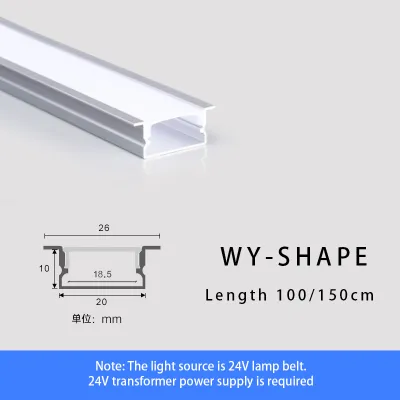
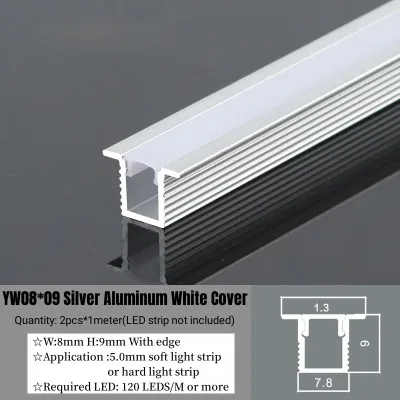
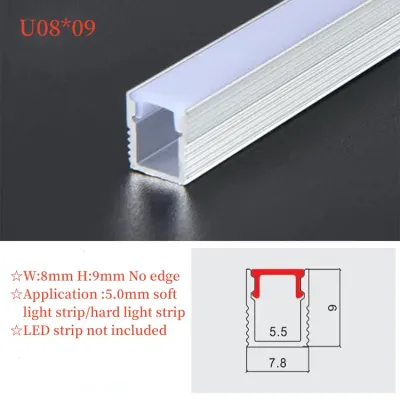
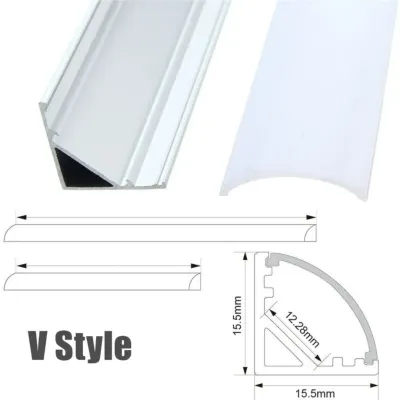
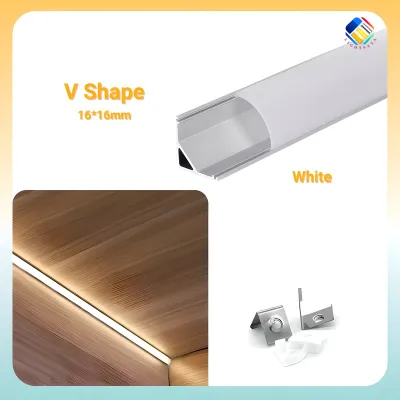
Prices are valid at publication and may change. Please refer to the product page for the latest price.
Gathering the correct tools beforehand prevents delays and ensures clean cuts and secure attachments. For a standard installation, you will need a measuring tape, a spirit level or laser level, a pencil, a power drill with masonry and wood bits, a screwdriver, and a mitre box with a fine-toothed hacksaw for cutting the profiles. Safety glasses and heavy-duty work gloves are essential, especially when cutting metal channels or drilling overhead into tough materials.
Your materials checklist should include the LED strip light moulding profiles (usually made of aluminum or PVC), frosted diffuser covers, end caps, mounting clips, or heavy-duty construction adhesive. You will also need the LED strips, a compatible power supply, low-voltage wiring, and wire connectors. If you plan to use screws, ensure you have the correct wall anchors suited to your condo’s specific wall and ceiling materials.
Condo construction in the Philippines typically utilizes solid concrete or pre-cast concrete panels for structural walls and ceilings, while interior partitions are often made of gypsum drywall or light wood framing. Identifying these materials beforehand is crucial. Concrete surfaces require a hammer drill, masonry drill bits, and plastic wall plugs (commonly known locally as tox screws), whereas drywall partitions require toggle bolts or specialized hollow-wall anchors to hold the weight of the profiles securely.
Planning the Layout and Concealing Cables
An outstanding lighting design relies on meticulous planning and straight lines. Begin by using a laser level or a spirit level to project a straight reference line along the wall or ceiling where the moulding will be mounted. Mark this path lightly with a pencil. Because high-rise concrete ceilings are rarely perfectly flat, relying on a level ensures your light line looks uniform and does not highlight minor structural slopes.

Next, locate your nearest 220V power outlet or electrical junction box. Plan the route from this power source to the location of your LED driver, and then to the start of your strip light moulding run. Keep the low-voltage cable run as short as possible to minimize power loss, and ensure the power supply will be placed in an area that allows for easy access and troubleshooting.
Clean cable management is the secret to a professional-looking DIY installation. In a condo, you can route wires behind existing decorative bulkheads, run them along the tops of baseboards, or use paintable PVC cable trunking that blends into the wall. If you wish to drill small pass-through holes to route cables behind drywall partitions, always verify that you are not drilling into structural columns, plumbing lines, or electrical conduits.
Cutting your moulding profiles accurately is essential for clean joints, especially at the corners of your room. Use a mitre box to make precise 45-degree angle cuts for inside and outside corners. If you prefer a simpler approach, you can purchase pre-made 90-degree corner connectors that join straight profile segments together, though you must ensure these connectors match the exact width and depth of your moulding model.
Step-by-Step Mounting of the Moulding Profiles
To ensure a lasting installation, always check the applied product’s label and the treated item’s manufacturer instructions before starting. If instructions conflict, the item is unidentified, or the use is not covered, stop and consult the manufacturer or a qualified professional. Proper preparation prevents damage to your condo’s surfaces and ensures the mounting system performs as intended.
Step 1: Surface Preparation
Clean the mounting surface thoroughly along your pencil line to remove all dust, grease, and loose paint. In humid tropical environments, moisture and oil on walls can severely weaken adhesive bonds. Wipe the area with a damp cloth or a mild isopropyl alcohol solution, then allow it to dry completely before attempting to mount any clips or adhesives.
Step 2: Securing the Profile
Depending on your condo’s rules and your wall type, choose one of the following two mounting methods to secure your moulding profiles.
Using Mounting Clips and Screws (Best for Concrete and Heavy Profiles)
- Mark the intervals: Hold the profile against your reference line and mark anchor points every 30 to 50 cm.
- Drill pilot holes: Using a power drill with a masonry bit, drill holes at the marked points. Avoid drilling deeper than the length of your wall anchor.
- Insert wall anchors: Tap plastic wall plugs firmly into the drilled holes until they are flush with the surface.
- Attach the clips: Align the mounting clips over the anchors and screw them tightly into place.
- Snap the profile: Press the aluminum or PVC moulding profile into the clips until you hear it click securely into position.
Using Heavy-Duty Construction Adhesive (Best for Smooth Surfaces or Rented Units)
- Apply the adhesive: Run a continuous, zigzag bead of high-strength, polyurethane-based construction adhesive along the flat back of the moulding profile.
- Press and hold: Press the profile firmly against the cleaned wall or ceiling along your level line, applying even pressure for at least 30 seconds to establish an initial bond.
- Secure with tape: Use painter's tape at regular intervals to hold the profile tightly against the surface while the adhesive cures.
- Allow to cure: Let the adhesive dry completely according to the manufacturer's specified curing time (usually 24 hours) before installing the LED strips.
Step 3: Attaching End Caps and Preparing the Channel
Once the profiles are firmly mounted, slide or snap the end caps onto the exposed ends of the channels. Take a clean, dry microfiber cloth and wipe down the inside of the channel to remove any debris, metal shavings, or dust that accumulated during the cutting and mounting process.
Warning: Stop and consult your condominium’s Property Management Office (PMO) guidelines before drilling into structural concrete ceilings, columns, or post-tension slabs. Drilling into structural reinforcement or post-tension cables can compromise building safety, violate your association rules, and void your unit’s warranty.
Wiring the LED Strips and Connecting Power Safely
To install the LED strip, measure the exact length of the mounted channel. Cut the LED strip to size, making sure to cut only along the clearly marked copper cutting lines. Peeling the adhesive backing off in small sections, press the strip firmly and evenly into the bottom of the moulding channel, ensuring there are no ripples or lifted sections that could cause uneven lighting.
When connecting multiple strip segments, use solderless quick connectors designed for your specific strip width and pin count (e.g., 2-pin for single color, 4-pin for RGB). If your layout requires sharp angles or custom lengths, soldering the wires directly to the copper pads provides a highly durable connection. If you choose to solder, insulate the exposed joints with heat-shrink tubing to prevent short circuits.
Route the low-voltage output wires from the end of your LED strip to the location of your LED driver. When working with electricity, safety must be your top priority. Always isolate the power at the main circuit breaker before handling any electrical connections, and verify that the power is off using a reliable voltage tester.
In the Philippines, the standard residential electrical system operates at 220V to 230V. Hardwiring an LED driver directly into your condo’s mains electrical system is a fixed-wiring task that must be performed by a licensed electrician to comply with the Philippine Electrical Code. For a safe, DIY-friendly alternative, use a plug-and-play setup where the LED driver connects to a standard wall outlet via a pre-assembled power cord.
Mount your LED driver and controller in an accessible but hidden location, such as on top of a kitchen cabinet, inside a ventilated closet, or behind a removable access panel. Never seal a power supply inside a completely enclosed, unventilated wall cavity. LED drivers generate heat during operation, and adequate ventilation is required to prevent overheating, which can cause premature component failure or pose a fire hazard.
Testing, Diffuser Installation, and Final Checks
Before sealing your moulding profiles, switch the power back on at the breaker and turn on the lights to test the entire system. Inspect the run to ensure all light-emitting diodes illuminate correctly and that there is no flickering. Look closely at the far end of the strip to check for voltage drop, which appears as a noticeable loss of brightness or a shift in color compared to the section closest to the power supply.
If you encounter issues during testing, begin troubleshooting by checking all physical connections. Verify that the positive (+) and negative (-) polarities match perfectly across all connectors and at the power supply terminals. If an entire run fails to light up, verify that your power supply’s total wattage capacity exceeds the total wattage consumption of your connected LED strips by at least 20%, providing a safe operating buffer.
Once the system passes testing, install the frosted diffuser covers. Align the diffuser with the front of the moulding channel and gently press it in until it snaps into place along the entire length of the run. The frosted cover diffuses the harsh, pinpoint light of individual LEDs, blending them into a smooth, continuous, and elegant neon-like glow.
Complete your project with a final visual inspection. Turn off the main room lights and evaluate the ambient effect of your new strip light moulding. Verify that the moulding is perfectly level, the diffusion is uniform, and the color temperature aligns with your design goals. Warm white tones (2700K to 3000K) are excellent for creating a relaxing atmosphere in bedrooms and living rooms, while adjustable RGB systems offer dynamic customization for modern entertainment spaces.
Frequently Asked Questions (FAQ)
Can I install LED strip moulding on a concrete condo ceiling without drilling?
Yes, you can install lightweight aluminum or PVC profiles on concrete ceilings without drilling by using high-strength polyurethane construction adhesives or heavy-duty mounting tapes designed for building materials. However, you must verify the weight limits of the adhesive and ensure the ceiling’s paint layer is perfectly stable. If the paint is old, chalky, or peeling, the weight of the profile may eventually pull the paint off the concrete, causing the installation to fall.
How do I prevent voltage drop in long ceiling cove runs?
Voltage drop occurs when the electrical current encounters resistance over a long distance, resulting in dimmer light at the end of the strip. To prevent this, you can inject power by running a separate low-voltage wire from your power supply and connecting it to both ends of the LED strip. Another highly effective solution is to use a 24V LED strip system instead of a 12V system, as higher-voltage systems carry current more efficiently over longer runs.
Do I need a permit from my condo admin to install cove lighting?
For simple, plug-and-play installations that use existing wall outlets and adhesive mounting, a formal work permit is generally not required. However, if your project involves drilling into structural concrete ceilings, routing wires inside structural walls, or hardwiring connections directly into your unit’s main electrical panel, you must consult your Property Management Office (PMO). They will provide the necessary guidelines, work permits, and schedule requirements to ensure your project complies with building policies.
Community discussion
Share your experience or ask a question. Comments are reviewed before publication.