
Installing an LED light strip can instantly transform a compact condominium into a modern, visually spacious home. Whether you want to highlight a false ceiling cove, illuminate kitchen countertops, or add sophisticated backlighting to a television console, the process is highly achievable as a weekend DIY project. In the Philippines, where high humidity and concrete walls are standard, a successful installation requires careful surface preparation and the right mounting strategy to ensure the lights remain secure over time.
By understanding the electrical requirements, selecting the correct tools, and following a systematic mounting process, you can achieve professional-grade ambient lighting. This comprehensive guide walks you through every stage of the installation, from initial measurements to rent-friendly mounting alternatives that protect your security deposit.
Essential Tools and Materials for Condo Installation
Before beginning your project, gather all the necessary components and tools to ensure a smooth, uninterrupted installation. Having the correct materials on hand prevents mid-project delays and helps protect your condo’s surfaces from accidental damage.
Products mentioned in this guide
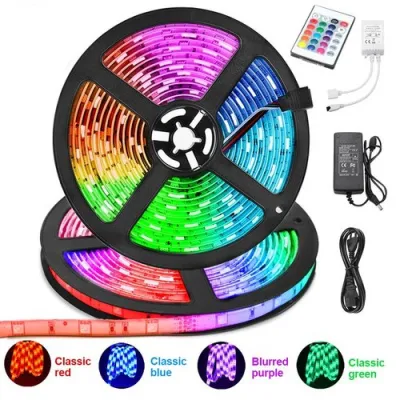
Prices are valid at publication and may change. Please refer to the product page for the latest price.
Core Lighting Components
- LED Strip Lights: Select a high-quality LED light strip that matches your desired brightness, color temperature, and smart features. Ensure you choose the correct length for your target area.
- Compatible Power Adapter: The power supply unit (PSU) must match the voltage of your LED strip (typically 12V or 24V DC) and provide sufficient wattage to power the entire length safely.
- Controller: Depending on your system, this may be a simple inline manual controller, an infrared (IR) receiver with a remote, or a smart Wi-Fi/Bluetooth controller that integrates with home automation systems.
Installation and Preparation Tools
- Measuring Tape: Essential for calculating the exact length of the strips needed and planning the run to the nearest power outlet.
- Cleaning Supplies: High-purity isopropyl alcohol (70% or higher) and a clean, lint-free microfiber cloth to prep the mounting surfaces.
- Sharp Scissors: Required for cutting the strips to size, but only at the designated cut points specified by the manufacturer.
Condo-Specific Mounting Aids
- Aluminum Channels with Diffusers: These metal tracks act as a heat sink to dissipate warmth while diffusing individual light points into a smooth, continuous glow.
- Heavy-Duty Double-Sided Mounting Tape: Acrylic-based foam tapes are highly recommended for securing channels or strips to painted concrete walls, especially in humid tropical climates.
- Adhesive Cable Clips: Small, non-damaging clips to secure loose power cords and maintain a clean, professional aesthetic.
Step 1: Measure, Plan, and Prepare the Surface
Accurate planning is the foundation of a flawless lighting installation. Failing to prepare the surface or map out the electrical path can lead to peeling adhesives, visible dark spots, or cords that cannot reach the power outlet.

Start by measuring the exact dimensions of the target area, such as a ceiling cove, the underside of kitchen cabinets, or the perimeter of a TV console. When planning your layout, identify where the strip will begin and end. To avoid visible dark spots, ensure the strip runs continuously across the designated area without overlapping. If you are lighting a long perimeter, calculate the total wattage requirement by multiplying the wattage per meter (provided by the manufacturer) by the total length of the run. This calculation ensures your power adapter can handle the load without overheating.
Next, focus on surface preparation, which is the most critical step for adhesive longevity. In the Philippines, the combination of ambient humidity and microscopic airborne grease—especially in open-plan studio or one-bedroom condos—creates a thin film on walls and cabinets that prevents adhesives from bonding. Clean the installation surface thoroughly using a microfiber cloth dampened with isopropyl alcohol. Do not use household glass cleaners or multi-surface sprays, as they often leave behind a slick residue that compromises the adhesive.
After wiping down the surface, allow it to dry completely. This typically takes 10 to 15 minutes depending on the room’s ventilation. Applying adhesive to a even slightly damp surface will inevitably cause the strip to sag or peel away within a few weeks.
Step 2: Mount the LED Strips and Handle Corners
Mounting the strips requires a delicate balance of firm pressure and careful handling. Because LED strips are flexible circuit boards, rough handling can break the internal copper traces, leading to dead sections or flickering lights.
Begin mounting from the end closest to where the controller and power supply will be positioned. Peel away a small section of the adhesive backing—about 30 centimeters at a time—rather than removing the entire backing at once. This prevents the exposed adhesive from gathering dust or sticking to itself. Press the strip firmly against the prepared surface, applying even pressure with your thumb or a soft cloth for at least 10 to 15 seconds per section to activate the pressure-sensitive adhesive.
Navigating 90-degree corners requires specific techniques to avoid damaging the circuitry. Never bend an LED strip sharply around a corner, as this creases the copper conductors and will likely cause permanent damage. Instead, use one of the following two methods:
- The Ribbon Fold Method: If the manufacturer's instructions explicitly permit it, you can create a loose, rounded loop or a 45-degree accordion fold at the corner. Ensure you do not bend the strip tighter than its specified minimum bending radius.
- Solderless Corner Connectors: For a cleaner and safer installation, cut the strip at the designated cut line and use an L-shaped solderless connector. Insert the cut ends into the connector, matching the positive (+) and negative (-) markings on both sides, and snap the plastic cover shut to secure the connection.
Throughout the mounting process, avoid stretching the strip. Pulling the strip too tightly can tear the delicate solder joints between the individual LED segments, resulting in partial failure of the light run.
Step 3: Connect the Power Supply and Hide Cables
Once the physical mounting is complete, you must establish the electrical connections safely and organize the wiring to maintain a clean, clutter-free living space.
Always follow the correct connection sequence to prevent electrical surges or short circuits. First, connect the end of the LED strip to the output port of the controller. Next, connect the input port of the controller to the DC output jack of the power adapter. Finally, plug the power adapter into the AC wall outlet. Before turning on the power, verify that the input voltage listed on the power adapter matches the local mains supply, which is standard 220V at 60Hz in the Philippines. Inspect the adapter for recognized safety marks, such as the Philippine Standard (PS) mark or the Import Commodity Clearance (ICC) sticker, to ensure the device complies with local electrical safety regulations.
Keep all electrical connections, including the controller and power brick, away from moisture and heat traps. For kitchen under-cabinet installations, mount the power adapter away from the sink, stovetop, or kettle steam vents. Do not seal the power adapter inside tight, unventilated ceiling cavities or behind heavy furniture where heat cannot dissipate naturally. If your project involves fixed wiring, tapping into ceiling junction boxes, or working at heights on high-lofts, always isolate the power at the main circuit breaker first, and consult a qualified professional to complete the electrical connections.
To keep your condo looking tidy, implement practical cable management. Use adhesive cable clips to secure loose wires along the undersides of cabinets or behind furniture. For visible runs along concrete walls, install small plastic cable raceways or paintable micro-trunking that matches your wall color to blend the wires seamlessly into the background.
Step 4: Test the Setup and Troubleshoot Issues
With all components connected, it is time to perform a comprehensive system test to ensure the installation is fully functional and safe for daily use.
Plug the power adapter into the wall outlet and turn on the system. Use the controller, remote, or dedicated smartphone app to cycle through all available colors, dimming levels, and dynamic modes. This initial test helps identify any connection issues or manufacturing defects before you finalize the placement of your furniture or cable management channels.
If your installation does not perform as expected, use the following troubleshooting steps to diagnose and resolve the issue:
- The Strip Does Not Turn On: Double-check that the wall outlet has power and that the power adapter is plugged in securely. Verify that the connections between the strip, controller, and adapter are tight and oriented correctly. For DC connections, ensure the positive (+) and negative (-) polarity lines match perfectly across all connectors.
- The Lights are Flickering: Flickering is commonly caused by an overloaded power supply or a loose connection. Check that the total wattage of your LED strip does not exceed 80% of the power adapter's maximum rated capacity. If the wattage is correct, wiggle the solderless connectors gently to identify any loose physical contacts.
- Partial Lighting or Color Mismatch: If only a portion of the strip lights up, or if some sections display different colors, inspect the strip closely for physical crimps, tears, or loose solderless connectors at the junction points. A loose connection on one of the color channels (Red, Green, or Blue) will cause incorrect color rendering downstream.
Rent-Friendly Tips for Secure and Damage-Free Mounting
Condo renters must balance their desire for beautiful ambient lighting with the practical need to avoid property damage. Standard LED strip adhesives are incredibly strong and can easily tear latex paint or drywall paper when removed, leading to costly security deposit deductions.
To prevent wall damage, consider using aluminum channels with diffusers. Instead of sticking the LED strip directly to the wall, mount the strip inside the aluminum channel. You can then mount the lightweight channel to the wall using damage-free, removable adhesive strips designed for hanging pictures. This setup not only protects your walls from aggressive adhesives but also acts as an excellent heat sink, drawing heat away from the LEDs to extend their operational lifespan in warm tropical environments.
Alternatively, you can apply a layer of low-tack painter’s tape to the wall or cabinet surface first, and then adhere the LED strip directly onto the painter’s tape. While this method is highly effective at protecting paint, keep in mind that high humidity can cause painter’s tape to lose its grip over time. For a more robust solution, use specialized renter-friendly double-sided tapes designed for clean removal.
Before making any modifications, always review your condominium’s lease agreement or house rules. Some property management offices restrict drilling, modifications to fixed electrical boxes, or the installation of highly visible colored lighting on balconies that alters the building’s exterior appearance. Keeping your installation completely reversible ensures a hassle-free move-out process when your lease ends.
Frequently Asked Questions (FAQ)
How do I remove LED strip lights without peeling condo paint?
To remove LED strip lights safely, use a handheld hairdryer set to low-to-medium heat to gently warm the adhesive backing. The heat softens the acrylic glue, making it pliable. Starting from one end, slowly peel the strip away from the wall at a shallow 45-degree angle while continuing to apply heat just ahead of the peeling point. Never pull the strip straight outward, as this concentrates the tension and is highly likely to tear the paint or plaster. Any remaining sticky residue can be wiped away gently using a microfiber cloth dampened with a small amount of isopropyl alcohol or a dedicated adhesive remover.
Can I cut and reconnect LED strips to fit custom lengths?
Yes, you can cut and reconnect LED strips, but you must follow specific physical rules to avoid ruining the circuit. Only cut the strip along the designated cut lines, which are clearly marked with copper pads and often feature a small scissor icon. Cutting anywhere else will permanently disable the LEDs in that section. To reconnect the cut pieces, use solderless clip-on connectors that match your strip type (such as 2-pin for single color, or 4-pin/5-pin for RGB/RGBW). Slide the clean, cut copper pads of the strip under the metal contact prongs inside the connector and snap the clip shut, ensuring that the positive and negative polarities match perfectly across the connection.
Community discussion
Share your experience or ask a question. Comments are reviewed before publication.