
Living in a modern condominium offers convenience and style, but rental agreements and strict homeowner association rules often limit your decorating options. Drilling holes or using permanent adhesives to mount ambient lighting can lead to costly security deposit deductions when it is time to move out. Fortunately, you can easily transform your living space with vibrant accent lighting without leaving a single mark on your walls.
Installing LED strip lights in a rental-friendly manner requires shifting away from the aggressive factory adhesives pre-applied to the back of most light strips. By allocating a small budget of around ₱200 to ₱500 for high-quality removable adhesive strips or specialized mounting clips, you can secure your lighting setup firmly. This approach allows you to enjoy a customized, modern interior while ensuring the paint and plaster underneath remain completely untouched.
Plan Your Lighting Layout and Power Access
Before purchasing any lighting equipment, a successful installation begins with a clear, measured plan. Start by identifying the exact areas you want to highlight, such as a ceiling cove, the underside of kitchen cabinets, the back of a television, or the frame of a bed headboard. Use a flexible measuring tape to record the precise length of these surfaces so you know exactly how many meters of LED strips to acquire.
Products mentioned in this guide
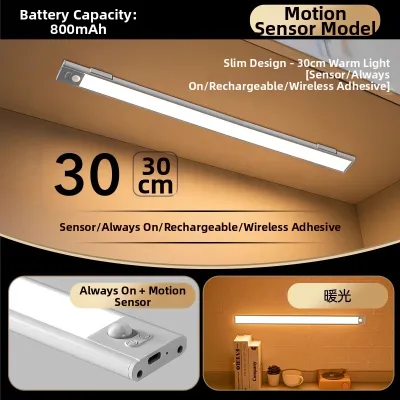
Prices are valid at publication and may change. Please refer to the product page for the latest price.
Next, locate the nearest electrical outlets relative to your planned layout. Because LED strips require a continuous power source, you must map out a routing path for the power adapter and cables that avoids creating a tripping hazard or visual clutter. If an outlet is too far, you may need to plan for a discreet extension cord or choose a strip kit with a longer lead cable.
Before purchasing, verify the technical specifications of your LED kit, including the input voltage, wattage limits, strip dimensions, dimming methods, and local electrical certifications to ensure compatibility with your condo’s electrical system. If your layout involves damp areas like bathroom vanities, working at heights near high ceilings, or modifying fixed wiring, always isolate the power source beforehand and consult a qualified professional to handle the installation safely.
You should also evaluate the existing ambient light in your room to select the right type of LED strip. Warm white strips provide a cozy, relaxing glow that mimics traditional incandescent bulbs, making them ideal for bedrooms and living areas. On the other hand, RGB (Red, Green, Blue) strips offer dynamic, multi-color customization that is perfect for entertainment zones or home offices. Keep in mind that these lighting styles are highly subjective preferences, so choose the option that best complements your daily activities and personal taste.
Choose Rental-Friendly Mounting Solutions
The secret to a damage-free installation lies in matching your mounting method to the specific texture and material of your condo walls. Standard painted drywall, smooth concrete, polished wood, and textured wallpaper all react differently to adhesives. In tropical climates like the Philippines, where indoor humidity levels can fluctuate significantly, standard adhesives can degrade quickly, causing the light strips to sag or peel away paint when removed.

While most LED strips come with a peel-and-stick backing, this factory adhesive is often either too weak to withstand tropical humidity or so aggressive that it tears the drywall paper upon removal. To avoid this, consider using high-quality removable adhesive hooks or silicone mounting clips designed for temporary setups. These accessories grip the strip securely while utilizing stretch-release adhesive technology that pulls away cleanly without leaving sticky residue.
For a more polished, professional look, lightweight aluminum channels are an excellent alternative. These channels house the LED strips and feature a frosted diffuser cover that softens the individual light points into a smooth, continuous glow. To mount these channels without screws, apply heavy-duty, damage-free mounting strips to the back of the aluminum. The metal channel also acts as a heat sink, drawing warmth away from the LEDs to protect both the delicate wall paint and the light components from heat-induced discoloration over time.
Gather Tools and Materials for a Safe Setup
Having all your tools and materials prepared beforehand prevents interruptions and ensures a clean, safe installation. Gather your chosen LED strip light kit, ensuring it includes a compatible power adapter that matches your local voltage requirements. You will also need a pair of sharp household scissors to trim the strips, but remember to only cut along the clearly marked copper cutting points to avoid damaging the internal circuitry.
For surface preparation and mounting, keep a bottle of isopropyl alcohol (70% concentration is ideal) and a clean microfiber cloth nearby. Avoid using standard household glass cleaners or soapy water, as these can leave behind a thin residue that prevents temporary adhesives from bonding correctly.
Finally, gather your chosen damage-free mounting aids, such as removable clips, mounting putty, or painter’s tape. A spirit level or a simple laser level can help you maintain a perfectly straight line along open walls, while a roll of low-tack painter’s tape is incredibly useful for temporarily holding the strips in place as you test the layout.
Mount the LED Strips Without Damaging the Walls
To begin the physical installation, start by thoroughly cleaning the target surface. Pour a small amount of isopropyl alcohol onto your microfiber cloth and gently wipe down the area where the lights or mounting clips will be attached. This step removes accumulated dust, skin oils, and ambient moisture, which is especially important in humid environments. Allow the surface to dry completely for at least ten minutes before proceeding.
If you are using removable mounting clips, space them evenly along the planned path, approximately every thirty to forty centimeters. Apply the temporary adhesive backing to each clip, press it firmly against the wall for thirty seconds, and let the adhesive cure according to the manufacturer’s instructions before threading the LED strip through them. If you opt for aluminum channels, apply the damage-free mounting strips to the back of the channel, press the channel against the wall, and slide the LED strip into the groove before snapping the diffuser cover in place.
As you position the lights, route the power cables neatly along the edges of your furniture, baseboards, or door frames. Avoid bending the LED strip at sharp ninety-degree angles, as this can crack the flexible circuit board inside; instead, create a gentle loop at corners or use specialized solderless corner connectors.
Before finalizing your cable management or concealing the power brick, plug the adapter into the outlet and turn on the lights. Test all the functions, including dimming levels, color transitions, and remote control responsiveness. Verifying that everything works at this stage saves you the frustration of dismantling a fully secured setup to troubleshoot a loose connection or a faulty segment.
Remove or Reposition the Lights Safely
When it is time to move out of your condo or redesign your room, removing the LED strips requires patience to ensure the walls remain pristine. Never rip or yank the strips or mounting clips directly off the wall, as this sudden force is highly likely to peel away the paint layers or damage the underlying plaster.
Instead, use a household hairdryer set to a low or medium heat setting. Hold the hairdryer a few centimeters away from the adhesive area for about twenty to thirty seconds. The gentle heat will soften the adhesive, making it pliable and significantly reducing its grip on the wall surface. Slowly and steadily peel the strip, clip, or channel away from the wall at a shallow angle, keeping the tension even.
If any sticky residue remains on the wall, avoid using harsh abrasive pads or scraping tools that can scratch the paint. Instead, gently roll the residue into a ball using your fingertips, or apply a small amount of isopropyl alcohol to a clean cloth and rub the spot gently until the adhesive dissolves.
Once the walls are clear, inspect the area under good lighting. If you notice any minor discoloration or tiny paint chips, you can easily perform basic touch-ups. Keeping a small jar of matching wall paint provided by your condo management or landlord ensures you can quickly restore the surface to its original condition, securing the full return of your security deposit.
Frequently Asked Questions (FAQ)
Can I plug LED strip lights into a standard condo outlet?
Yes, you can safely plug LED strip lights into a standard residential outlet. In the Philippines, standard wall outlets supply 220V alternating current (AC). The power adapter included in your LED strip kit acts as a transformer, converting this high-voltage household electricity into a safe, low-voltage direct current (DC), typically 12V or 24V, which the light strip requires. Always verify that the input specifications printed on your power adapter match your local voltage and check for recognized electrical safety certifications. To maintain a safe environment, avoid overloading a single outlet by plugging the lights into the same circuit as high-draw appliances like air conditioners or microwave ovens.
Will aluminum channels damage my walls when removed?
The aluminum channels themselves are rigid and will not cause any damage to your walls, but the method you use to mount them determines how safe they are for rentals. If you use the metal screws that often come with the channels, you will leave permanent holes in your condo walls. To keep the installation completely damage-free, avoid the screws and instead use high-quality, removable adhesive strips designed for hanging pictures. Apply these strips to the back of the aluminum channel before pressing it onto the wall. When it is time to move, you can pull the release tabs on the adhesive strips to remove the channels cleanly without leaving a trace.
How do I hide the power cord and adapter in a small room?
Maintaining a clean, minimalist aesthetic in a compact condo room requires creative cable management. You can route the power cords along the natural architectural lines of the room, such as behind bed headboards, along the edges of desks, or tucked neatly behind curtains. For exposed wall sections, use paintable, plastic cord covers (raceways) that adhere with wall-safe tape, allowing you to blend the cables directly into your wall color. The bulky power adapter brick can be tucked away behind heavy furniture or placed inside a stylish, well-ventilated cable management box on the floor to keep it hidden from view while preventing overheating.
Community discussion
Share your experience or ask a question. Comments are reviewed before publication.