
Installing LED strip lights in a bedroom is an excellent way to introduce customizable ambient lighting, highlight architectural features, and establish a relaxing atmosphere. Finding the right lights for room illumination and accentuation is a highly approachable DIY project that can instantly transform your space. By understanding the mechanical requirements of adhesive backing, safe electrical routing, and proper surface preparation, you can achieve a polished, long-lasting installation without the need for professional assistance.
Planning Your Layout and Choosing the Right Lights for Room Ambience
Before purchasing any materials or unboxing your lighting kit, a successful installation relies on thorough planning and accurate measurements. The physical layout of your bedroom dictates not only the length of the LED strips you need but also the placement of your power sources and controllers. Taking the time to map out your lighting path prevents common mistakes, such as running out of strip length mid-installation or finding that your power adapter cannot reach the nearest wall outlet.
When measuring your planned installation path, always use a physical measuring tape to trace the exact route. Whether it follows the perimeter of a ceiling cove, the back of a wooden headboard, or the underside of a bed frame, precise measurements are critical. Once you have the total linear measurement, add a 10% buffer to your final figure. This extra length accounts for minor routing mistakes, corner transitions, and the small portions of the strip that may need to be trimmed during the fitting process.
Products mentioned in this guide
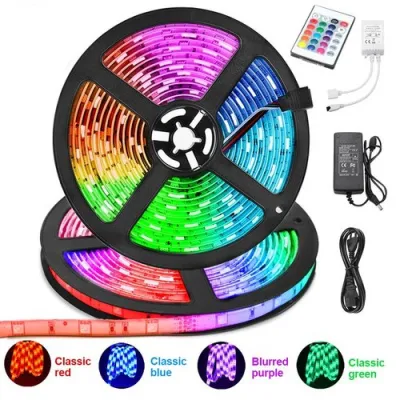
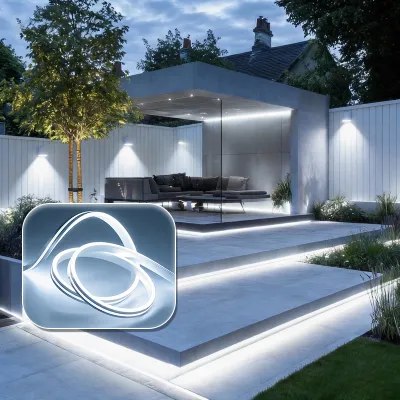
Prices are valid at publication and may change. Please refer to the product page for the latest price.
Identifying the location of your nearest power outlets is equally critical during this planning phase. Because low-voltage LED strip lights rely on a plug-in power adapter, you must ensure that the start of your LED strip is positioned close enough to an outlet to prevent the power cord from being stretched tightly or suspended in mid-air. Placing the power adapter in an accessible, well-ventilated location also ensures that you can easily unplug the system or access the controller if troubleshooting is ever required.
Mapping the Placement
Different areas of the bedroom serve distinct lighting functions, and choosing where to mount your strips will define the room’s overall feel. Ceiling coves or crown moldings are ideal for indirect, upward-facing ambient light, which bounces off the ceiling to illuminate the entire room softly without harsh glare. Alternatively, mounting strips behind a headboard provides a subtle accent glow that is perfect for reading or winding down in the evening. For a modern, floating effect that also serves as a practical nightlight, installing the strips under the bed frame casts a gentle downward light that illuminates the floor without waking up a partner.
Before finalizing your placement, inspect the chosen path for physical obstructions that could interfere with the light beam or the adhesive backing. In many bedrooms, features such as curtain rods, wall-mounted air conditioning units, or heavy wardrobes can block the continuous run of a strip or create unwanted shadows. Ensuring a clear, unobstructed path guarantees a seamless distribution of light and a much simpler installation process.
Choosing Between RGB and Warm White Strips
Deciding between multi-colored RGB (Red, Green, Blue) strips and single-color warm white strips is a matter of personal preference and how you intend to use the space. Warm white strips, typically ranging from 2700K to 3000K, excel at creating a traditional, cozy, and sleep-conducive environment that mimics classic incandescent lighting. On the other hand, RGB or tunable white strips offer dynamic, mood-setting capabilities, allowing you to change colors or adjust the color temperature to match different times of day or entertainment activities.
Your choice of strip type also influences the complexity of your control system. Single-color warm white strips are highly straightforward, often requiring only a basic inline dimmer or a smart plug for simple on-and-off scheduling. RGB and tunable white systems require a compatible controller, which may be operated via a physical remote, a smartphone application, or a smart home hub. When selecting your kit, always check the product specifications to ensure the controller’s interface matches your preferred method of operation.
Additionally, consider the local climate conditions of your bedroom. In tropical environments with high ambient humidity, such as the Philippines, exposed electronic components can be subject to moisture-induced wear over time. While bedrooms are generally classified as dry locations, verifying that your chosen LED strip kit is rated for indoor use and features a protective coating can offer extra peace of mind against humidity-related degradation.
Essential Tools and Materials Checklist
Having all your tools and materials prepared before you begin ensures a smooth, uninterrupted installation process. Gathering these items beforehand prevents the adhesive from collecting dust while you search for misplaced tools, securing a much stronger bond to your bedroom surfaces.

The core components of your installation will typically come packaged together in a complete DIY kit, but you should verify that all necessary parts are present before starting. Your basic checklist must include:
- LED Strip Light Kit: This should contain the LED strips themselves, a compatible receiver or controller, and a certified power adapter.
- Measuring Tape: Essential for verifying your path and double-checking the strip length before making any cuts.
- Rubbing Alcohol (Isopropylic or Ethyl): Used to clean the mounting surface thoroughly to ensure proper adhesion.
- Lint-Free Cloths: For wiping down the cleaning area without leaving fibers behind.
- Sharp Scissors: Specifically for cutting the LED strip at the designated cutting points.
- Cable Management Accessories: Plastic cable clips, cord covers, or extra double-sided mounting tape to secure loose wires.
- Aluminum Mounting Channels (Optional): Highly recommended for installations on textured surfaces or where a highly diffused, professional look is desired. These channels also act as heat sinks, which can prolong the lifespan of the LEDs.
Step 1: Preparing the Surface for Maximum Adhesion
The most common cause of DIY LED strip failure is the strip peeling off the wall or furniture after only a few days of use. This is almost always due to improper surface preparation. Dust, oils, and microscopic residues naturally accumulate on household surfaces, creating a barrier that prevents the pressure-sensitive adhesive backing on the LED strip from forming a permanent bond.
To prepare your mounting surface, start by dampening a lint-free cloth with rubbing alcohol. Gently wipe down the entire length of the path where the LED strip will be applied. This cleaning method is highly effective for smooth painted drywall, finished wood, metal, and plastic surfaces. Avoid using household surface cleaners or glass sprays, as these products often leave behind a thin, waxy residue that actually repels the adhesive. After wiping the surface, allow the area to dry completely—usually about 10 to 15 minutes—before attempting to mount the lights.
You must exercise caution when dealing with specific wall finishes. Applying strong adhesive backing directly to freshly painted walls (cured for less than four weeks), delicate wallpaper, or highly matte paint finishes carries a risk of peeling the paint or tearing the paper if you ever need to reposition or remove the strips. Always check the manufacturer’s care instructions for both your wall paint and the LED strip adhesive to ensure compatibility.
If your bedroom walls are heavily textured, porous, or prone to peeling paint, standard adhesive backing will not hold successfully. In these scenarios, you must pause and utilize alternative mounting methods. Installing slim aluminum mounting channels using small screws, or applying a heavy-duty, double-sided mounting tape designed specifically for textured surfaces, provides a secure mechanical foundation that prevents the strip from sagging or falling.
Step 2: Mounting, Cutting, and Routing the Strips
With your surface clean and dry, you are ready to begin the physical installation of the LED strips. This step requires a patient, methodical approach to ensure the strip runs straight and remains securely attached along its entire path.
To begin mounting, peel back only a few inches of the adhesive backing at the start of the strip. Align the strip carefully with your starting point—typically near your power source—and press it down firmly with your thumb or fingers. Continue working your way along the path, peeling back the backing paper in small increments and pressing the strip down as you go. This incremental method prevents the exposed adhesive from picking up dust or accidentally sticking to itself, which would severely weaken its bonding strength.
Eventually, you will reach the end of your planned run and will likely need to shorten the strip. LED strips are designed with specific electrical circuits that run in repeating segments. You must only cut the strip directly along the designated copper pads, which are typically marked with a scissor icon. Cutting anywhere else along the strip will sever the internal electrical pathway, rendering the entire remaining segment of the strip permanently non-functional and voiding the manufacturer’s warranty.
Navigating corners requires careful handling to avoid damaging the delicate circuitry inside the strip. Folding an LED strip sharply at a 90-degree angle can easily snap the internal copper traces, causing the lights beyond that fold to fail. To safely round a corner, you can create a gentle, rounded loop with the strip, provided the bend radius does not pinch the circuit. Alternatively, the safest and cleanest method is to cut the strip at a designated cut point and use an official clip-on corner connector to bridge the gap electrically.
For your safety, always observe clear electrical boundaries during this step. This guide assumes the use of low-voltage (12V or 24V) DIY kits powered by a plug-in step-down adapter. Never attempt to cut, splice, or modify mains-voltage (110V or 220V) LED strips while they are connected to power, as this presents a severe risk of electrical shock and fire. Always disconnect the power supply completely before performing any adjustments or cuts.
Step 3: Power Connection and Safe Cable Management
Once the LED strips are physically mounted, the next phase is establishing a safe and clean electrical connection. Properly managing your cables not only improves the visual appeal of your bedroom but also eliminates physical hazards that could lead to accidental damage or injury.
Start by connecting the end of your LED strip to the receiver or controller unit, and then connect the controller to the power adapter. Pay close attention to the alignment of the connection pins; most low-voltage connectors feature small arrows or positive/negative markings that must align perfectly. Forcing a connection with reversed pins can damage the controller or cause the lights to malfunction. Ensure all plugs are fully seated and secure.
Because electrical standards vary globally, always verify your local electrical specifications before plugging the system in. If you are installing these lights in the Philippines, inspect the input label on your power adapter to confirm that it explicitly supports 220V at 60Hz. Standard household outlets in the Philippines operate at this voltage and frequency, and using an incompatible adapter designed solely for 110V systems can cause the adapter to overheat, fail, or pose a fire hazard.
Cable management is essential for maintaining a clean bedroom aesthetic and preventing tripping hazards. Use plastic adhesive cable clips or dedicated cord covers to route the excess power cords neatly along the baseboards, behind nightstands, or down the side of your bed frame. Keep all cords out of high-traffic walkways where they could be stepped on or caught by vacuum cleaners.
To maintain electrical safety, never exceed the rated capacity of your power supply. Do not attempt to daisy-chain multiple high-draw LED strips together onto a single adapter unless the manufacturer’s specifications explicitly state that the power supply can handle the combined wattage. Overloading a power adapter will cause it to run dangerously hot and will significantly shorten its lifespan. Furthermore, if your installation plan involves hardwiring the lights directly into a wall switch or making modifications to your home’s fixed electrical wiring, stop immediately and hire a licensed professional electrician to complete the work safely.
Step 4: Testing, Troubleshooting, and Final Adjustments
Before you pack away your tools and finalize your cable management, it is crucial to perform a complete system test. Testing the lights while the adhesive is fresh and the connections are accessible allows you to resolve any minor issues quickly without having to tear down your completed work.
Plug in the power adapter and turn on the lights using your remote, app, or physical switch. If you are using an RGB or tunable white system, cycle through all the primary colors (red, green, blue) and shades of white to ensure the diodes are displaying colors accurately. Test the dimming function across its entire range to verify that the light remains stable and does not flicker at lower brightness levels.
If you encounter issues during this test, follow a systematic troubleshooting process:
- Entire Strip is Dark: Check that the power adapter is securely plugged into a working outlet and that the inline connection to the controller is tight. Verify that the outlet has power by testing it with another device.
- Section of the Strip is Dark: This usually indicates a loose connection at a joint or a damaged circuit trace near a cut point. Inspect any clip-on connectors to ensure the metal teeth are making direct contact with the copper pads on the strip.
- Flickering or Incorrect Colors: This is often caused by misaligned pins between the controller and the strip. Disconnect the power, check that the alignment arrows on the connectors are pointing toward each other, and reconnect them securely.
Once you have confirmed that the system is operating perfectly, perform one final physical check. Walk along the length of the installed strip and gently press down on any areas where the adhesive backing might be lifting. Pressing these edges firmly while the strip is slightly warm from initial operation can help the pressure-sensitive adhesive cure and form a stronger bond with the surface.
Long-Term Maintenance and Safety Boundaries
To ensure your bedroom LED strip lights remain safe and functional for years to come, regular maintenance and adherence to safety guidelines are necessary. LED lights are highly efficient, but they still generate a small amount of heat that must be allowed to dissipate naturally.
Never cover your LED strips with fabrics, blankets, curtains, or insulation material. Trapping the heat generated by the diodes will cause the strip to operate at elevated temperatures, which rapidly degrades the adhesive backing, discolors the protective coating, and shortens the operational lifespan of the LEDs. Ensure there is adequate airflow around the entire installation path.
When cleaning your lights, keep moisture away from the electrical components. Dust the strips periodically using a dry, clean microfiber cloth or a soft-bristled static duster. Never spray liquid household cleaners, water, or glass cleaners directly onto the LED diodes or the exposed copper connection pads, as this can cause short circuits or corrosion.
Finally, make it a habit to periodically inspect your power adapter and wall outlet. The adapter should feel warm to the touch during operation, but it should never feel hot or emit any unusual odors. Ensure that your bedroom outlets are not overloaded with multiple high-wattage appliances, and check that all power cables remain free of pinches or sharp bends behind heavy furniture.
Frequently Asked Questions (FAQ)
Can I install LED strips on textured walls or popcorn ceilings?
Standard pressure-sensitive adhesive backing is designed for smooth, non-porous surfaces and will generally fail on textured drywall or popcorn ceilings due to the lack of surface contact. To install lights securely on these surfaces, you should use slim aluminum mounting channels secured with small mounting screws, or utilize heavy-duty mounting clips and double-sided foam tape rated specifically for uneven textures.
Will removing the adhesive damage my bedroom paint?
Strong adhesives can peel flat or matte paint, and may tear delicate wallpaper upon removal. To minimize the risk of damage, use a hairdryer on a low heat setting to gently warm and soften the adhesive backing before slowly peeling the strip away at a sharp angle. For rented spaces, mounting the strips inside aluminum channels or on furniture backing is an excellent way to avoid direct wall contact entirely.
Can I connect multiple LED strip kits to one power adapter?
Every power adapter has a strict maximum wattage limit that must not be exceeded. To determine if you can connect multiple strips, calculate the total wattage consumption of all the strips you plan to connect and compare it to the rated output of your power adapter. If the combined wattage exceeds the adapter’s capacity, you must use a separate power supply or upgrade to a higher-capacity unit to prevent overheating and potential electrical failure.
Community discussion
Share your experience or ask a question. Comments are reviewed before publication.