
Installing LED strip lights in a condominium room is an excellent way to introduce modern ambient lighting, highlight architectural features, and make a compact living space feel more open and inviting. Whether you want to add a soft glow behind your headboard, illuminate kitchen countertops, or create a dramatic drop-ceiling effect, these flexible light strips offer a highly customizable solution. The installation process is straightforward and highly rewarding, but it requires careful planning, proper surface preparation, and a basic understanding of low-voltage electrical connections. Before you begin handling any components, always prioritize safety by verifying that your power source is disconnected and checking that all system components are fully compatible.
Planning Your LED Strip Layout and Power Requirements
Before purchasing or installing any lighting equipment, you must evaluate the physical layout of your condo room and determine where the lights will be positioned. Popular locations in modern condo units include ceiling coves, under kitchen cabinets, behind television screens, and along bed frames or floating shelves. Each of these surfaces presents unique characteristics; for instance, smooth melamine cabinets provide excellent adhesion, whereas textured concrete walls or matte-painted drywall may require additional mounting support. Take the time to inspect the flatness and material of your chosen surface to ensure the adhesive backing can form a secure, long-lasting bond.
Accurate measurement is the foundation of a clean installation. Use a flexible measuring tape to trace the exact path where the LED strip will run, accounting for any corners, turns, or obstacles. When planning the route, locate the nearest electrical outlet and measure the distance from the end of the LED strip to the power source. Avoid overstretching the strip or planning excessively long runs from a single power point, as this can lead to a noticeable drop in brightness at the far end of the line. If your layout requires navigating sharp 90-degree corners, plan to use dedicated solderless corner connectors rather than bending the flexible strip itself, which can damage the internal copper circuitry.
Products mentioned in this guide
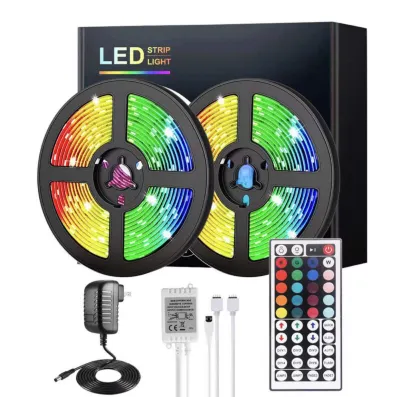
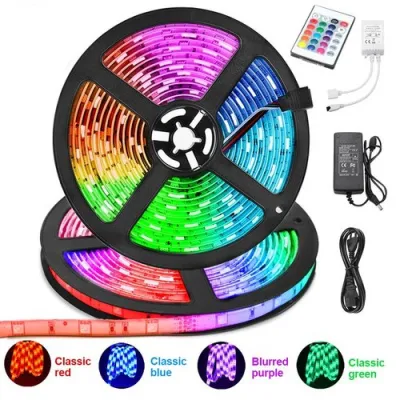
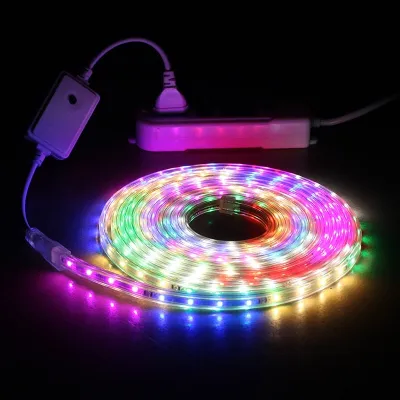
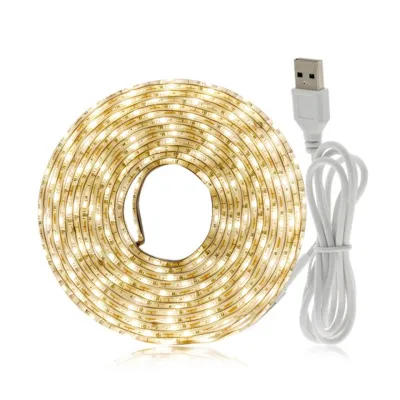
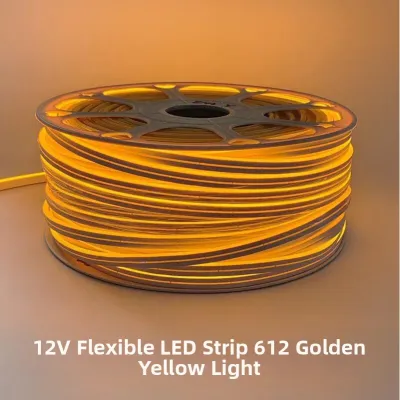
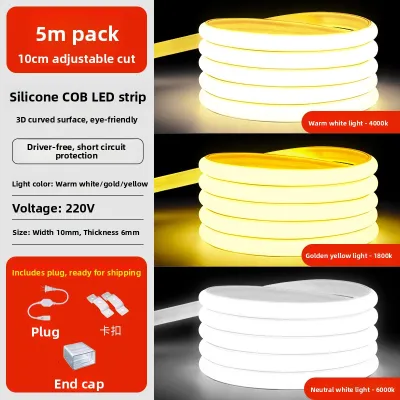

Prices are valid at publication and may change. Please refer to the product page for the latest price.
Understanding the electrical requirements of your LED setup is crucial for both performance and safety. LED strips typically operate on low-voltage direct current (DC), commonly 12V, 24V, or 5V for USB-powered options. You must verify that the voltage rating printed on your LED strip matches the output voltage of your power adapter exactly; mismatched voltages can permanently damage the LEDs or result in extremely dim lights. Additionally, calculate the total wattage load by multiplying the strip’s wattage rating per meter by the total length of the installation. To prevent overheating and ensure system longevity, select a power adapter with a wattage capacity that exceeds your calculated load by at least 20 percent.
Essential Tools and Materials for LED Strip Installation
Having the correct tools and materials on hand before you begin will streamline the installation process and prevent unnecessary interruptions. The core components of your lighting system include the LED strip lights themselves, a compatible power adapter (often referred to as a driver), and a controller if you are using color-changing (RGB) or dimmable strips. Ensure that all these components are designed to work together and feature matching connection interfaces.

For the physical installation, gather a few basic household tools. A reliable measuring tape is essential for verifying lengths, while a sharp pair of household scissors is required to cut the strips at their designated points. To prepare the mounting surface, keep a clean microfiber cloth and a mild cleaning solution—such as isopropyl alcohol or a diluted, non-oily dish soap—nearby. Avoid using harsh chemical cleaners or oil-based polishes, as these can leave a thin residue that prevents the adhesive backing from sticking properly.
Depending on your specific installation environment, you may also want to acquire a few optional accessories to improve durability and aesthetics. Aluminum channels with plastic diffusers are highly recommended for exposed installations, as they protect the strip from dust, help dissipate heat, and soften the individual points of light into a continuous glow. If you are mounting the lights on challenging surfaces like textured paint or in high-humidity areas, keep extra high-strength double-sided acrylic tape or small plastic mounting clips with adhesive backings on hand to reinforce the installation.
Step-by-Step Installation Process
Preparing the Mounting Surface
The longevity of your LED strip installation depends heavily on how well the adhesive backing bonds to the surface. In tropical climates where humidity levels can be high, airborne moisture, dust, and microscopic grease films accumulate quickly on walls and furniture. Begin by thoroughly wiping down the entire mounting path with your microfiber cloth dampened with isopropyl alcohol or a mild cleaning solution. This step removes any oils left behind by touch, cooking grease in kitchen areas, or settled dust that would otherwise compromise the adhesive.
After cleaning, allow the surface to dry completely before attempting to apply the strip. While waiting, inspect the surface closely for any signs of peeling paint, loose wallpaper, or crumbling plaster. If the underlying paint is already flaking, the weight and tension of the LED strip will eventually pull the loose paint off the wall, causing the entire installation to sag. If you encounter unstable surfaces, consider using mechanical mounting clips or installing lightweight aluminum channels secured with small screws rather than relying solely on the strip’s adhesive backing.
Mounting and Connecting the LED Strips
Once the surface is clean and dry, prepare the LED strip by cutting it to the exact length required. Look closely at the strip to locate the designated cut lines, which are typically marked with a small scissor icon and copper solder pads spaced at regular intervals. It is critical to cut only along these specified lines; cutting anywhere else will sever the internal electrical circuit, rendering the entire section between the cut and the end of the strip completely non-functional.
To mount the strip, begin at the end closest to your power controller. Peel back a small portion of the adhesive backing—about 30 to 50 centimeters—to expose the sticky tape. Align the strip carefully with your planned path and press it firmly onto the surface. Apply steady, gentle pressure along the length of the strip, taking care not to press directly on the delicate LED chips or the tiny resistors, as excessive force can crack these components. Continue peeling the backing and pressing the strip down in small sections to maintain control and avoid accidental twists or misalignment.
After securing the strip physically, establish the electrical connections. Connect the end of the LED strip to your controller, paying close attention to the alignment of the connection pins. For color-changing strips, the connector will often have a small arrow that must align with the corresponding positive mark on the strip. Once the controller is securely attached, plug the controller’s input cable into the power adapter. Ensure all connections are fully seated and tight to prevent loose contacts that could cause flickering or intermittent power loss.
Testing and Final Adjustments
With all physical and electrical connections in place, plug the power adapter into your wall outlet to test the system. Use your remote control, wall switch, or smart application to turn the lights on and cycle through the available colors and brightness levels. This initial test allows you to verify that the entire length of the strip illuminates evenly and that the colors match your expectations.
During the test, inspect the installation closely for any dark spots, flickering sections, or areas where the light appears dimmer. A sudden drop in brightness toward the end of a long strip indicates a voltage drop, which may require you to run a separate power feed to the far end. Additionally, walk along the installation path to check for any lifting edges or sagging sections. If you notice any areas where the adhesive is struggling to hold, immediately reinforce them using plastic mounting clips or small pieces of high-strength double-sided tape to prevent the strip from peeling away over time.
Electrical Safety Limits and When to Hire a Professional
While low-voltage LED strip installations are generally safe for DIY enthusiasts, it is important to recognize the boundaries of safe electrical work. Standard plug-and-play kits that utilize an external power adapter plugged directly into an existing wall outlet pose minimal risk. However, if your lighting plan involves modifying your condo’s fixed electrical wiring, hardwiring a high-power transformer directly into a junction box, or routing cables through concrete walls, you must consult a qualified professional.
Before performing any work near existing light fixtures, switches, or outlets, always turn off the corresponding circuit breaker at your condo’s main electrical panel. Never attempt to splice, cut, or modify the high-voltage (AC) side of a power adapter or plug. Additionally, if you plan to install LED strips in high-moisture environments—such as bathrooms, outdoor balconies, or directly above kitchen sinks—ensure that the strips and their connections carry an appropriate Ingress Protection (IP) rating, such as IP65 or higher, to prevent water intrusion and short circuits.
Always check the product labels and packaging for recognized electrical safety certifications and clear specifications regarding maximum wattage and voltage limits. Overloading a power adapter or daisy-chaining too many LED strips together can cause components to overheat, creating a potential fire hazard. By adhering to the manufacturer’s specified limits and keeping all high-voltage work in the hands of a licensed electrician, you can enjoy your new lighting setup with complete peace of mind.
Troubleshooting Common LED Strip Issues
Even with careful installation, you may occasionally encounter performance issues with your LED strip lights. If only a portion of your strip illuminates, the issue is almost always located at the point where the light stops. Double-check the nearest cut mark or connector to ensure the strip was cut precisely on the designated line and that the connection pins are fully inserted and making solid contact with the copper pads. If a solderless connector is loose, gently press the locking clip to secure the connection.
Flickering lights or incorrect color rendering are typically caused by power supply issues or loose control wiring. Verify that your power adapter has sufficient wattage capacity to support the entire length of the connected strip; an underpowered adapter will struggle to provide stable current, leading to flickering or dimming. If you are using an RGB strip and certain colors are missing, inspect the controller pins to ensure they are aligned correctly and not bent. For infrared (IR) controllers, make sure the receiver node is not obstructed by furniture or valances, as it requires a clear line of sight to function.
Adhesive failure is another common issue, particularly on textured surfaces or in warm, humid environments. If your LED strip begins to sag or peel away from the surface, do not attempt to reapply the worn-out adhesive backing. Instead, clean the area again and apply a high-quality, double-sided acrylic foam tape to the back of the strip, or install lightweight aluminum mounting channels. These channels not only provide a permanent mechanical mount but also act as a heat sink, drawing warmth away from the LEDs to extend their operational lifespan.
Frequently Asked Questions (FAQ)
Can I cut LED strip lights to fit shorter spaces?
Yes, you can cut LED strip lights to fit your specific space, but you must only cut them along the designated cutting lines. These lines are clearly marked with a scissor icon or copper solder pads spaced at regular intervals along the strip. Cutting the strip anywhere else will break the internal electrical circuit, which will permanently disable the entire section of the strip between that cut and the next functional connection point.
Will LED strip lights damage my condo walls when removed?
LED strip lights can potentially damage paint or wallpaper upon removal if they are pulled off too quickly. To minimize the risk of damage, use a handheld hairdryer on a low-heat setting to gently warm the adhesive backing before you begin peeling. The heat softens the adhesive, allowing you to slowly and carefully peel the strip away from the wall. Any remaining sticky residue can be cleaned off using a mild solvent or soapy water on a microfiber cloth.
Do I need an aluminum channel for my LED strips?
While not strictly required for every installation, aluminum channels are highly recommended for several reasons. They act as an effective heat sink, drawing heat away from the LED chips to prolong their lifespan, which is especially beneficial for high-wattage strips. Additionally, channels protect the delicate circuitry from dust and physical contact, and when paired with a frosted diffuser cover, they blend the individual light points into a smooth, continuous glow.
Community discussion
Share your experience or ask a question. Comments are reviewed before publication.