
Installing LED strip lights under your kitchen cabinets is one of the most practical and visually rewarding DIY projects you can undertake. It transforms a dark, shadowed countertop into a bright, functional workspace while adding a sophisticated ambient glow to the entire room. Whether you are preparing a late-night meal or hosting a gathering, proper under-cabinet lighting enhances both safety and aesthetic appeal.
While modern low-voltage LED kits make this project highly accessible, achieving a clean, long-lasting installation requires careful planning. Success depends on thorough surface preparation, precise layout mapping, and strict adherence to electrical safety boundaries. By understanding the components and following a systematic approach, you can complete this upgrade successfully without the need for professional electrical work.
What You Need Before Starting
Before peeling any adhesive or cutting any strips, gathering the correct tools and materials will prevent mid-project interruptions and ensure a seamless installation. Having everything on hand allows you to verify component compatibility and test the system before mounting it permanently to your cabinetry.
Products mentioned in this guide
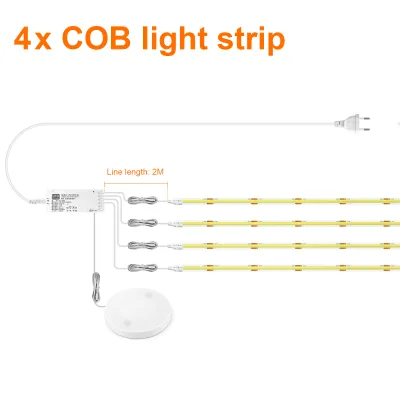
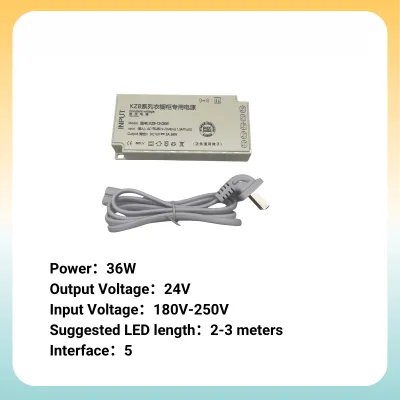
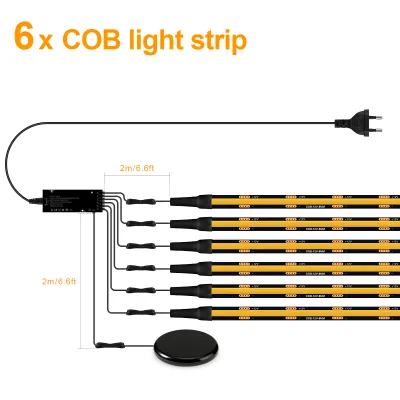
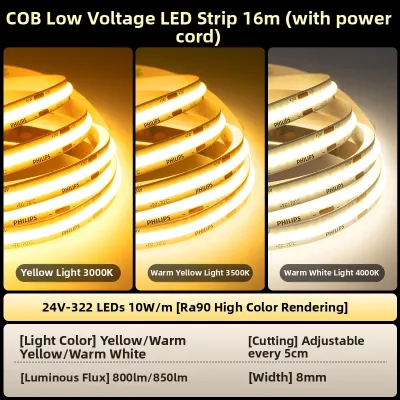
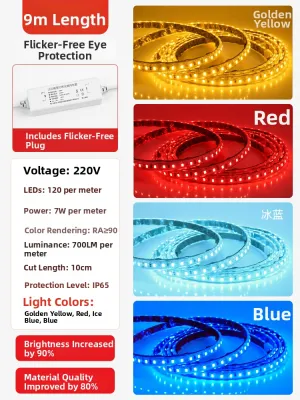
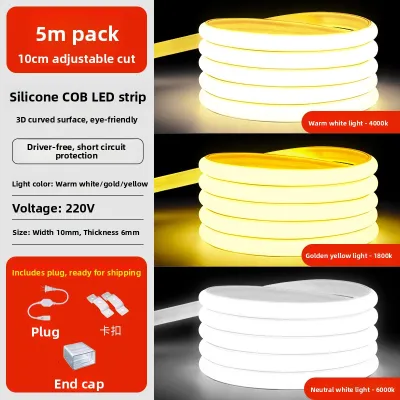
Prices are valid at publication and may change. Please refer to the product page for the latest price.
For preparation and mounting, you will need a reliable measuring tape, sharp scissors, rubbing alcohol, and clean microfiber cloths. These basic household items are essential for measuring your cabinet runs accurately and preparing the mounting surfaces so that the adhesive backing bonds securely.
Next, verify all the components included in your LED lighting kit. This includes the LED strip rolls, the power adapter, compatible corner connectors, and supplementary mounting clips. Laying these parts out on a clean table allows you to inspect them for any physical damage or missing pieces before you begin the physical installation.
It is crucial to check the power adapter specifications to ensure compatibility with your local mains voltage and plug type. In the Philippines, the standard household voltage is 220V at 60Hz, so your power adapter must be rated to handle this input safely. Look for official electrical safety certification marks on the adapter body to verify that the device has undergone proper quality and safety testing.
Additionally, confirm that the output voltage of the adapter matches the voltage requirement of your LED strips, which is typically 12V or 24V. Using an incompatible transformer can lead to immediate component failure, overheating, or a potential fire hazard. Taking a few minutes to verify these electrical specifications protects your home and ensures the longevity of your new lighting system.
Choosing the Right LED Strip Lights for Your Cabinets
Selecting the right LED strip lights involves balancing functional requirements with your personal design preferences. Because the kitchen is a high-activity area, the lighting you choose must serve both practical cooking tasks and general room ambiance.

Consider the primary purpose of the lights when deciding on color temperature and brightness. For food preparation and safe knife work, neutral white or cool white provides clear, high-contrast visibility that reduces eye strain. If you prefer a cozy, inviting atmosphere for dining and entertaining, warm white is a popular choice, while color-changing RGB strips offer dynamic mood-setting options. Note that decorative style, perceived color temperature, and spatial effects are conditional preferences rather than universal performance facts.
Control options and accessibility should also influence your purchase decision. Basic installations might rely on a simple inline manual switch, while more advanced setups feature infrared remote controls or smart app integration. If you plan to integrate the lights into a smart home system, ensure the controller is compatible with your existing wireless network and smart assistants.
Evaluating the Ingress Protection (IP) rating is another critical step, especially in a kitchen environment. The areas near kitchen sinks, dishwashers, and cooking ranges are prone to high humidity, steam, and occasional water splashes. In tropical climates where ambient humidity is naturally high, choosing a strip with at least an IP65 rating—which features a protective silicone coating—safeguards the delicate light-emitting diodes from moisture damage.
Step-by-Step Installation Process
The physical installation of under-cabinet LED strip lights is a straightforward process when broken down into logical phases. By working systematically from surface preparation to final power-up, you can avoid common mistakes such as misaligned strips, loose wiring, or poor electrical connections.
Step 1: Prepare the Cabinet Surface
The longevity of your LED strip installation depends heavily on how well the adhesive bonds to the underside of your cabinets. Kitchen cabinets naturally accumulate a thin layer of airborne grease, cooking residue, and dust over time, which prevents adhesive tape from sticking properly.
To prepare the surface, dampen a clean microfiber cloth with rubbing alcohol and thoroughly wipe down the entire underside of the cabinets where the strips will be mounted. Avoid using harsh chemical degreasers or household surface cleaners, as these can leave behind a microscopic residue that interferes with the adhesive backing.
Allow the cabinet surface to dry completely before attempting to apply any adhesive tape. Even a small amount of lingering moisture can ruin the tackiness of the tape, causing the strip to sag or peel away within a few days.
While the surface dries, inspect the underside of the cabinets for splinters, heavy wood grain, or uneven laminate textures. If the surface is highly textured, rough, or painted with a chalky finish, standard adhesive backing may not hold long-term. In these cases, plan to use mechanical mounting clips or a high-quality, heat-resistant double-sided mounting tape to secure the strips.
Step 2: Plan the Layout and Power Source
A well-planned layout ensures that your lights are distributed evenly and that all wiring remains completely hidden from view. Start by measuring the length of each cabinet section where you intend to install the lights, keeping in mind the location of your nearest electrical outlet.
Identify the designated cut points on your LED strip before making any cuts. These points are typically marked with a scissors icon or copper solder pads spaced at regular intervals along the strip. Cutting anywhere else will sever the internal circuitry, rendering that entire section of the strip useless.
Route the power cable from the starting point of your LED run to the nearest grounded wall outlet. To keep the installation looking clean and professional, plan to run the wires along the inner lip of the cabinet frame or behind decorative trim.
If your kitchen layout features L-shaped or U-shaped cabinets, or if you need to jump across a gap over a range hood or sink, plan your corner connections carefully. You can use solderless gap connectors or flexible extension cables to bridge these gaps without bending the LED strip itself at sharp, damaging angles.
Step 3: Mount the LED Strips
Mounting the LED strips requires a steady hand and a patient approach to avoid damaging the delicate light-emitting diodes and resistors embedded in the flexible circuit board. Never rush this step, as pulling or twisting the strip can break the internal copper traces.
Begin by peeling away a small section of the adhesive backing—about 15 to 30 centimeters at a time. This prevents the exposed adhesive from accidentally touching other surfaces, gathering dust, or sticking to itself before it is in position.
Align the strip along your planned path, typically just behind the front lip of the cabinet face frame to hide the light source from direct line of sight. Press firmly along the length of the strip with your thumb, applying even pressure to ensure a strong bond, but avoid pressing directly on the raised LED chips or resistors.
If you encounter corners or obstacles, do not fold or make sharp bends in the strip, as this can crack the circuit board. Instead, use a flexible corner connector to make the turn safely. If you notice any sections where the original adhesive feels weak, reinforce them immediately with supplementary double-sided tape or small plastic mounting clips screwed into the cabinet underside.
Step 4: Connect the Power and Test
With the LED strips securely mounted, you are ready to connect the electrical components and verify that the system functions correctly. This is the most exciting phase of the project, where you see your hard work come to light.
Connect the end of your LED strip to the power controller, and then plug the power adapter into your designated wall outlet. If you are using a smart plug or an inline timer, connect the adapter to that device first before plugging it into the wall to enable automated scheduling.
Turn on the power and test all available functions, including color modes, dimming levels, and remote control responsiveness. Check the entire length of the installation to ensure uniform brightness and verify that all corner connectors are delivering power consistently to subsequent sections.
Once you have confirmed that everything works perfectly, focus on wire management. Use adhesive cable clips to secure any loose wires, excess cable, or the power controller box to the underside of the cabinets, keeping them completely hidden from view and preventing them from sagging over time.
When to Stop and Call a Professional
While plug-and-play LED strip kits are highly suitable for DIY installation, certain scenarios present safety risks that require the expertise of a licensed professional. Recognizing these boundaries is essential for protecting your home from electrical hazards and ensuring compliance with local building codes.
If your installation requires hardwiring the power supply directly into your home’s electrical panel, a junction box, or an existing wall switch, do not attempt this yourself. Working with high-voltage alternating current (AC) poses severe risks of electrical shock and fire if not handled by a qualified electrician who can isolate the power safely.
Additionally, avoid drilling through structural cabinet elements, load-bearing walls, or fire barriers to route or hide wires. Accidentally damaging structural supports or breaching fire-rated walls can compromise the safety of your home and may violate local building regulations.
Finally, if you notice signs of electrical malfunction during or after installation—such as an overheating power adapter, persistent flickering, a burning smell, or incompatible voltage readings—disconnect the power immediately. These symptoms indicate a serious underlying issue, such as a short circuit or a faulty transformer, which should be evaluated by a professional before the system is used again.
Maintenance and Troubleshooting Tips
Proper maintenance and prompt troubleshooting will keep your under-cabinet LED strip lights operating safely and looking brilliant for years to come. Because the kitchen is a dynamic environment with fluctuating temperatures and humidity, regular checks are highly recommended.
If you notice sections of the strip beginning to peel or sag over time due to kitchen heat or humidity, do not use standard household glue or hot glue, which can damage the protective coating. Instead, clean the area again with rubbing alcohol and apply a small piece of high-quality, heat-resistant double-sided mounting tape or secure the section with a mechanical mounting clip.
When cleaning your LED strips, always turn off the power first and allow the lights to cool down completely. Wipe the strips gently with a dry or slightly damp microfiber cloth to remove dust and grease buildup; never use harsh chemical degreasers, abrasive pads, or excessive water, which can penetrate the protective seal and corrode the circuitry.
If a segment of your light strip suddenly stops working, start troubleshooting by checking the physical connections. Ensure that the pins inside your solderless connectors are aligned perfectly with the copper pads on the strip and that the power supply is not overloaded by a run that exceeds its maximum wattage capacity.
Frequently Asked Questions (FAQ)
Can I cut LED strip lights to fit shorter cabinets?
Yes, you can cut LED strip lights to fit shorter cabinets, but you must do so only at the designated cut lines. These lines are clearly marked with a scissors icon or vertical copper solder pads spaced at regular intervals along the strip. Cutting anywhere else will break the electrical circuit for that section, causing the remaining LEDs on that segment to stop working entirely. Always use a pair of sharp scissors to ensure a clean, straight cut directly through the center of the copper pads.
Will the adhesive damage my cabinet finish when removed?
The adhesive backing on most LED strip lights is designed to hold firmly, which means it can potentially damage painted, varnished, or delicate laminated cabinet finishes if pulled off carelessly. To remove the strips safely without ruining your cabinets, use a handheld hair dryer on a low-heat setting to gently warm and soften the adhesive before peeling it back slowly. If any sticky residue remains on the wood or laminate, wipe it away gently using a microfiber cloth dampened with rubbing alcohol or a mild adhesive remover, testing a small, hidden spot first.
Community discussion
Share your experience or ask a question. Comments are reviewed before publication.