
Installing ambient lighting is one of the most effective ways to transform a compact condo room into a cozy, personalized sanctuary. Whether you want to add a warm, relaxing glow behind your headboard or vibrant, color-changing accents under your kitchen cabinets, the Ookas LED strip light offers an accessible, plug-and-play solution. In the Philippines, where condo living often means working with limited space and strict rental guidelines, installing these lights requires a careful balance of aesthetic planning and damage-free mounting. By following a systematic installation process, you can achieve professional-looking cove or accent lighting without risking your security deposit (which can easily cost ₱5,000 or more in paint repairs) or compromising electrical safety.
What You Need Before Starting the Installation
Before unrolling your LED strip lights, gathering the correct tools and verifying your equipment will save time and prevent electrical mishaps. You will need a reliable measuring tape, a sharp pair of household scissors, a clean microfiber cloth, and isopropyl alcohol (70% concentration is ideal for surface preparation). Avoid using harsh chemical solvents that could strip the paint off your condo walls.
Next, inspect the electrical specifications of your Ookas LED strip light kit. In the Philippines, standard household outlets supply 220V AC power. Ensure that the included power adapter is rated for this input voltage (most modern adapters support a wide range of 100V to 240V). The adapter converts this high-voltage alternating current into a safe, low-voltage direct current (typically 12V or 24V DC) to power the light strip. Check the adapter and controller for recognized safety certification marks to ensure they comply with local electrical standards.
Products mentioned in this guide
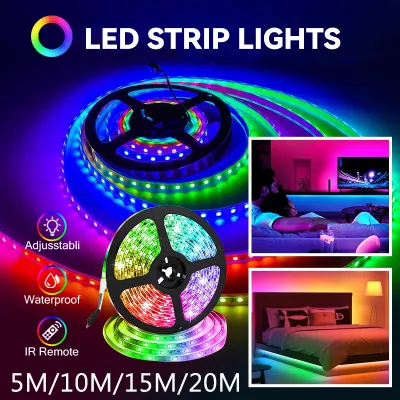
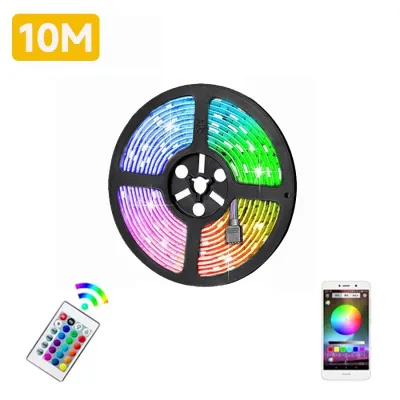
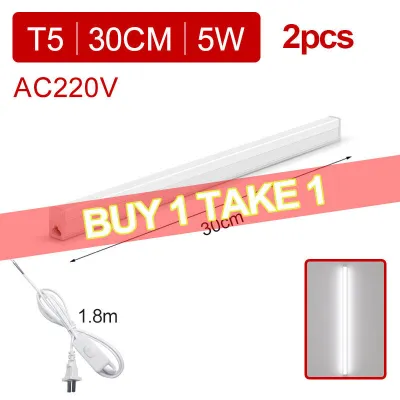
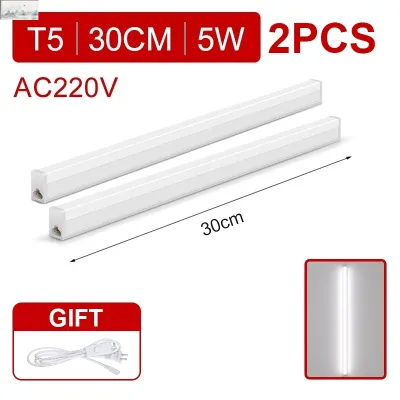
Prices are valid at publication and may change. Please refer to the product page for the latest price.
Finally, unbox the kit and lay out all components on a clean, dry table. Verify that you have the LED strip reel, the power adapter, the controller receiver box, and the remote control (along with its battery). Unroll the strip completely and plug it in briefly to ensure all light-emitting diodes (LEDs) illuminate correctly before you mount them. Never leave an LED strip powered on while it is still tightly wound on the plastic reel, as heat can build up rapidly and damage the delicate circuitry.
Step 1: Surface Preparation and Measurement
The longevity of your LED installation depends heavily on how well the adhesive bonds to your condo’s walls, ceilings, or furniture. In tropical climates characterized by high humidity, airborne dust and moisture can quickly compromise the sticky backing of the strip. Begin by wiping down the planned installation path with a microfiber cloth dampened with isopropyl alcohol. This step removes accumulated grease, fingerprints, and dust. Allow the surface to dry completely for at least ten to fifteen minutes before proceeding; applying adhesive to a damp surface will inevitably lead to peeling.

While the surface dries, use your measuring tape to map out the exact path of the installation. If you are mounting the lights behind a television, under kitchen cabinets, or along the ceiling cove, measure each straight run carefully. If your layout requires turning corners, identify the exact points where the strip must bend or be cut. Look closely at the LED strip to locate the designated cut marks. These are typically represented by a small scissor icon or a set of exposed copper solder pads spaced at regular intervals along the strip. Cutting anywhere else will break the electrical circuit, leaving a portion of your strip permanently dark.
As you plan the route, pay close attention to the proximity of your power outlet. The power cord extending from the adapter to the controller must reach the outlet comfortably without being stretched tight or suspended in mid-air. A taut cable can strain the connection ports, leading to loose contacts or physical damage over time. Additionally, ensure the cord does not cross high-traffic walkways where it could become a tripping hazard or get caught under doors and furniture.
Step 2: Mounting the LED Strip and Managing Adhesion
Once your surface is clean and your measurements are finalized, you can begin the physical mounting process. Peel back a small section—about 30 to 50 centimeters—of the adhesive backing from the start of the LED strip. Align the strip carefully with your starting point, then press it down firmly using your thumb or a soft cloth. Work your way along the path slowly, peeling the backing paper away in small increments while applying consistent, even pressure for at least ten seconds on each section. This gradual approach prevents dust from settling on the exposed adhesive before it contacts the wall.
Navigating corners requires careful handling to protect the internal copper traces that carry electricity through the strip. Bending the strip at a sharp 90-degree angle can crease and break these delicate circuits, causing the lights beyond the bend to fail. Instead, create a gentle, rounded loop at the corner, or use specialized solderless LED strip connectors (such as L-shaped corner connectors) to bridge the turn safely. If you choose to use connectors, ensure you match the positive and negative markings on both cut ends of the strip to maintain correct electrical polarity.
In many Philippine condos, walls are finished with textured paint or concrete, which can make it difficult for standard adhesive backings to maintain a strong grip over time. If you notice the strip starting to sag or peel, do not rely solely on the built-in adhesive. You can reinforce the installation by applying small strips of high-quality, double-sided mounting tape at regular intervals, or by using plastic mounting clips secured with small screws. If you are renting and cannot drill into the walls, damage-free adhesive clips designed for cable management are an excellent alternative to keep the strip securely in place.
Step 3: Power Connection and Controller Setup
With the physical strip securely mounted, you can now connect the electrical components. Begin by plugging the multi-pin connector of the LED strip into the controller receiver box. If you are installing an RGB (Red, Green, Blue) color-changing strip, pay close attention to the alignment arrows printed on both the strip’s connector and the controller’s plug. These arrows must point directly at each other to ensure the correct pins align; reversing this connection can result in incorrect colors or prevent the strip from lighting up entirely. Once aligned, push the connectors together firmly.
Next, connect the controller receiver to the power adapter’s barrel jack. Ensure the connection is tight and free of wiggle room. Before plugging the power adapter into the wall outlet, perform a quick safety check of the surrounding environment. In compact condo units, space is often shared between living and utility areas. Ensure the power adapter is positioned away from potential heat sources, such as kitchen stoves or direct tropical sunlight streaming through windows, and keep it completely clear of damp areas like sinks, refrigerators, or air conditioning condensation lines.
Finally, plug the power adapter into your standard 220V wall outlet. If your Ookas LED strip light includes an infrared (IR) remote control, ensure the small receiver wire on the controller box is visible and has a clear line of sight to where you will be standing. If your model features smart connectivity, download the manufacturer’s designated mobile application on your smartphone. Turn on your phone’s Bluetooth and connect to your home’s 2.4GHz Wi-Fi network—most smart lighting controllers do not support 5GHz bands. Follow the in-app prompts to pair the device, allowing you to control brightness, set schedules, and switch between vibrant RGB modes or relaxing warm white tones.
Step 4: Testing, Troubleshooting, and Final Adjustments
After powering on the system, conduct a thorough visual inspection of the entire length of the LED strip. Look closely for any dead LEDs, flickering sections, or inconsistent color zones. If a specific segment of the strip displays a different color than the rest, or fails to light up at all, it usually indicates a loose connection at a joint or physical damage to the internal circuitry. Gently press along the strip and check any connectors you installed to see if the connection stabilizes.
If the remote control is unresponsive, the most common culprit is a simple barrier to power. Check if you removed the clear plastic battery saver tab from the bottom of the remote. If the tab has been removed and it still fails to work, replace the button-cell battery with a fresh one. For smart app connectivity issues, ensure your smartphone is close to the controller during the initial pairing process and verify that your Wi-Fi password was entered correctly. If the connection fails repeatedly, power-cycle the controller by unplugging the adapter for ten seconds before trying again.
The final step involves adjusting the physical placement of the lights to optimize their visual impact. Direct exposure to bare LED chips can cause harsh glare and distracting “hotspots” on reflective surfaces like polished tiles or glass tabletops. To achieve a premium, soft glow, position the strip so the light bounces off a matte wall or ceiling before reaching your eyes. If you are using RGB modes, this indirect placement blends the individual red, green, and blue light sources into a seamless, unified color. For warm white setups, indirect lighting creates a soft, sophisticated ambiance that mimics high-end hotel interiors.
Maintenance and Safe Removal Tips for Condo Renters
Maintaining your LED strip lights ensures they remain bright and safe to operate throughout their lifespan. Over time, dust can accumulate on the surface of the strip, acting as an insulating layer that traps heat and dims the light output. To clean the lights, always turn off the power and unplug the adapter first. Use a dry, anti-static microfiber cloth or a soft feather duster to gently sweep away dust. Never spray water, liquid glass cleaners, or household detergents directly onto the LEDs or exposed electrical connections, as moisture can cause short circuits and permanent corrosion.
For condo renters, the biggest concern is often how to remove the lights at the end of a lease without damaging the landlord’s paint or wallpaper. Pulling a cold LED strip directly off the wall can easily tear away layers of drywall or plaster, leading to costly repairs. To remove the strip safely, use a handheld hairdryer set to low or medium heat. Direct the warm air at a small section of the strip for fifteen to thirty seconds to soften the adhesive backing. Once the adhesive becomes warm and pliable, gently peel the strip away from the wall at a shallow angle.
If you encounter a stubborn section where the adhesive has bonded intensely to the paint, do not force it. Stop immediately and apply a small amount of commercial adhesive remover or rubbing alcohol to the edge of the strip using a cotton swab. Let it sit for a minute to dissolve the bond before attempting to peel again. If the lights were installed on delicate, non-washable wallpaper, consult your property manager or a professional painter for advice on the safest removal methods to avoid tearing the paper fibers.
Frequently Asked Questions (FAQ)
Can I cut the LED strip to fit a shorter space?
Yes, you can cut the strip, but you must do so only along the designated cut lines. These lines are clearly marked with copper pads and a scissor icon. Cutting anywhere else will interrupt the electrical flow and ruin that section of the strip. If you cut the strip, the remaining piece that is disconnected from the power source will not light up unless you use a specialized solderless connector to link it to another power supply or controller.
Will the adhesive damage my condo's paint when removed?
It depends on the quality of the paint, the wall material, and how long the strip has been installed. In humid tropical climates, adhesive can bond very strongly over time. To minimize the risk of peeling paint, always test the adhesive on a small, hidden area of the wall first. When it is time to remove the lights, use a hairdryer to warm and soften the adhesive before peeling it off slowly.
Do I need an electrician to install these lights?
No, standard plug-and-play LED strip light kits do not require a professional electrician because they use a pre-wired power adapter that plugs directly into a standard wall outlet. However, if you plan to hardwire the lights into your condo’s main electrical system, mount them in damp areas like bathrooms, or run wiring behind walls, you must isolate the power source and consult a qualified professional to ensure compliance with local building codes.
Community discussion
Share your experience or ask a question. Comments are reviewed before publication.