
Living in a modern rental condo in the Philippines offers unmatched convenience, but personalizing concrete-walled spaces can be a significant challenge. Strict condominium association rules and lease agreements almost always forbid drilling holes into walls, leaving residents with dim, uninspiring spaces. Fortunately, installing a modern rechargeable led light strip allows you to elevate your home with sophisticated ambient glow without risking your security deposit. By using specialized non-damaging adhesives and planning your layout around easy charging access, you can achieve a professional-looking lighting upgrade that is completely reversible.
This guide details how to select, install, and maintain rechargeable LED strip lights in your condo safely and cleanly, ensuring your walls remain pristine when it is time to move out.
What You Need Before Installing Your Rechargeable LED Light Strips
Before you begin, gather the necessary tools and verify your equipment’s specifications to ensure a safe, long-lasting installation. You will need:
Products mentioned in this guide
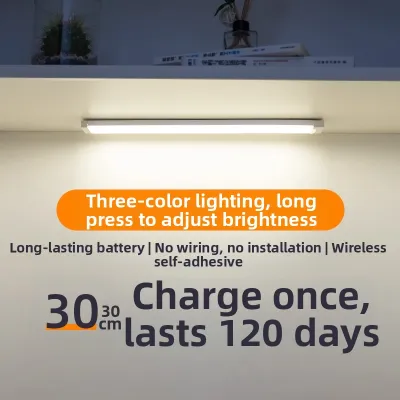
Prices are valid at publication and may change. Please refer to the product page for the latest price.
- Rechargeable LED strip lights: Opt for high-quality kits that feature detachable battery packs or accessible USB charging ports.
- Damage-free mounting tape: Acrylic or foam double-sided tape specifically formulated for painted indoor walls (such as removable mounting strips).
- 70% Isopropyl alcohol: Crucial for removing oils and dust without leaving a slippery film.
- Microfiber cloth: To clean the surface thoroughly without leaving lint behind.
- Measuring tape and scissors: For precise planning and cutting.
Weight Verification Before mounting, check the weight of both the LED strip and its battery pack. Compare this total weight against the weight limit printed on your mounting tape’s packaging. Most standard damage-free strips support between 1 to 4 kilograms, which is more than enough for lightweight LED setups. However, heavy-duty battery packs may require multiple strips or specialized heavy-duty foam tape to prevent the assembly from falling.
Wall Paint Assessment Inspect your condo’s walls. The paint must be fully cured (which typically takes at least 30 days after painting) and free of peeling, cracking, or chalking. Applying adhesive to compromised or freshly applied paint will inevitably lead to the paint peeling off when you eventually remove the lights.
Electrical and Safety Verification Always check the manufacturer’s specifications on your lighting kit. Verify the input voltage (commonly 5V for USB-rechargeable models), the battery capacity (measured in mAh), and look for recognized electrical safety certifications (such as CE, FCC, or RoHS) on the packaging. If you plan to use a wall adapter for charging, ensure its output matches the recommended wattage limit of your light’s battery pack to prevent overheating.
Step-by-Step Guide to Damage-Free Installation
Step 1: Plan the Layout and Measure
A successful installation begins with a clear visual plan. Walk through your condo and identify the areas that need accent lighting—popular choices include under kitchen cabinets, along floating shelves, behind the television, or framing a bedroom headboard. As you map out the path of the strip, pay close attention to the placement of the battery pack. Because this is a rechargeable system, you must keep the micro-USB or USB-C charging port completely accessible. Avoid burying the port deep behind heavy furniture or in tight corners where a charging cable cannot reach.

When choosing your lights, keep in mind that decorative style, perceived color temperature, and spatial effects are highly subjective preferences. For example, warm white (around 2700K to 3000K) is often preferred for cozy, relaxing spaces like bedrooms, whereas cool white (5000K to 6500K) is popular for task-oriented areas like kitchen countertops to improve visibility. These choices do not affect the physical performance or energy efficiency of the LED strip itself.
Once your layout is decided, use a measuring tape to determine the exact length of the strip required. If your LED strip is longer than needed, do not simply fold or bend it sharply, as this can break the delicate internal copper circuitry. Instead, locate the designated cut lines—usually marked with a small scissors icon or copper pads—and cut cleanly along those lines. Cutting anywhere else will permanently disable that section of the lights.
Step 2: Clean and Prep the Surface
Tropical climates, such as those in the Philippines, present unique challenges for adhesives. High ambient humidity, combined with airborne cooking grease in condo kitchenettes or dust from open windows, creates an invisible barrier on walls and cabinets that prevents tape from bonding securely. To combat this, pour 70% isopropyl alcohol onto a clean microfiber cloth and thoroughly wipe down the entire installation path.
Avoid using standard household glass cleaners, dish soaps, or multi-surface sprays. These products often contain silicones, waxes, or oils that leave a slippery residue, causing your adhesive to fail within a few days. After wiping the surface with alcohol, allow it to dry completely. In humid environments, give it at least 15 minutes to ensure all microscopic moisture has evaporated from the pores of the wall or cabinet material before applying any tape.
Step 3: Apply the Mounting Tape and Attach the Lights
With a clean, dry surface, you are ready to mount. If your rechargeable LED strip comes with factory-installed adhesive backing, be cautious. These pre-applied adhesives are often designed for perfectly smooth, non-porous surfaces and may fail on typical semi-gloss or textured condo walls. For a secure hold, apply your chosen damage-free mounting tape directly to the back of the LED strip or onto the mounting brackets provided in your kit. For the battery housing, which carries the bulk of the weight, use a dedicated piece of heavy-duty removable mounting tape.
When placing the strip onto the wall, work in small sections. Press the strip firmly against the surface using your thumb or fingers, holding continuous pressure for at least 30 seconds per section. This pressure is vital because most damage-free tapes use pressure-sensitive adhesives that require physical force to flow into the microscopic texture of the wall and create a strong bond.
During this process, take care not to pull or stretch the flexible strip. Stretching can tear the internal copper traces that supply power to the LEDs, leading to dead zones where sections of the strip fail to light up. It can also create tension that slowly pulls the adhesive away from the wall over time.
How to Safely Remove the Lights Without Peeling Paint
When it is time to move out or rearrange your decor, removing the adhesive incorrectly can tear away chunks of drywall paint, leading to costly repair deductions from your security deposit. To remove the lights safely, never yank or pull the strip directly outward from the wall.
Instead, utilize the “stretch-release” method if you are using pull-tab style mounting strips. Grasp the exposed tab and slowly pull it parallel to the wall, stretching it in the same direction the tape is running. This stretching action chemically releases the adhesive bond, allowing the tape to fall away cleanly without putting outward stress on the paint layers.
For standard double-sided foam or acrylic tapes that do not have pull-tabs, use a hairdryer to assist the process. Set the hairdryer to a low or medium heat setting and hold it a few inches away from the tape. Slowly move the warm air back and forth along a section of the strip for 20 to 30 seconds. The heat will soften the adhesive polymers, making them pliable. Gently peel the strip back at a shallow angle while continuing to apply gentle heat. Be careful not to hold the hairdryer in one spot for too long, as excessive heat can blister the wall paint or warp the plastic components of your LED strip.
If any sticky residue remains on the wall, do not scrub it with abrasive sponges, which can scratch the paint finish. Instead, apply a small amount of a gentle, paint-safe citrus-based adhesive remover to a clean cloth and gently dab the residue. Always test the remover on an inconspicuous area first—such as inside a closet or near the floorboards—to ensure it does not discolor or dissolve your specific wall paint. Wipe the area clean with a damp cloth afterward.
Common Mistakes to Avoid in Rental Condos
To ensure your lighting setup remains beautiful, functional, and safe, keep these common pitfalls in mind:
- Relying solely on low-grade factory adhesive: Many budget LED strips feature weak adhesive backings that degrade quickly under tropical warmth and humidity. Always supplement these with trusted, brand-name removable mounting tapes designed for indoor walls.
- Blocking the charging port: Mounting your battery pack flush against a corner or behind a permanent fixture makes it impossible to plug in a charging cable. Always test the cable clearance before finalizing the battery pack's position.
- Overloading weight limits: A common error is using standard thin tape to hold a heavy, high-capacity battery pack. If the battery pack falls, it can rip the LED strip down with it, damaging the wall and the light itself. Always use hook-and-loop style mounting strips rated for the specific weight of the battery.
- Ignoring moisture and splash zones: Installing standard indoor-rated (IP20) LED strips in high-humidity areas like bathrooms or directly above a kitchen stove can lead to premature failure or electrical short circuits. Always check the IP (Ingress Protection) rating of your light strip. For damp areas, select strips rated IP44 or higher.
Additionally, if your installation requires working at heights (such as near high condo ceilings) or mounting heavy suspended loads, prioritize your safety by using a stable ladder, following all manufacturer safety instructions, and seeking professional assistance if you are unsure. If you ever decide to transition to a hardwired setup, remember that fixed wiring must always be isolated from the power supply and installed by a qualified professional.
Frequently Asked Questions (FAQ)
Can I use removable mounting strips for LED lights?
Yes, removable mounting strips are highly effective for securing both the LED light strips and their battery packs. These strips are designed to hold weight securely and peel off cleanly. However, they require a smooth, clean, and non-porous surface to work effectively. They may not adhere reliably to heavily textured plaster, unfinished wood, or highly porous wallpaper.
How do I manage charging if the strip is mounted high up?
To manage charging for high-mounted strips, look for a rechargeable led light kit that features a detachable magnetic battery pack. This allows you to slide the battery off its mount for charging while leaving the light strip itself undisturbed on the wall. Alternatively, you can use a long USB charging cable paired with a portable power bank, allowing you to charge the unit high up without needing a nearby wall outlet.
Will the heat from the LED strips damage my condo walls?
No, high-quality LED strips emit very little heat compared to traditional incandescent or halogen bulbs, making them completely safe for painted drywall, wood cabinets, and laminate shelves. However, the small amount of heat they do generate must be allowed to dissipate. Avoid enclosing the strips in tight, unventilated plastic channels or behind heavy fabrics, as trapped heat can degrade the adhesive backing over time, causing the lights to sag or fall.
Community discussion
Share your experience or ask a question. Comments are reviewed before publication.