
Condo living in the Philippines offers beautiful skyline views, but customizing a balcony often comes with strict “no-drilling” rules from property management. Installing an led neon light strip solar system is an elegant, energy-efficient way to elevate your outdoor space with a vibrant glow without risking your security deposit. By utilizing damage-free mounting solutions like heavy-duty outdoor adhesive clips, zip ties, and tension rods, you can secure both the flexible light strip and its solar panel safely.
Achieving a professional-looking installation requires careful planning around the unique layout of your balcony. Because condo balconies are typically covered by deep overhead concrete slabs, positioning the solar panel where it can capture sufficient direct sunlight is the most critical step. With the right preparation, weather-resistant materials, and strategic placement, you can transform your balcony into a cozy tropical oasis that powers itself every night.
Prepare Your Balcony and Gather the Right Tools
Before purchasing any lighting equipment, your first step must always be to consult your condominium’s house rules or property management guidelines. Many high-rise developments in metropolitan areas have strict regulations regarding exterior aesthetics, which may restrict the color, brightness, or operating hours of balcony lights. Some buildings also prohibit any modifications to the exterior facade, including the attachment of items to balcony railings or outer walls, making a completely reversible, non-invasive installation method absolutely essential.
Products mentioned in this guide
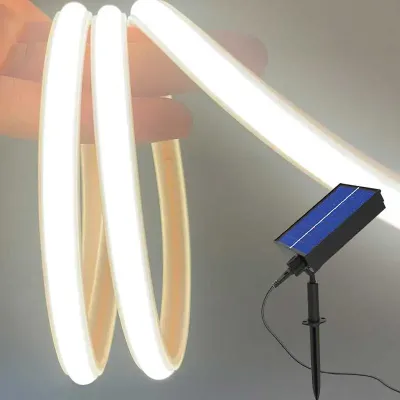
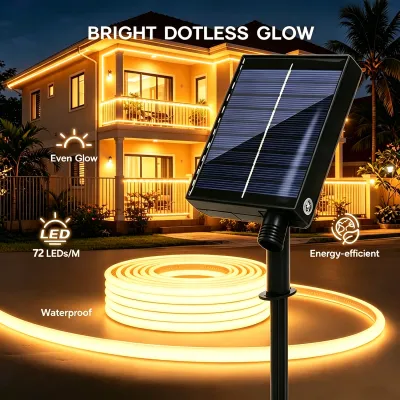
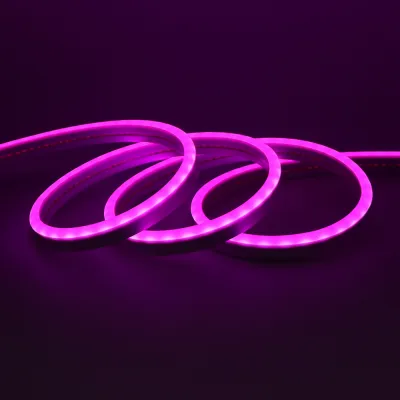
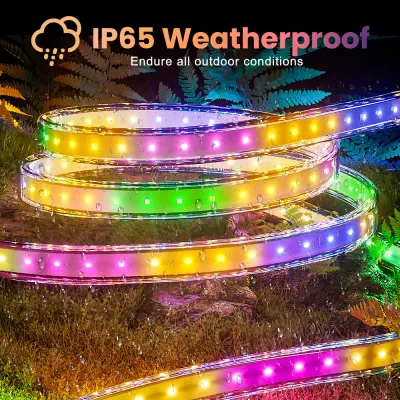
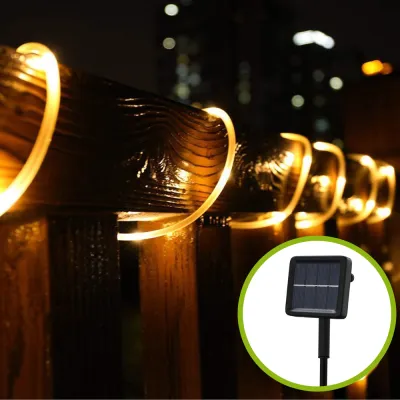
Prices are valid at publication and may change. Please refer to the product page for the latest price.
Once you have verified your building’s policies, you can assemble the tools and materials needed for the project. A standard setup requires a high-quality solar LED neon light strip kit, no-drill mounting hardware tailored to your balcony’s surfaces, a bottle of isopropyl rubbing alcohol, a clean microfiber cloth, and outdoor-rated cable management clips. Having these items ready beforehand ensures a smooth installation process and prevents mid-project delays.
When selecting your lighting kit, you must carefully inspect the product packaging, labels, and manufacturer specifications to verify the Ingress Protection (IP) rating. Because the balcony is exposed to the elements, both the neon light strip and the solar panel must be explicitly rated for outdoor use. Look for an IP65 rating or higher, which indicates the product is protected against dust ingress and low-pressure water jets, such as heavy tropical downpours. For highly exposed balconies prone to severe wind-driven rain, an IP67 or IP68 rating is recommended to ensure long-term electrical safety and durability.
Additionally, check the manufacturer’s technical specifications for electrical safety certifications, voltage ratings, wattage limits, and maximum operating temperatures. Solar-powered strips typically operate on low-voltage direct current (DC), which minimizes electrical hazards, but you must still confirm that the system’s components are fully compatible. Review the manufacturer instructions for any specific limits on continuous run times, battery charging parameters, and physical dimensions to ensure the kit fits your balcony’s layout. If you intend to connect the system to any fixed wiring or if your balcony layout requires working at height, always isolate the power source first and consult a qualified professional to ensure safety.
Choose the Right No-Drill Mounting Method for Your Surfaces
Different balcony surfaces require distinct mounting strategies to ensure the light strip remains secure without causing permanent damage. Selecting the wrong mounting method can lead to the strip sagging, falling, or peeling away paint and finishes when removed.

Adhesive Mounting Clips: These are highly effective for smooth, non-porous surfaces such as glass balustrades, sliding doors, or glazed ceramic tiles. To achieve a strong bond, the target surface must be meticulously cleaned to remove any oily residue or environmental grime. It is important to note that the intense heat and high humidity typical of the Philippine climate can degrade adhesive backings over time. Because of this, you should perform periodic checks on the clips and choose heavy-duty, acrylic-based outdoor adhesives that are formulated to withstand UV exposure and temperature fluctuations.
Zip Ties and Cable Ties: For balconies with metal grilles, wrought iron railings, wooden balusters, or wire mesh, UV-resistant nylon zip ties are the most reliable option. This mechanical fastening method completely eliminates the risk of adhesive failure due to moisture or heat. When using zip ties, ensure they are looped securely around both the railing and the mounting brackets or the light strip itself, taking care not to pinch or crush the flexible housing. Opt for black or dark-colored zip ties, as they generally offer better resistance to ultraviolet degradation than clear or white varieties.
Tension Rods or Adjustable Poles: If your balcony features a solid ceiling and floor but lacks suitable railings or smooth walls, a rust-resistant tension rod is an excellent alternative. By wedging an adjustable pole vertically between the floor and ceiling, or horizontally between two solid side walls, you create a temporary structural support. You can then spiral the neon strip around the pole or attach mounting clips directly to it, keeping your condo walls completely untouched and free of any adhesive residue.
Suction Cups with Hooks: For temporary setups or highly localized accents on glass windows and sliding doors, heavy-duty suction cups offer a quick, adjustable solution. However, suction cups are prone to losing their seal as temperature shifts cause the air inside the cup to expand and contract. If you choose this method, plan to inspect the suction seal regularly and clean both the glass and the rubber cup periodically to prevent unexpected falls.
Step-by-Step Installation Guide
Positioning the Solar Panel for Optimal Charging
To ensure your led neon light strip solar system illuminates reliably every evening, you must find a location on your balcony that receives direct, unshaded sunlight for at least six to eight hours a day. Condo balconies are notorious for deep concrete overhangs that cast shadows over the lower portion of the space for most of the day. Observe your balcony’s sun patterns to identify the area with the least obstruction, which is typically the top edge of the outer railing or the outermost corner of the structure.
Mount the solar panel securely using adjustable railing clamps, heavy-duty outdoor adhesive pads, or zip ties, depending on the design of the panel’s mounting bracket. Angle the face of the panel upward and toward the path of the sun to maximize solar energy absorption. If your balcony faces a direction that receives limited direct sunlight, you may need to position the panel at a steeper angle or mount it higher up on the railing to catch the angled afternoon sun.
Avoid placing the solar panel underneath dense hanging plants, deep eaves, or behind tinted glass panels. Tinted glass and plastic barriers block a significant portion of the solar spectrum, which drastically reduces the charging efficiency of the photovoltaic cells. If the battery does not receive adequate charge during the day, the light strip’s operational duration will be severely shortened, or it may fail to turn on entirely.
Mounting the Neon Light Strip
Begin the mounting process by preparing the installation path on your balcony. Wipe the designated mounting surfaces thoroughly with isopropyl rubbing alcohol and a clean microfiber cloth to remove all dust, grease, and moisture. Allow the surface to dry completely for several minutes, as any remaining moisture or cleaning residue will prevent the mounting clips or adhesive tape from bonding properly. Always check the applied product’s label and the treated item’s manufacturer instructions before applying any cleaning agents or adhesives to sensitive finishes.
Install your chosen mounting clips along the prepared path, spacing them according to the manufacturer’s recommended intervals—typically every 30 to 45 centimeters. Placing clips too far apart will cause the flexible neon strip to sag over time, especially when exposed to wind. Pay close attention to corners and curves, placing additional clips immediately before and after any bend to maintain a clean, crisp outline.
Gently press the flexible neon light strip into the mounting clips, working your way systematically from the end closest to the solar panel connection. Avoid pulling or stretching the strip tightly during installation, as physical tension can damage the delicate internal circuitry and LED solder joints. Additionally, never bend the strip sharper than its specified minimum bending radius; forcing a sharp 90-degree fold can pinch the internal wiring and cause sections of the strip to fail. Note that your choice of color temperature (such as warm white or cool white) and the resulting spatial effect are conditional preferences that depend on your desired balcony ambiance, rather than universal performance facts.
Routing Cables and Securing Connections
Once the light strip and solar panel are mounted, route the connecting cable neatly along the edges of the balcony railing or wall. Keeping the cable flush against structural elements prevents it from dangling loosely, which can look untidy and pose a safety hazard. Ensure the cable path does not cross high-traffic areas where it could be tripped over or caught by sliding balcony doors.
Secure the routed cable at regular intervals using small adhesive cable clips or outdoor zip ties. This prevents the wire from whipping back and forth during strong winds, which can strain the physical connections and damage the cable jacket over time. Leave a small amount of slack near the connection points to allow for natural thermal expansion and contraction of the balcony materials.
Examine the electrical connection port between the neon strip and the solar panel’s power cord. Confirm that the waterproof connector cap is fully tightened and that the rubber gasket is properly seated according to the manufacturer’s care instructions. Position this connection point so that the cable entry faces downward; this simple orientation prevents rainwater from pooling around the seal and minimizes the risk of moisture ingress.
Weatherproofing and Maintenance for Tropical Balconies
The tropical climate of the Philippines presents unique environmental challenges, including intense solar heat, high relative humidity, and heavy monsoon rains. To protect your investment and extend the lifespan of your solar LED neon light strip, establishing a regular maintenance routine is highly recommended.
At least once a month, perform a visual inspection of all adhesive mounts and clips. Prolonged exposure to high ambient temperatures and humidity can gradually soften adhesive backings, causing them to slide or lift from the surface. If you notice any clips starting to peel away, replace them immediately with fresh outdoor-rated adhesive tape, or consider transitioning to a mechanical fastening method like zip ties to prevent the entire strip from falling.
Keep the solar panel clean by wiping its surface with a soft, damp microfiber cloth every few weeks. In urban condo environments, a thin layer of atmospheric dust, soot, pollen, and occasional bird droppings can quickly accumulate on the glass cover. This accumulation blocks sunlight and can significantly reduce the panel’s charging capability, leading to dim lights or short run times. Avoid using abrasive sponges or harsh chemical cleaners, which can scratch the protective glass and permanently degrade solar absorption.
Regularly inspect the flexible silicone or PVC jacket of the neon light strip for signs of UV degradation. Over time, intense sunlight can cause these materials to yellow, become brittle, or develop micro-cracks. If you observe any physical cracking or deterioration in the outer casing, consult the manufacturer’s care and warranty instructions to determine if the strip remains safe for continued outdoor use, as cracked jackets can allow moisture to reach the live electrical components.
Always prioritize safety by following the manufacturer’s specific cleaning and maintenance guidelines. If you notice persistent moisture inside the light strip housing, or if any portion of the wiring appears frayed or damaged, disconnect the power source immediately. For complex issues, suspended loads, or if the system’s electrical safety is in question, consult a qualified professional or the manufacturer’s customer support before attempting any repairs.
Troubleshoot Common Solar Lighting Issues
Even with a careful installation, you may occasionally encounter operational issues with your outdoor solar lighting system. Most common problems can be diagnosed and resolved using a few simple, non-invasive troubleshooting steps.
Lights Not Turning On: If your neon strip fails to illuminate at dusk, first check that the physical power switch on the back of the solar panel is in the “ON” position. Next, ensure the solar panel is not obstructed by temporary shadows, hanging laundry, or newly placed balcony decor. If the system is brand new, remember that the internal rechargeable battery typically requires a full day of unobstructed, direct sunlight to achieve its initial charge before it can power the lights.
Dim or Flickering Output: A dim or flickering light strip is often a sign of insufficient power or a loose connection. Inspect the cable connection between the panel and the strip to ensure it is tightly joined and free of dirt or moisture. If the connection is secure and the solar panel is clean, the issue may be due to a degraded rechargeable battery that can no longer hold a full charge. Check the manufacturer’s guidelines to see if the battery is user-replaceable, and only use the exact battery type and specification recommended by the brand.
Adhesive Failure: When adhesive clips fail to hold, do not attempt to re-stick the old tape, as its bonding properties will be entirely lost. Instead, safely peel away the failed adhesive, clean any remaining residue from the balcony surface using rubbing alcohol, and reapply using a stronger, outdoor-rated mounting solution. If the surface is highly textured or repeatedly exposed to direct rain, transitioning to mechanical zip ties or a tension rod will provide a much more stable, long-term solution.
Community discussion
Share your experience or ask a question. Comments are reviewed before publication.