
Installing solar LED strip lights indoors is entirely possible even if your bedroom or living room does not receive direct sunlight. The key lies in utilizing a split-system setup where the solar panel is positioned in an outdoor sunlit area, such as a window sill or balcony, while the LED strip is routed inside to provide ambient lighting. This approach allows you to harness solar energy to power your indoor decor, creating a beautiful glow behind your television, headboard, or curtain pelmets without increasing your electricity bill.
To make this setup work, you need to plan the physical layout, select compatible hardware, and route the cabling without damaging your home’s seals. In high-density residential areas like modern condominiums in the Philippines, where drilling into exterior walls is often restricted, finding non-invasive mounting solutions is essential. By following a systematic installation process, you can achieve a clean, professional look that keeps your solar panel charging efficiently while your indoor space remains beautifully illuminated.
Assessing Your Space and Light Availability
Before purchasing any lighting equipment, evaluate your indoor and outdoor spaces to identify where sunlight is available and how you will bridge the gap to your indoor lighting zones. Start by observing your home’s exterior features during the brightest parts of the day. Look for areas that receive consistent, unobstructed sunlight, such as window sills, balcony railings, or accessible exterior walls. In tropical climates, the sun’s angle changes throughout the year, so choosing a spot with the widest possible exposure is crucial for consistent charging.
Products mentioned in this guide
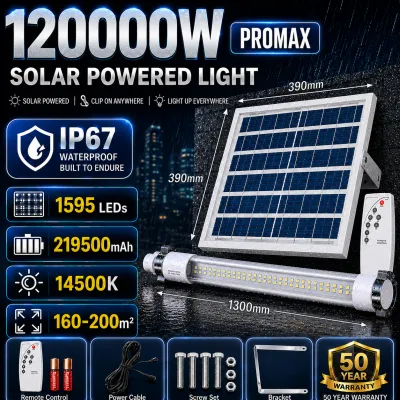
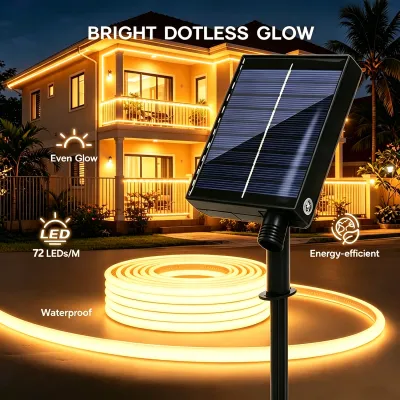
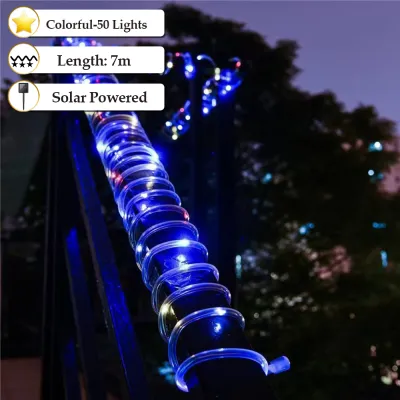
Prices are valid at publication and may change. Please refer to the product page for the latest price.
Once you have identified a viable outdoor location for the solar panel, determine exactly where you want to install the LED strip lights indoors. Popular choices for ambient lighting include the perimeter of a living room ceiling, behind a bedroom headboard, or underneath a TV console. Use a flexible measuring tape to map out the exact path the connecting cable will take from the outdoor solar panel to the start of the indoor light strip. Be sure to account for corners, door frames, and window tracks, as routing around these obstacles will require extra cable length.
It is also important to review your building’s rules before making any modifications. Many condominium corporations and homeowners’ associations have strict guidelines regarding exterior aesthetics and safety. For instance, hanging items over balcony railings or drilling holes into exterior concrete walls may be prohibited. Checking these regulations beforehand will help you decide whether to use non-destructive mounting methods, such as heavy-duty suction cups or temporary clamps, to secure your solar panel safely.
Choosing the Right Solar LED Strip Light Setup
When shopping for a solar LED strip light, you will encounter two primary configurations: integrated designs and split designs. Integrated designs feature the solar panel, battery, and LED strip permanently joined together, often with very short cords. These are generally unsuitable for indoor use because the light strip cannot reach your living spaces if the panel is placed outside. Instead, look for a split-system design where the solar panel is a separate unit connected to the LED strip by a long, detachable cable.

Verify the cable length specifications on the product packaging or manufacturer’s website before making a purchase. The included cable must be long enough to span the distance from your outdoor mounting point to your indoor installation zone. If the standard cable is too short, check if the manufacturer offers compatible, weather-sealed extension cables. Avoid splicing or using third-party wires unless they are explicitly approved by the manufacturer, as mismatched resistance can cause voltage drops, resulting in dim lights or electrical hazards.
Pay close attention to the Ingress Protection (IP) ratings of the components. The solar panel and its integrated battery housing will be exposed to tropical downpours, high humidity, and intense heat, meaning they require a high weather-resistance rating, such as IP65 or IP67. Conversely, the indoor LED strip itself does not need extreme weatherproofing unless you plan to install it in a high-moisture area like a bathroom. A standard IP20-rated strip is usually sufficient for dry indoor environments like bedrooms and living rooms, and these dry-rated strips are often more flexible and easier to mount.
Positioning and Securing the Solar Panel for Maximum Charge
To get the most out of your solar LED strip lights, the solar panel must be oriented to capture as much sunlight as possible. In the Philippines, orienting your panel generally toward the south or north depending on the season can help maximize daily exposure, but the most practical approach is to align it with the open sky away from neighboring buildings or overhanging roofs. Even partial shading from a nearby pillar or potted plant can drastically reduce the panel’s energy output, so keep the face of the panel completely clear.
Securing the panel safely is paramount, especially if you live on a high floor of a condominium where strong winds are common during the typhoon season. If you cannot drill into the exterior walls, utilize non-destructive mounting hardware. Heavy-duty suction cups can secure lightweight panels directly to window glass, while adjustable C-clamps or zip ties can fasten brackets to balcony railings. Ensure all mounting components are UV-resistant and rated for outdoor use so they do not degrade and fail under intense tropical sun exposure.
If your installation requires permanent drilling into concrete, brick, or structural metal railings, stop and consult a qualified professional or your building’s maintenance staff. Improper drilling can compromise the building’s waterproofing layers, leading to leaks during heavy rains, or weaken structural railings. A professional installer can ensure that any drilled anchors are properly sealed with outdoor-grade silicone sealant and that the installation complies with local building codes and safety standards.
Routing the Connection Cable Indoors Cleanly
Bringing the power cable from the outdoor solar panel to the indoor LED strip requires a path that does not compromise your home’s weatherproofing or security. One of the most effective methods is to use ultra-flat cables designed specifically to pass through the gaps of closed windows or sliding balcony doors. These flat wires are thin enough to allow the window or door to lock securely without pinching, crushing, or severing the internal copper conductors. Always test the window’s operation slowly after placing the cable to ensure there is no friction.
Once the cable is safely inside, you will want to conceal it to maintain a clean, uncluttered interior aesthetic. Adhesive cable clips are excellent for securing the wire along the edges of window frames, baseboards, or crown molding. For a more seamless look, install paintable plastic cord covers or mini-conduits that match your wall color. This not only hides the wire from view but also protects it from accidental damage caused by vacuum cleaners, pets, or foot traffic.
When routing the cable, avoid making sharp ninety-degree bends, as bending the wire too tightly can damage the internal shielding and lead to intermittent power failures. Keep the cable away from potential heat sources, such as air conditioning exhaust units or direct sunlight behind glass, which can degrade the wire insulation over time. Additionally, ensure the cable is positioned clear of moving window tracks or sliding door rollers to prevent it from being caught and severed during daily use.
Mounting the LED Strip for Optimal Ambient Effects
Achieving a beautiful, indirect glow in your bedroom or living room depends heavily on how you mount the LED strip. Popular techniques involve hiding the strip behind furniture or architectural features so that the light reflects softly off the walls. For instance, mounting the strip behind a wooden headboard creates a warm halo effect that is well-suited for winding down at night. In the living room, placing the strip inside a curtain pelmet or behind a wall-mounted television console adds depth and reduces eye strain during evening viewing.
Before peeling off the adhesive backing, prepare the mounting surface thoroughly. Dust, oil, and moisture will prevent the adhesive from bonding properly, causing the strip to sag or fall off over time. Wipe the surface with a clean cloth dampened with rubbing alcohol, and let it dry completely. If you are mounting the strip to a rough or porous surface like bare wood or textured plaster, consider using mounting clips or installing the strip inside a lightweight aluminum profile channel for a secure hold.
If the LED strip is longer than your installation area, you must follow the manufacturer’s cutting guidelines precisely. Look for the designated cut lines, which are typically marked with a pair of scissors icon and copper solder pads. Cutting anywhere else will permanently damage that section of the strip, preventing it from lighting up. Before finalizing the adhesive placement, temporarily lay out the strip and connect it to the solar panel’s battery unit to test the lighting effect, remote control range, and overall layout.
Optimizing Performance and Maintenance
To ensure your solar-powered indoor lights continue to perform reliably, establish a simple routine maintenance schedule. Outdoor solar panels quickly accumulate a layer of dust, pollen, and water spots from rain, which can block sunlight and significantly reduce charging efficiency. Wipe the glass surface of the panel every few weeks with a soft, damp microfiber cloth. Avoid using abrasive scrubbers or harsh chemical cleaners, as these can scratch the protective coating and permanently degrade the panel’s ability to absorb light.
As the seasons change, the sun’s path across the sky shifts, which may cause shadows to fall on your solar panel at times when it previously received full sun. Periodically check the panel’s exposure and adjust its tilt angle to match the seasonal sun position. This minor adjustment can make a noticeable difference in how quickly the internal battery charges, especially during the cloudier rainy season when daylight hours are less intense.
Regularly inspect the physical condition of the entire system to catch potential issues before they cause a failure. Check the outdoor cable connections to ensure they remain tight and dry, and look for any signs of wear or cracking in the wire insulation. If your system features a detachable battery housing, inspect it for moisture ingress or corrosion around the terminals. Addressing these minor issues early will prolong the lifespan of your lighting setup and ensure safe operation.
Troubleshooting Common Issues
If your solar LED strip lights are dim or run out of power quickly, the most common culprit is insufficient charging. Check the solar panel during the day to ensure it is not being partially shaded by newly grown foliage, hanging laundry, or neighboring structures. Keep in mind that solar panels require several hours of direct sunlight to charge the battery fully; on overcast or rainy days, the run time will naturally be shorter. Refer to your product manual to understand the expected charge-to-run time ratio under typical conditions.
Another frequent issue is the light strip failing to turn on automatically at night. Most solar panels have a built-in light sensor that automatically activates the LEDs when it detects darkness. If your solar panel is mounted in an area that receives light from streetlamps, corridor lights, or adjacent apartments, the sensor may “think” it is still daytime and keep the lights off. To resolve this, try adjusting the angle of the panel away from artificial light sources, or cover the sensor if your model allows manual control.
If the lights fail to turn on at all, systematically check all physical connections. Unplug and firmly reconnect the junction between the solar panel cable and the indoor LED strip, ensuring any locking collars or weatherproofing caps are fully tightened. Inspect the entire length of the cable for any visible damage, such as pinches from windows or chew marks from pests. If the connections are secure and the cable is intact, the battery may have discharged completely; try turning the system off and letting the panel charge in direct sunlight for two full days before turning it back on.
Frequently Asked Questions (FAQ)
Can I use a separate solar panel with any LED strip light?
No, you cannot safely mix and match standalone solar panels with generic LED strip lights unless they are specifically designed to work together. The solar panel’s output voltage, the connector type, and the integrated battery’s charging circuitry must match the electrical requirements of the LED strip exactly. Connecting incompatible components can lead to insufficient power, permanent damage to the LEDs, or electrical hazards, and will almost certainly void any manufacturer warranties. Always check the manufacturer’s specifications and use approved components.
How do I manage the light sensor if the panel is outdoors but the strip is indoors?
Because most solar LED systems use a dusk-to-dawn sensor built directly into the outdoor solar panel, the indoor strip will automatically turn on when it gets dark outside, regardless of your indoor lighting conditions. If you want independent control over your indoor lights, look for a solar LED strip model that includes a manual power switch, a remote control, or a mobile app interface. These features allow you to turn the indoor lights off when you do not need them, conserving the stored battery power for when you actually want to enjoy the ambient glow.

Community discussion
Share your experience or ask a question. Comments are reviewed before publication.