
Installing waterfall string lights in your living room is an excellent way to introduce soft, ambient illumination and a dramatic vertical design element to your home. Achieving that perfect cascading effect requires securing a sturdy horizontal main cable along your wall or ceiling and letting the vertical light strands drape naturally downward. Whether you are decorating a cozy condo or a spacious living area, the key to a successful installation lies in choosing the right mounting hardware, managing the power supply safely, and neatly concealing the trailing wires. By following a systematic approach, you can transform a plain wall or ceiling into a glowing focal point without damaging your paint or risking electrical hazards.
Pre-Installation Checks and Safety Boundaries
Before hanging any lighting fixtures, you must verify the electrical specifications of your waterfall string lights to ensure safe operation. Check the manufacturer’s label for the rated voltage, wattage limits, and electrical certification marks. In the Philippines, the standard household voltage is 220V at 60Hz. If your lights use a lower voltage or a different plug type, you will need a compatible step-down transformer or adapter. Ensure the total wattage of the light set does not exceed the capacity of your wall outlet or any surge protector you plan to use. Inspect the entire length of the cord for frayed wires, exposed copper, or cracked insulation before plugging them in for a quick pre-test.
The physical environment of your living room also dictates how you should mount the lights. Concrete, plaster, and drywall react differently to adhesives and hardware. In high-humidity tropical climates, standard adhesive strips can lose their grip over time, especially on textured walls or near open windows where moisture levels fluctuate. If your installation requires working at heights to reach high ceilings, always use a stable stepladder and have a second person spot you. For any setup that involves fixed wiring, modifying your home’s electrical outlets, or mounting heavy suspended loads overhead, stop immediately and consult a qualified professional electrician to prevent fire hazards or structural damage.
Products mentioned in this guide
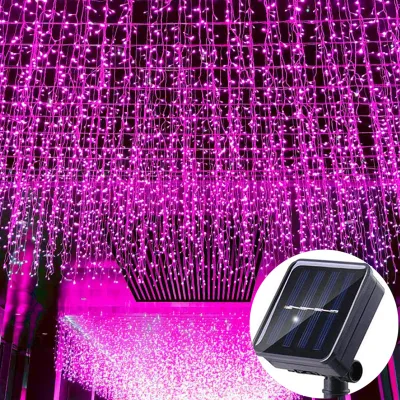
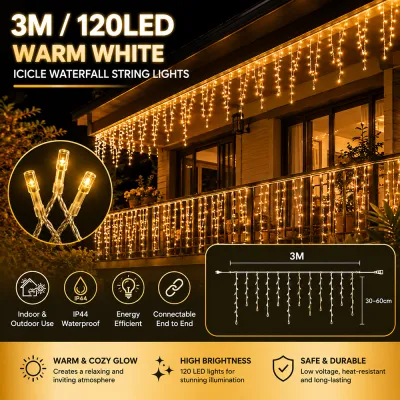
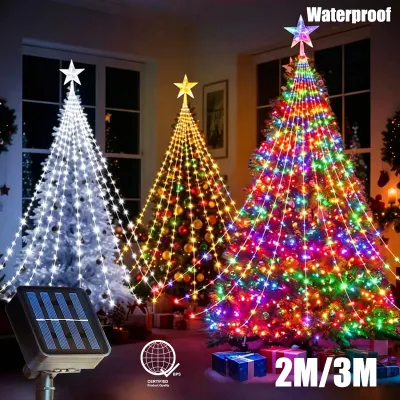


Prices are valid at publication and may change. Please refer to the product page for the latest price.
Tools and Materials Needed for Mounting
Selecting the right mounting hardware depends on your living room’s wall material and whether you live in a rented condo or an owned home. For renters who need damage-free options, high-quality adhesive hooks or clear cable clips designed for indoor use are ideal. These clips hold the main horizontal wire securely without requiring drills or nails. Ensure you choose clips rated for the weight of your specific light set, as waterfall lights with many vertical strands can be surprisingly heavy.

For homeowners who prefer a permanent, heavy-duty installation, small cup hooks, finish nails, or drywall anchors provide a more reliable hold. These options are particularly useful for concrete walls common in local condominiums, which often require a masonry drill bit and small plastic wall plugs to secure screws. To keep the installation looking polished, gather wire management tools such as clear cable ties, paintable cord covers, and double-sided mounting tape. Having a measuring tape, a pencil, and a spirit level on hand will also ensure your horizontal baseline remains perfectly straight.
Step-by-Step Installation on Walls and Ceilings
To achieve a flawless cascading effect, start by measuring the width of the wall or ceiling area you wish to cover. Use your measuring tape to find the center point and mark it lightly with a pencil. From there, measure outward to both sides to mark where your outer anchors will go. Use a spirit level to ensure these marks form a perfectly straight horizontal line. This baseline is crucial because any tilt in the main horizontal wire will cause the vertical strands to hang at an angle, ruining the uniform waterfall appearance.
Once your mounting points are marked, install your chosen hooks or clips along the baseline. Space the anchors approximately 30 to 50 centimeters apart to distribute the weight evenly and prevent the main cable from sagging in the middle. After securing the anchors, carefully hang the main horizontal wire of the waterfall lights onto the hooks. Do not untie the individual vertical strands just yet; keeping them bundled during this step prevents them from tangling while you work.
With the main cable firmly supported, begin releasing the vertical strands one by one, starting from one end and moving to the other. Let each strand drop naturally toward the floor. If any strands are twisted, gently untangle them by hand without pulling hard on the wires, which can damage the internal connections. Adjust the spacing of the vertical strands along the main cable if necessary to ensure an even distribution of light across the entire width of the display.
Wall-Mounted Waterfall Setup
When installing waterfall lights on a vertical wall, such as behind a sofa, a dining table, or a media console, position the top horizontal wire close to the ceiling line or just below the crown molding. This high placement maximizes the visual height of the room and creates a grander cascading effect. If you are mounting the lights behind a television or entertainment center, ensure the strands are positioned far enough back to avoid overheating from the electronics.
Managing the bottom edge of the vertical strands is essential for safety and neatness. The ends of the lights should hang freely but should not touch the floor where they can become tripping hazards, get caught in vacuum cleaners, or be disturbed by pets. If the strands are slightly too long, you can tuck the excess length behind furniture or use small adhesive clips near the baseboard to secure the bottom of each strand, keeping them taut and orderly.
Ceiling-Mounted Waterfall Setup
A ceiling-mounted installation allows you to create a stunning overhead canopy or a glowing room divider that separates different zones in an open-plan living room. Because overhead fixtures are subject to gravity, you must ensure the ceiling anchors are exceptionally secure. Avoid sticking adhesive hooks directly to textured ceiling plaster, as the weight of the cascading strands can pull the plaster finish right off the ceiling. Instead, use screw-in cup hooks anchored into ceiling joists or use specialized toggle bolts for hollow drywall ceilings.
When planning a ceiling setup, carefully calculate the drop length of the vertical strands to maintain adequate head clearance. In high-traffic areas of the living room, the bottom of the strands should remain well above head height to prevent guests from walking into them. If you are using the lights as a room divider behind a couch, you can let them drape lower, but ensure they are positioned away from pathways to prevent accidental pulling.
Concealing Wires and Power Cords in a Living Room
A beautiful light display can easily be spoiled by messy, dangling power cords. To maintain a clean, professional look, route the main power cable from the end of the waterfall lights down toward the nearest outlet by following the natural architectural lines of your living room. Run the cord vertically down the corner of the wall or along the edge of a window frame, securing it with clear adhesive wire clips every few inches to keep it flush against the surface.
For a completely seamless appearance, use paintable plastic cord covers. These shallow tracks adhere to your wall and can be painted the exact color of your living room walls, making the power cord virtually invisible. If the cord must run horizontally, guide it along the top of your baseboards or behind large furniture pieces like bookshelves and sofas.
Always observe safety limits when managing your power source. Avoid running electrical cords under rugs or carpets, as foot traffic can wear down the insulation and create a hidden fire hazard. If you must use an extension cord, ensure it is rated for indoor use, matches the wattage requirements of your lights, and is kept out of high-traffic walkways. Never daisy-chain multiple extension cords together; instead, position your light display so that the main plug can easily reach a permanent wall outlet.
Testing and Adjusting the Cascading Effect
Once the installation is complete and all wires are secured, plug in the waterfall lights to evaluate the overall visual effect. Step back to the opposite side of the living room to view the display from a distance. Look for any gaps, uneven spacing, or tangled strands that disrupt the smooth, cascading flow of light. If some areas look sparse, gently slide the vertical strands along the main horizontal wire to balance the distribution.
Take this time to perform a thorough safety walk-through. Feel the power adapter, plug, and wires to ensure they are not overheating. Check that no cords are pinched behind heavy furniture or stretched too tightly, which can strain the internal copper wiring. If you notice any flickering or dead sections of lights, unplug the unit immediately and check for loose bulbs or damaged wire sections before turning them back on.
Frequently Asked Questions (FAQ)
Can I cut or shorten the vertical strands if they are too long?
You should never cut or shorten the vertical strands of your waterfall string lights unless the manufacturer’s instructions explicitly state that the model is cuttable. Most consumer-grade string lights are wired in a specific series or parallel circuit; cutting the wires will break the electrical circuit, causing the entire strand—or the entire light set—to stop working. Additionally, cutting live or even unplugged wires voids the product warranty, destroys any built-in waterproof seals, and exposes raw copper, which poses a serious risk of electrical shock or short circuits.
If your lights are too long for your living room wall, manage the excess length using non-destructive methods. You can raise the main horizontal mounting wire closer to the ceiling to lift the entire display. Alternatively, you can gently fold the bottom of each strand upward and secure the excess length with clear cable ties, or loop the bottom of the strands back up to a secondary row of hooks to create a scalloped, double-cascade effect.
How do I safely remove adhesive clips without damaging condo paint?
Removing adhesive clips from condo walls without peeling off the paint or tearing the drywall paper requires patience and the right technique. Never pull the clip straight outward from the wall, as this concentrated force will easily rip the paint layer. Instead, use a handheld hair dryer set to low or medium heat to warm the adhesive backing for about 30 seconds. The gentle heat softens the adhesive, making it pliable and easier to release.
Once the adhesive is warm, hold the plastic clip steady with one hand while slowly pulling the adhesive strip’s release tab. Pull the tab straight downward, keeping it parallel to the wall surface rather than pulling it toward you. This stretches the adhesive strip, releasing its grip cleanly. If any sticky residue remains on your wall, gently wipe it away using a microfiber cloth dampened with a mild soapy water solution or a small amount of rubbing alcohol, testing a small, hidden area of your wall first to ensure it does not discolor the paint.
Community discussion
Share your experience or ask a question. Comments are reviewed before publication.