
Creating a reusable DIY Halloween backdrop using fabric is an excellent way to bring festive, spooky energy into your home without generating excessive waste. Unlike paper or thin plastic decorations that tear easily and end up in the trash after a single night, a well-crafted fabric backdrop can serve as a stunning photo background or party centerpiece year after year. By selecting durable materials, planning your layout, and using secure yet reversible assembly techniques, you can design a custom holiday display that fits your space perfectly and stands up to multiple seasons of use.
Planning Your Fabric Halloween Backdrop Design and Space
Before purchasing any materials, assess the physical space where you intend to display your backdrop. Measure the height and width of the designated wall, doorway, or freestanding frame using a standard measuring tape. Standard indoor walls in many homes have a height of around 2.4 to 2.7 meters, so a backdrop measuring 1.5 meters wide by 2 meters tall is often a versatile size that accommodates group photos while remaining manageable to assemble and store. Write down these dimensions to ensure you buy the correct yardage of fabric and avoid running short during construction.
Once you have your measurements, choose a cohesive color palette that aligns with your desired Halloween theme. Classic combinations like deep black, vibrant orange, and bright purple create a traditional, high-contrast look that stands out in photographs. If you prefer a more eerie, gothic atmosphere, consider a palette of charcoal gray, deep crimson, and muted silver. For a playful, kid-friendly setup, lighter shades of lime green, pumpkin orange, and ghostly white work beautifully. Sticking to three or four primary colors keeps the design visually balanced and prevents the backdrop from looking cluttered.
Products mentioned in this guide
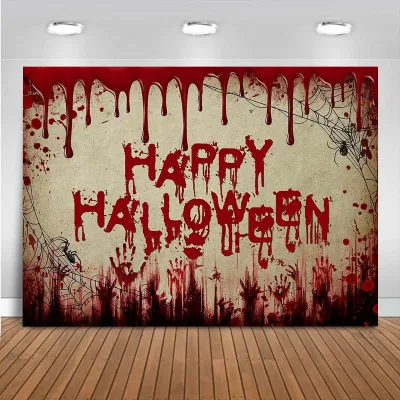
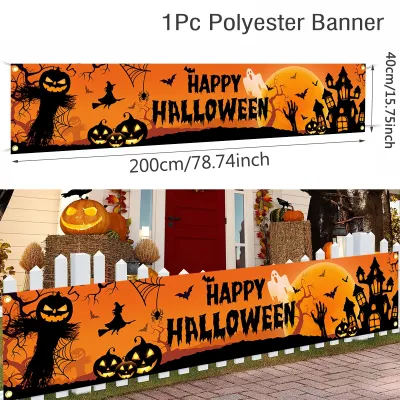
34 Lazada user ratings
Background for fun party, outdoor Halloween decorations, pumpkin and bat printed, suitable for scary theme, Halloween scary party banner,
the items were shipped out on time and delivery did not take too long. the order was also accurate but it is smaller than i thought.
Lightweight very affordable good decoration for halloween i like it very much i cant say anything bad fast delivery enjoy so much
Printed with vivid colors, Spooky Halloween design, Ideal for home entrance, Price:100 Quality:100 Design:100
Akala ko plastic siya. Tela pala. Pwede pa ma re-use for the next halloween. Great buy! Sulit.
Prices are valid at publication and may change. Please refer to the product page for the latest price.
When designing the layout, distinguish between the permanent background elements and the removable or adjustable decorations. A solid-colored base fabric provides a clean canvas, while thematic shapes like bats, ghosts, pumpkins, or spooky trees can be layered on top. Deciding which elements are reusable is key to the project’s longevity. While the main fabric base and sturdy felt cutouts can easily last for years, you might choose to incorporate a few temporary accents, such as fresh paper spiderwebs or real dried leaves, which can be discarded and replaced next season. This hybrid approach keeps your setup customizable while preserving the core structure.
Essential Craft Supplies and Fabric Choices
Selecting the right fabric is crucial for both the visual appeal and the durability of your DIY Halloween backdrop. For the main base, lightweight cotton fabric, polyester blends, or canvas are excellent choices because they drape smoothly, resist excessive wrinkling, and are widely available in local textile markets. For the decorative shapes and characters, felt is highly recommended. Felt does not fray at the edges when cut, holds its shape exceptionally well, and comes in a vast array of vibrant colors. Tulle or netting can also be added as an overlay to create a misty, ethereal, or cobweb-like texture without adding significant weight to the structure.

To assemble your backdrop, gather basic crafting tools that ensure clean cuts and secure attachments. A pair of dedicated fabric scissors is indispensable, as dull household scissors will chew through fabric edges and cause fraying. You will also need a hot glue gun with plenty of glue sticks for rapid assembly, fabric glue for a more flexible bond, and sewing pins to temporarily hold your designs in place before securing them. If you prefer a completely glueless option that allows you to rearrange the elements in future years, hook-and-loop fasteners or safety pins are excellent alternatives.
Estimating a realistic budget helps you make smart purchasing decisions at local craft shops or online marketplaces. A standard fabric backdrop project typically ranges from ₱500 to ₱1,500, depending on the size of your display and the types of fabric you select. To keep costs low, look for fabric scraps or remnants at local textile stores, which are often sold at a fraction of the price of full rolls. You can also repurpose old dark-colored bedsheets, curtains, or tablecloths as your base fabric, allowing you to allocate more of your budget to high-quality felt and decorative accents.
Step-by-Step Instructions to Build the Backdrop
Building your backdrop is a straightforward process that requires a clean workspace and a systematic approach to assembly. Before you begin, clear a large flat surface, such as a dining table or a clean section of the floor, so you can lay out your fabrics without folding or creasing them. Always prioritize safety when crafting: keep your hot glue gun on a heat-resistant stand when not in use, work in a well-ventilated room, and keep sharp fabric scissors out of reach of children or pets to prevent accidental cuts or burns.
Preparing the Base and Cutting Fabric Shapes
Begin by preparing your base fabric to ensure a professional, polished finish. If your base material is cotton or a polyester blend, iron it on the appropriate heat setting recommended by the manufacturer to remove any deep creases or fold lines. For synthetic fabrics that might melt under direct heat, place a clean, damp pressing cloth between the iron and the fabric, or use a handheld garment steamer. A smooth, wrinkle-free base ensures that your decorative elements lay flat and do not warp or pull the fabric once attached.
Next, create paper templates for your thematic shapes to ensure consistency and precision. Draw your designs—such as bats, crescent moons, pumpkins, or ghosts—onto sturdy cardboard or thick paper, then cut them out to create stencils. Place your base fabric or colored felt flat on your workspace, trace around the templates using tailor’s chalk or a washable fabric marker, and carefully cut out the shapes using your fabric scissors. Using templates prevents mistakes, saves fabric, and ensures that matching elements, like a colony of bats, look uniform across the display.
Assembling and Attaching the Decorations
Once all your shapes are cut, arrange them on the prepared base fabric without any adhesive first. This dry run allows you to experiment with different layouts, adjust the spacing, and ensure the composition looks balanced from a distance. To create visual depth, use layering techniques: place larger, darker elements like spooky trees or haunted house silhouettes in the background, and layer brighter, smaller shapes like glowing pumpkins or white ghosts in the foreground. Take a quick photo of your preferred layout on your phone to use as a reference during the final attachment phase.
When securing the decorations, choose the adhesive method that best suits your materials and long-term plans. Hot glue provides an instant, rigid bond that is ideal for heavy felt shapes, but it can sometimes bleed through thin fabrics or make the backdrop stiff. Liquid fabric glue offers a more flexible finish and allows for minor adjustments before it cures, though it requires longer drying times—typically 2 to 4 hours, depending on the brand’s instructions. If you want the option to rearrange or remove the shapes next year, use small safety pins or sew-on snap fasteners, which secure the pieces firmly without permanently altering the base fabric.
Hanging and Displaying Your Backdrop Safely
Mounting your finished backdrop securely is essential to prevent it from falling during your Halloween celebrations. If you are renting or want to avoid damaging your walls, use damage-free adhesive utility hooks or mounting strips designed for hanging textiles. Alternatively, if you have an existing curtain rod or an adjustable tension rod, you can fold the top edge of your base fabric over and sew or glue a simple rod pocket to slide the rod through. This distributes the weight evenly and creates a clean, professional drape.
Safety should be your top priority when positioning the display, especially in high-traffic areas. Ensure the backdrop is hung away from open flames, candles, stoves, or high-heat light sources, as most crafting fabrics and glues are flammable. Secure the bottom edge of the fabric to the wall or floor using removable double-sided tape to prevent it from flapping or blowing in the breeze, which can create a tripping hazard for children or pets running nearby. If you are using a freestanding backdrop stand, weigh down the base legs with sandbags or heavy books to ensure it remains stable if accidentally bumped.
Storing and Reusing Your Backdrop for Next Year
Proper storage is the key to keeping your DIY Halloween backdrop in pristine condition for future holiday seasons. Before packing it away, carefully inspect the display and gently remove any delicate or temporary attachments, such as paper accents or loose plastic spiders, that could crush or tear the main fabric. Use a soft brush or a lint roller to remove any dust, pet hair, or loose threads that may have accumulated on the surface during your event.
To prevent deep, stubborn creases that can damage the fabric fibers over time, roll the backdrop instead of folding it. Wrap the rolled fabric around a clean cardboard shipping tube or a pool noodle, keeping the decorated side facing outward to avoid crushing the raised felt shapes. Store the rolled backdrop in a heavy-duty plastic storage bin or a breathable fabric garment bag to protect it from dust, pests, and moisture. Keep the container in a cool, dry closet, as the high humidity and heat typical of tropical climates can cause mold growth or degrade hot glue bonds over time.
Frequently Asked Questions (FAQ)
Can I wash my fabric Halloween backdrop if it gets dirty?
Yes, but you must take precautions to avoid damaging the attached decorations and adhesives. Check the care labels of your base fabric before attempting any cleaning. If you used hot glue or fabric glue to secure the shapes, machine washing or dry cleaning is not recommended, as the heat and agitation can dissolve the adhesive or cause the felt shapes to warp and bleed color. Instead, spot-clean any soiled areas by gently dabbing them with a clean microfiber cloth dampened with cool water and a drop of mild dish soap. Allow the backdrop to air dry completely in a well-ventilated indoor space away from direct sunlight before rolling it up for storage.
What is the best way to add lighting to a fabric backdrop?
Adding lighting can dramatically enhance the spooky atmosphere of your backdrop, but it must be done safely to prevent fire hazards. Always use low-voltage, battery-operated LED fairy lights or copper wire string lights, as LEDs generate virtually no heat and are safe to place in direct contact with fabrics. Avoid using traditional incandescent bulbs, which can become hot enough to scorch or ignite synthetic materials. When selecting lights, verify the manufacturer’s electrical certification, voltage requirements, and wattage limits to ensure they are safe for indoor use. To integrate the lights, weave the thin copper wires through small loops sewn onto the back of the fabric, or use safety pins to secure the wire along the borders of your design, taking care not to pierce or pinch the insulated electrical wires.
Community discussion
Share your experience or ask a question. Comments are reviewed before publication.