
Replacing a damaged or yellowed Chip-on-Board (COB) light cover requires matching three critical factors: precise physical dimensions, the specific mounting mechanism, and the thermal tolerance of the replacement material. Because COB LEDs concentrate high-intensity light and heat into a small surface area, choosing an incompatible cover can lead to poor light diffusion, physical warping, or even electrical hazards. By systematically measuring your existing fixture, identifying its attachment style, and verifying the material’s heat limits, you can safely restore your lighting setup to its optimal performance.
Prepare the Fixture Safely Before Measuring
Safety first. Before touching any part of the light fixture, isolate the electrical supply. Do not rely solely on the wall switch; turn off the corresponding circuit breaker in your electrical panel to prevent accidental shocks.
When dealing with fixed wiring, installations in damp areas, or fixtures mounted at height, always prioritize safety by isolating the power at the main breaker panel. If the replacement requires climbing a tall ladder or handling heavy suspended loads, secure the work area and follow the manufacturer’s installation instructions carefully. If you encounter damaged wiring or feel uncomfortable working at height, stop and contact a qualified professional.
Products mentioned in this guide
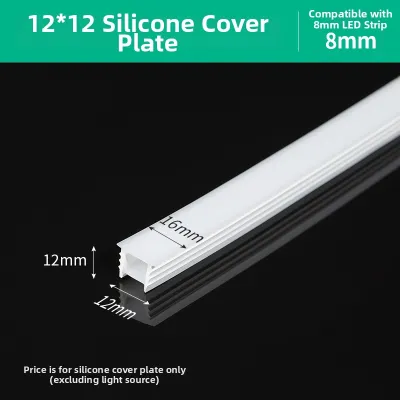
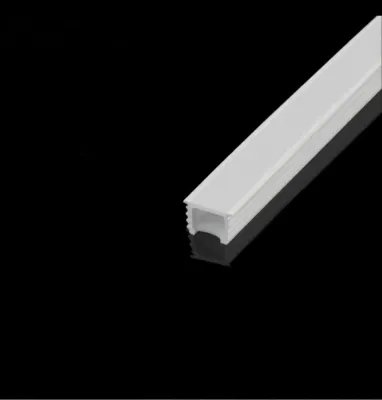
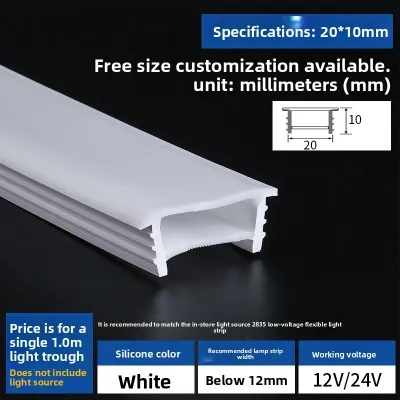
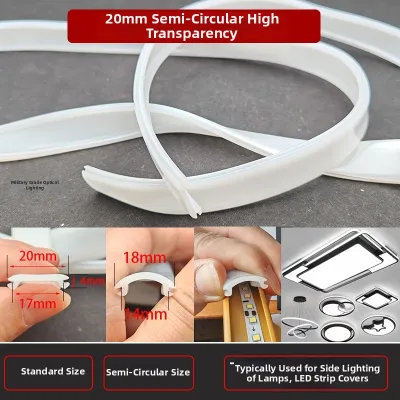
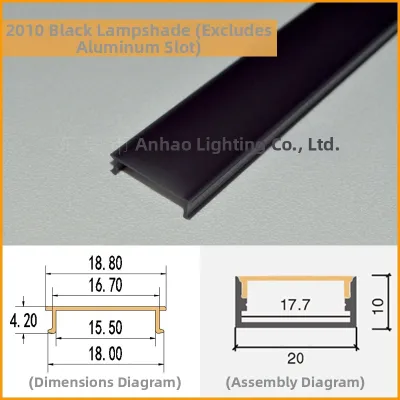
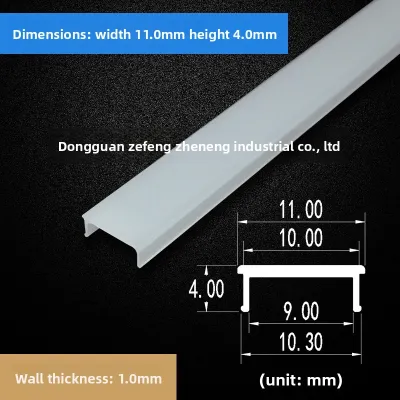
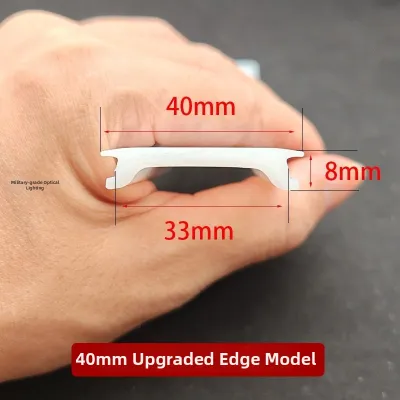
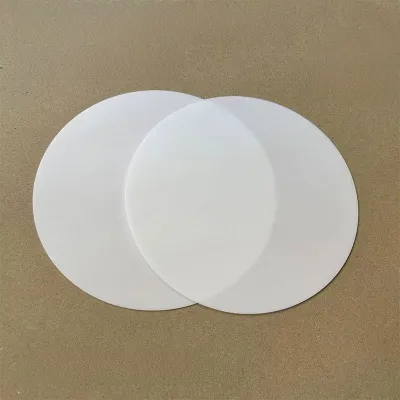
Prices are valid at publication and may change. Please refer to the product page for the latest price.
Allow the fixture to cool down completely. COB LEDs are highly efficient, but they generate significant localized heat behind the lens, concentrated around the heat sink. Touching a recently active fixture can cause minor burns or lead you to drop and shatter the fragile cover. Wait at least twenty to thirty minutes after turning off the power before attempting any physical contact.
Carefully remove the old cover to inspect it. If the cover is cracked or brittle from years of thermal exposure, wear protective gloves and safety glasses. Gently release any retaining clips, unscrew the collar, or slide the cover out of its track according to the fixture’s design, ensuring you do not apply excessive force that could damage the underlying aluminum housing or the delicate COB yellow phosphor chip.
Measure the Exact Dimensions of Your Existing Cover
Accurate measurements are the foundation of a successful replacement. To begin, obtain a high-quality measuring tool; while a rigid steel tape measure works for larger fixtures, a digital caliper is highly recommended for capturing the precise millimeter-level details of smaller COB downlights. Even a tiny discrepancy of one or two millimeters can prevent a snap-fit cover from securing properly or cause a screw-in lens to cross-thread.

Measure the outer diameter or overall width of the existing cover first. This represents the maximum boundary of the lens that sits flush against your ceiling or wall trim. Next, measure the inner lip or flange diameter, which is the portion of the cover that actually inserts into the fixture housing. This flange measurement must match the inner opening of your light fixture to ensure a snug, wobble-free fit.
Do not forget to measure the depth or height clearance of the cover. COB chips often sit slightly recessed within a reflector cone, but some designs feature protruding elements or require a specific air gap to allow heat to dissipate toward the heat sink. If your replacement cover is too shallow, it may press directly against the COB module, risking physical damage to the light-emitting surface or trapping excessive heat that shortens the lifespan of the LED.
If the original cover is missing, measure the internal diameter of the fixture’s mounting track with calipers, then subtract a 1-millimeter clearance margin to determine the maximum allowable flange size.
Identify the Shape and Mounting Mechanism
COB light covers come in various shapes, with round, square, and rectangular profiles being the most common in residential and commercial spaces. Beyond the basic shape, pay close attention to the edge profile. Some covers feature a flat face, while others have a domed, convex, or recessed design that alters how the light is projected and how the cover seats within the trim.
Examine how the cover attaches to the fixture housing. The most common mounting styles include snap-in clips, screw-on threaded collars, magnetic rings, and friction-fit rubber gaskets. Snap-in covers rely on small plastic or metal tabs along the perimeter that flex into matching slots in the housing. Threaded covers require you to match the pitch and diameter of the threads on the fixture collar, which can be highly brand-specific.
Inspect the fixture housing for any specialized brackets or mounting hardware. Some architectural COB downlights use twist-lock mechanisms (similar to a bayonet mount) where you insert the cover and rotate it a quarter-turn to lock it in place. If your fixture uses magnetic attachments, verify that the replacement cover includes the necessary ferrous metal ring or integrated magnets, and check that they align perfectly with the magnetic contact points on the housing.
Select the Right Material and Light Diffusion
The material of your replacement cover directly influences both the quality of light and the durability of the fixture. Acrylic (PMMA) and polycarbonate are the two most prevalent plastics used for LED covers. Acrylic offers excellent optical clarity and resistance to UV yellowing, making it ideal for general living spaces, but it can be brittle. Polycarbonate is highly impact-resistant and handles higher temperatures better, though it may yellow slightly faster over many years of continuous thermal exposure.
Choosing between frosted, opal, or clear covers is largely a matter of conditional preference based on your desired spatial effect and perceived color temperature. While a clear cover maintains the crisp, direct output of the COB chip, a frosted cover can soften the light, making the perceived color temperature feel slightly warmer and reducing harsh glare in intimate living spaces.
Always verify the heat tolerance and wattage limits of the material. In warm, humid climates like the Philippines, ambient temperatures can compound the heat generated by the COB module. Check the manufacturer specifications of the replacement cover to ensure it is rated for the operating temperature of your fixture. Avoid cheap, non-rated plastics that can warp, emit toxic fumes, or melt under the sustained thermal output of a high-wattage COB LED.
Verify Compatibility Before You Buy
Before finalizing your purchase on any online marketplace or specialty lighting store, double-check all technical specifications. Pay close attention to the distinction between “nominal size” and “actual size.” A cover marketed as a “4-inch downlight cover” may actually measure 4.2 inches or 3.8 inches in physical diameter; always rely on the exact millimeter measurements rather than generic category names.
Beyond physical dimensions, verify the electrical and environmental specifications of your setup. Ensure the replacement cover does not restrict the fixture’s designed airflow, which could affect the voltage stability, dimming performance, or wattage limits of the COB module. Check that the replacement part is rated for your specific installation environment—such as damp-rated covers for bathrooms or outdoor eaves—and look for recognized electrical certifications to guarantee the material meets flame-retardant standards.
Whenever possible, consult the original fixture manufacturer’s documentation. Locate the model number on the back of the fixture housing or in the user manual, and search for official replacement part numbers. If the original manufacturer does not offer individual replacement covers, look for third-party options that explicitly list compatibility with your specific fixture model.
Review the seller’s return and exchange policies carefully. Because minor measurement errors or slight manufacturing variances can prevent a perfect fit, ensure you can return or exchange the cover if it does not seat securely. Avoid non-returnable items or listings without detailed dimensional diagrams.
Install the Replacement Cover Safely
Once you have verified the dimensions and compatibility, you can proceed with the installation. Ensure the power remains completely isolated at the circuit breaker before starting. Align the mounting points of the new cover with the corresponding slots, threads, or clips on the fixture housing, taking care not to pinch any internal wiring or disturb the COB module.
For damp environments, ensure all seals and gaskets are seated correctly to prevent moisture ingress. If working at height, ensure your ladder is stable and the fixture is fully supported. If you notice exposed wiring or structural damage, halt the installation immediately and consult a qualified electrician.
Apply gentle, even pressure when securing the cover. For snap-in or friction-fit designs, press evenly around the perimeter rather than forcing a single point, which could crack the new plastic. For threaded covers, turn the lens slowly to ensure the threads align smoothly; if you feel resistance, back out and try again to avoid cross-threading the plastic or aluminum collar.
Test the physical stability of the cover by gently tugging or tapping it to ensure it is locked in place and will not fall due to gravity or ceiling vibrations. Once secure, restore power at the circuit breaker and turn on the switch. If you notice any flickering, unusual odors, or if the cover feels excessively hot to the touch within a few minutes, immediately turn off the power and inspect the installation. If any wiring is exposed, damaged, or if you suspect an electrical fault, stop immediately and consult a qualified electrician.
Frequently Asked Questions (FAQ)
Can I use a generic acrylic sheet if I cannot find an exact match?
While it is technically possible to cut a generic acrylic sheet to size, it is generally not recommended for COB light fixtures. Standard hobby-grade acrylic often lacks the necessary UV stabilizers and heat resistance required to withstand the intense, concentrated thermal output of a COB LED, leading to rapid yellowing, warping, or cracking. Additionally, achieving a perfectly round or custom-shaped cut with smooth edges requires specialized tools; rough edges can prevent a proper seal, allowing dust and moisture to enter the fixture. Using a non-approved, custom-cut cover may also void your fixture’s warranty and compromise its electrical safety certification.
What should I do if the new cover is slightly too tight or too loose?
If the replacement cover is slightly too tight, do not attempt to force it into place, as this can crack the cover or warp the metal housing of your fixture. Check the fixture frame for any accumulated dust, debris, or minor warping that might be obstructing the fit, and clean the mounting track gently with a dry microfiber cloth. If the cover is too loose, it poses a falling hazard and may allow moisture to bypass the seal, which is particularly dangerous in humid areas. Do not use temporary adhesives or tape to secure a loose cover, as the heat from the COB light will quickly degrade the adhesive; instead, return the part and source a cover with the correct matching dimensions.
Community discussion
Share your experience or ask a question. Comments are reviewed before publication.