
Finding a replacement lampshade for ceiling lights requires more than just picking an appealing color or material. To ensure a seamless installation, you must balance visual proportions with precise mechanical compatibility. A mismatched shade can result in exposed bulbs, inadequate light distribution, or even a physical hazard if the mounting hardware cannot support the weight. By systematically measuring your fixture’s physical dimensions, identifying its specific fitter mechanism, and calculating room clearance, you can confidently select a replacement that enhances both the safety and aesthetic appeal of your living space.
Gather Your Measuring and Safety Tools
A successful measurement process starts with gathering the proper equipment to ensure accuracy and personal safety. A steel tape measure is essential, as flexible fabric tailoring tapes can stretch or sag, leading to inaccurate readings that might cause you to buy the wrong size. Because ceiling fixtures are positioned overhead, a sturdy step ladder is necessary to provide stable, level access without risking a fall. Never rely on chairs or unstable household furniture when working at height.
Before touching any hardware or attempting to remove an existing shade, use a non-contact voltage tester to verify that the electrical current is completely shut off. Even if the wall switch is turned off, faulty or outdated wiring can occasionally keep a circuit live. Finally, keep a notepad or smartphone nearby to record your exact measurements and capture clear reference photos of the fixture’s mounting assembly from multiple angles.
Products mentioned in this guide
![[Fast Delivery] 5-Layer Lotus Lampshade Red Floral Pattern Pendant Light Cover - Decorative Ceiling Fixture for Living Room Bedroom](https://img.lazcdn.com/g/p/57b266e406f644f2995ebf32cd886890.png_400x400q80.png_.webp)
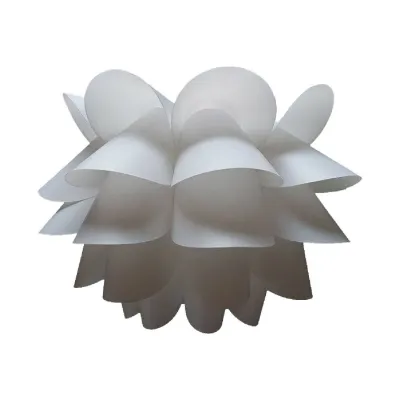
Prices are valid at publication and may change. Please refer to the product page for the latest price.
Identify Your Ceiling Fixture and Fitter Mechanism
To choose a compatible lampshade for ceiling installations, you must first classify the type of light fixture you have. Flush mount fixtures sit directly against the ceiling, leaving little to no space between the canopy and the shade. Semi-flush mounts feature a short decorative stem that suspends the light source a few inches below the ceiling line. Pendant lights hang lower from a cord, chain, or solid rod, while chandeliers use multiple arms to support several light sources. Each of these styles requires a distinct shade design to distribute light effectively and fit securely.

The critical link between any fixture and its shade is the “fitter.” This term refers to the specific physical collar, ring, or bracket that holds the lampshade securely in place. To inspect this mechanism, turn off the electrical power at your home’s main circuit breaker panel, verify the power is off with your voltage tester, and carefully remove the existing shade. Examine how the shade is held. Some modern minimalist fixtures or integrated LED units utilize proprietary, factory-sealed mounting systems that do not accept standard aftermarket shades, meaning you will need to contact the original manufacturer directly for replacement parts.
Common Fitter Types for Ceiling Lights
Understanding the specific fitter mechanism on your fixture prevents the frustration of buying an incompatible shade. Look for one of these standard designs:
- Drop Fitters (2 1/4-Inch and 4-Inch): These are highly common on traditional flush and semi-flush mounts. The glass bowl or globe shade features a flared lip that slides into a metal collar and is secured in place by tightening three or four small thumb screws evenly around the perimeter.
- Spider Fitters: Primarily used for fabric or paper shades on pendant lights, a spider fitter features a central ring with spokes that extend outward to the top rim of the shade. This central ring rests directly on a metal support structure called a harp, or sits securely over the socket collar of a bulb cluster.
- Screw-Collar Rings: Also known as threaded socket fitters, these are common on modern pendant lights. The shade features a central hole that slides directly over the threaded light socket, and a plastic or metal threaded ring is then screwed onto the socket from below, sandwiching the shade frame securely against the fixture body.
- Clip-On Fitters: These lightweight mechanisms clip directly onto the glass bulb itself. Because they rely entirely on the structural integrity of the bulb glass, they are strictly limited to lightweight fabric or paper shades and should never be paired with heavy glass or metal covers.
Measure the Existing Fixture and Room Clearance
Accurate physical measurements of both your fixture and the surrounding architectural space are vital to avoid spatial conflicts and visual crowding. Begin by measuring the outer diameter of your existing shade at its widest point. If the shade is missing, measure the width of the fixture’s mounting canopy—the metal base that connects directly to the ceiling box. Next, measure the “drop,” which is the vertical distance from the ceiling to the lowest point of the current fixture assembly.
In the Philippines, residential spaces often feature specific structural constraints that you must take into account. Standard ceiling heights in local condominiums and modern homes typically range from 2.4 to 2.7 meters. If you are replacing a shade in a high-traffic area like a hallway, entryway, or living room, ensure that the bottom of the completed fixture sits at least 2.1 meters above the floor to prevent taller occupants or guests from bumping their heads.
Additionally, if your room utilizes a ceiling fan or an “orbit fan” to maintain airflow, you must measure the horizontal distance from the light fixture to the outer tip of the fan blades. Ensure there is ample clearance to prevent the rotating blades from striking the lampshade or creating a distracting, strobe-like shadow effect across the room. Do not forget to calculate the swing radius of nearby closet doors, cabinet doors, or main entryways to guarantee they can open fully without making contact with the new shade.
Calculate the Ideal Lampshade Dimensions
Selecting the correct size is a balance of visual scale and functional performance. The primary job of a lampshade for ceiling fixtures is to diffuse light evenly while completely concealing the internal wiring, socket brackets, and bare lightbulbs from standard viewing angles. If a shade is too shallow or narrow, the harsh glare of the exposed bulb will cause eye strain, particularly when you are seated nearby.
The overall dimensions of the room and the height of your ceiling dictate the maximum boundaries of the shade. In a large, high-ceilinged room, a small, undersized shade will look visually lost and fail to distribute light adequately. Conversely, a massive shade in a small bedroom or dining alcove will overwhelm the space and make the ceiling feel lower than it actually is. Furthermore, in warm, humid climates, choosing a shade that is too tight or deeply enclosed can restrict airflow, trapping heat that can shorten the lifespan of your lightbulbs and damage delicate shade materials over time.
Standard Proportions for Width and Height
While personal design preferences vary, adhering to standard industry proportions ensures your new lampshade looks balanced and intentional.
- Width Ratios: As a general rule of thumb, the widest diameter of the lampshade should be at least 1 to 2 inches wider than the fixture’s ceiling canopy or base plate on all sides. This ensures that the shade completely frames the fixture and hides the electrical junction box from view.
- Height to Width Proportions: For an aesthetically pleasing balance, the vertical height of the shade should typically measure between 1/2 and 2/3 of its maximum horizontal width. For example, a shade that is 12 inches wide should ideally stand between 6 and 8 inches tall.
- Semi-Flush Mount Constraints: If you are fitting a shade onto a semi-flush mount fixture, pay close attention to the stem length. The height of the shade must never exceed the available length of the drop stem. If the shade is too tall, it will press awkwardly against the ceiling, trapping heat and potentially scorching the ceiling paint or plaster.
Verify Weight, Heat, and Electrical Safety Limits
Before purchasing any replacement lampshade for ceiling lights, you must verify that the physical and electrical safety limits of your fixture can support it. Every light fixture has a maximum wattage rating printed on a label near the socket. Your new shade must allow for sufficient heat dissipation to prevent exceeding this thermal limit. Fabric, paper, and plastic shades are highly susceptible to heat damage, discoloration, or scorching if positioned too close to high-wattage incandescent bulbs.
To mitigate fire risks and heat buildup—especially in naturally hot and humid environments—it is highly recommended to upgrade your light sources to LED bulbs. LEDs emit significantly less heat than traditional incandescent or halogen bulbs, making them much safer to use inside enclosed glass or fabric shades. When selecting a new shade, also verify the weight capacity of your ceiling electrical box and mounting bracket. Lightweight fabric shades can be mounted on almost any standard ceiling box. However, if you are upgrading to a heavy glass, crystal, or solid metal shade, you must ensure that your ceiling box is rated to support the increased load. Standard plastic boxes may sag or crack under heavy weights, requiring you to upgrade to a heavy-duty metal junction box.
Always turn off the electrical power at the main circuit breaker before removing your old shade, testing the weight capacity of the bracket, or installing new components. Additionally, verify that your replacement bulbs match the standard local voltage (typically 220V to 230V in the Philippines), feature the correct base interface (such as E27 or E14), and carry recognized safety certifications like the Philippine Standard (PS) mark or the Import Commodity Clearance (ICC) sticker. If you are dealing with fixed wiring or heavy suspended loads, always consult a qualified professional electrician.
Test the Fit and Complete the Installation
Once you have selected the perfect shade, the final step is to execute a safe and level installation. Carefully position yourself on your step ladder and test-fit the shade onto the fitter mechanism. If your fixture uses a drop fitter with thumb screws, tighten each screw gradually and evenly. Avoid tightening one screw completely before starting the others, as this will push the shade off-center and can crack glass covers.
Verify that the shade sits perfectly level, does not rattle when gently nudged, and maintains a safe, uniform clearance of at least 1 inch from the lightbulb on all sides. Once the shade is mechanically secure, step down, restore the electrical power at the main breaker, and turn on the light switch. Observe the light distribution from various seating and standing positions in the room. Confirm that there are no harsh, unshielded glares, distracting shadows, or light leaks escaping from the top of the shade. If the fixture feels loose, if you notice any exposed or frayed wiring, or if the shade does not sit flush against the fitter mechanism, stop immediately, turn the power back off at the breaker, and consult a qualified, licensed electrician to resolve the issue safely.
Frequently Asked Questions (FAQ)
Can I use a standard table lamp shade on a ceiling pendant?
Standard table lamp shades are generally not directly compatible with ceiling pendant fixtures due to structural differences in their fitter designs. Table lamp shades often utilize Uno or Spider fitters designed to sit upright on a metal harp supported from below. In contrast, ceiling pendants require shades designed to hang downward, relying on gravity and secure socket collars or drop fitters to stay in place. While adapter hardware and converter rings exist to modify table lamp shades for suspension, you must carefully verify that the shade’s frame is structurally strong enough to hang upside down and that its total weight does not exceed the safety limits of your pendant cord or chain.
What if my ceiling light has no visible fitter or screws?
If your ceiling light fixture has a completely smooth exterior with no visible screws, collars, or brackets, it is likely a modern integrated LED fixture or a minimalist design. These fixtures often employ alternative mounting methods, such as powerful internal magnets, spring-loaded tension clips, or proprietary twist-lock mechanisms where the shade must be rotated counterclockwise to unlock. Because these designs are highly specialized, attempting to force a standard aftermarket shade onto them can damage the internal driver or LED array. Always consult the manufacturer’s installation manual or contact the brand’s customer service department directly to identify the correct, proprietary replacement parts for your specific model.

Community discussion
Share your experience or ask a question. Comments are reviewed before publication.