
Replacing a worn or damaged lampshade with a natural capiz shell lampshade is an excellent way to bring a warm, coastal elegance to your living space. Capiz shells, harvested from the windowpane oyster, offer a distinct translucency that diffuses light beautifully, making them a beloved decorative staple in tropical homes across the Philippines. However, because capiz shades are constructed from delicate natural shells joined by thin metal wires, they require careful handling, precise sizing, and compatible hardware to ensure they sit securely and operate safely.
Over time, exposure to dust, humidity, or accidental bumps can leave an older shade looking worn, cracked, or discolored. Replacing a damaged or outdated shade with a fresh capiz shell lampshade is a straightforward DIY project that can instantly revitalize your existing lamp base. To ensure a successful replacement, you must carefully navigate the process of measuring your existing base, verifying hardware compatibility, and securing the new shade.
Assessing Your Lamp Base and Hardware Compatibility
Before purchasing a new capiz shell lampshade, you must thoroughly evaluate your existing lamp base to ensure it can physically and electrically support the upgrade. Start by identifying the fitter type, which is the metal structure that connects the shade to the lamp. The most common type is a spider fitter, which rests on a metal U-shaped wire called a harp and is secured at the top by a decorative nut known as a finial.
Products mentioned in this guide
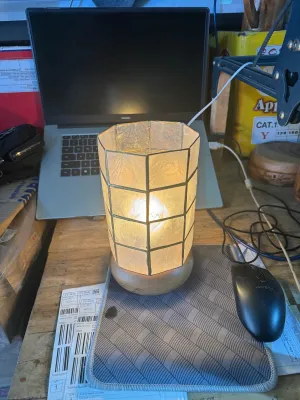
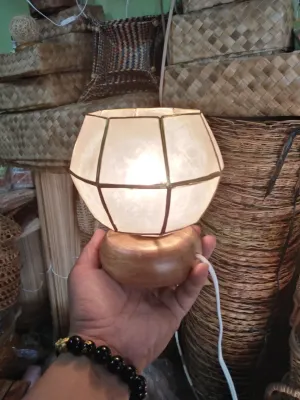
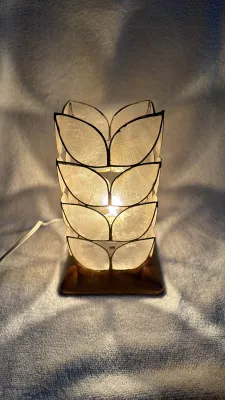
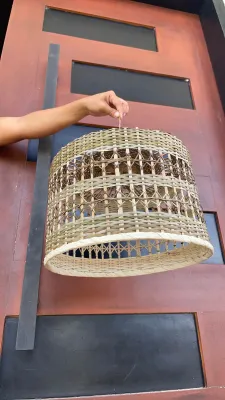
Prices are valid at publication and may change. Please refer to the product page for the latest price.
Other common configurations include uno fitters, which feature a threaded or slip-on ring that attaches directly to the electrical socket beneath the bulb, and clip-on fitters, which snap directly onto the glass of a standard light bulb. Because capiz shell shades are often heavier and more structurally complex than fabric shades, they are most commonly designed with spider or uno fitters to provide maximum stability. If your base uses a different interface, you may need to purchase a compatible adapter.
Next, locate the safety label on your lamp’s electrical socket to verify the maximum wattage limit, voltage compatibility, and electrical certification. Capiz shells are organic materials composed of calcium carbonate, making them highly sensitive to prolonged heat exposure. Exceeding the recommended wattage can cause the shells to dry out, turn yellow, or even crack, while also posing a fire hazard. Ensure your lamp base carries a valid electrical certification mark, indicating it has been tested for safe operation in your home’s environment.
Finally, consider the physical weight and stability of your lamp base. Capiz shell shades, particularly those with multiple tiers or dense layers of shells, carry more physical weight than standard paper or fabric alternatives. A lightweight plastic or thin ceramic base may become top-heavy and prone to tipping over when paired with a substantial capiz shade. Ensure your base has a wide, heavy bottom to safely anchor the new shade, especially if the lamp will be placed in high-traffic areas or near open windows where tropical breezes might catch the shells.
Measuring for the Ideal Capiz Shell Lampshade Proportions
Achieving a visually balanced and physically secure fit requires precise measurements of your lamp base and the surrounding space. To begin, measure the height of your lamp base from the very bottom of the stand to the top of the electrical socket. For an aesthetically pleasing proportion, the height of your new capiz shell lampshade should generally be approximately two-thirds the height of the lamp base itself.

Next, measure the width of the lamp base at its widest point. The bottom diameter of your new lampshade should ideally be within a few inches of the base’s overall height to maintain a balanced silhouette. Additionally, take note of the space where the lamp will sit; the shade must be narrow enough to clear nearby walls, tabletop decor, and any inline cord switches that you need to access easily.
You must also measure the distance between the light bulb socket and the inner edge of the proposed shade. To ensure proper heat dissipation and prevent damage to the natural shells, maintain a minimum clearance of at least two inches between the bulb and the inner surface of the capiz shade. This clearance is especially critical in warm, humid environments where ambient temperatures are already elevated.
Finally, measure the top opening of the shade and the fitter drop. The drop is the vertical distance from the top rim of the shade down to the central fitter ring. A shallow drop will cause the shade to sit high, exposing the unsightly socket and harp hardware. A deep drop will cause the shade to sit low, potentially crowding the lamp base or making it difficult to reach the power switch. Compare these measurements against your existing harp height to guarantee a seamless fit.
Step-by-Step Installation and Fitting Process
When you are ready to install your new capiz shell lampshade, begin by establishing a safe working environment. Always unplug the lamp from the wall outlet to isolate the power source completely. If the lamp was recently turned on, allow the light bulb to cool down entirely before touching any part of the fixture to prevent accidental burns.
If you are replacing a hanging pendant light or a hardwired wall sconce rather than a portable table lamp, ensure you turn off the power at the main circuit breaker before proceeding. For any complex fixed-wiring installations, damp environment setups, or work at significant heights, it is highly recommended to consult a qualified professional electrician to handle the mounting and electrical connections safely.
Carefully remove the old lampshade by unscrewing the finial from the top of the harp and lifting the shade upward. If your lamp utilizes an uno fitter, gently unscrew the light bulb first, then unscrew the collar ring that secures the fitter to the socket. Place the old hardware aside in a secure spot so you do not lose any small components during the transition.
Unpack your new capiz shell lampshade with extreme care. Because the individual shells are delicate and connected by thin metal wires, they can easily tangle or chip if handled roughly. Always lift and support the shade by its sturdy metal frame rather than pulling on the hanging shells themselves. Gently untangle any overlapping shells before attempting to mount the shade.
For a spider-fitter shade, lower the central ring of the fitter onto the top threads of the harp. For an uno-fitter shade, slide the fitter ring directly over the socket and thread the collar ring back on to lock it securely in place. Once the shade is positioned, screw the finial back onto the top of the harp, tightening it just enough to secure the shade without putting excessive stress on the frame.
Step back several paces and inspect the lamp from multiple angles at eye level. Gently adjust the shade with both hands until it sits perfectly level and centered. Give the table or the lamp base a very gentle nudge to ensure that the shade does not wobble, swing, or make contact with the bulb, verifying a stable and secure installation.
Post-Installation Safety Checks and Shell Care
Once your new capiz shell lampshade is securely mounted, perform a preliminary safety check by turning the lamp on. Leave the light on for approximately thirty minutes, monitoring the fixture closely. Gently place your hand near the top opening of the shade and the upper layers of shells to check for heat buildup; the area should feel cool or only mildly warm.
If you detect excessive heat or a burning odor, turn off the lamp immediately. This issue usually indicates that the bulb’s wattage is too high for the enclosure, or that the bulb is positioned too close to the natural shells. Consider replacing the bulb with a lower-wattage option or a cooler-running alternative to protect the organic material of the shade. If you plan to use a dimmable bulb, verify that both the bulb and your lamp base’s switch support the same dimming method to avoid flickering.
Maintaining the pristine appearance of natural capiz shells requires regular, gentle cleaning, especially in tropical climates where humidity can cause dust to adhere to surfaces. Use a soft, dry microfiber cloth or a clean, soft-bristled brush to gently sweep away dust from the individual shells and the wire connectors. Avoid using water, damp cloths, or liquid cleaners, as moisture can seep into the metal joints and cause rust or structural failure over time.
Never use harsh chemical solvents, abrasive scrubs, or commercial glass cleaners on capiz shells. These substances can strip away the natural pearlescent coating, leaving the shells dull, brittle, and prone to cracking. If you observe any frayed electrical cords, a loose socket mechanism, or a shade that remains persistently unstable despite proper adjustment, discontinue use immediately and consult a qualified electrician to inspect the fixture.
Frequently Asked Questions (FAQ)
What if the new capiz lampshade wobbles on the harp?
A wobbling shade is typically caused by a mismatch between the harp size and the shade’s fitter drop, or a loose finial connection. First, check that the finial is screwed down completely and sits flush against the fitter ring. If a gap remains, you can insert a small rubber washer or a specialized harp reducer to bridge the space and create a snug fit. If the wobble persists, you may need to purchase a new harp that matches the height and drop specifications of your new capiz shade more accurately.
Can I use an LED bulb with a capiz shell lampshade?
Yes, LED bulbs are highly recommended for use with capiz shell lampshades. Because LED bulbs emit significantly less heat than traditional incandescent bulbs, they minimize the risk of drying out, discoloring, or cracking the natural organic shells. When selecting an LED bulb, always verify that its actual wattage does not exceed the maximum rating labeled on your lamp’s socket, and ensure the bulb’s physical shape fits comfortably within the shade without touching the shells.
How do I clean dust from the individual capiz shells?
To safely clean dust from individual capiz shells, use a dry, soft-bristled brush, such as a clean makeup brush or a small paintbrush, to gently sweep away debris from the delicate surfaces and wire links. Avoid using water or liquid cleaning solutions, as moisture can cause the metal wire connectors holding the shells together to rust and break. Strictly avoid abrasive pads or chemical cleaners, which can permanently scratch and dull the natural pearlescent luster of the shells.

Community discussion
Share your experience or ask a question. Comments are reviewed before publication.