
Finding the perfect replacement lamp shade requires a careful balance of physical measurements, proportional math, and mechanical compatibility. To match a lamp shade to your existing table lamp base, you must measure the height and width of the base, calculate the ideal shade proportions using standard interior design rules, and identify your specific fitter type—whether it is a spider, Uno, or clip-on mechanism. Taking these steps ensures your lamp remains physically stable, visually balanced, and safe from heat-related hazards.
While choosing a shade might seem purely decorative, an ill-fitting shade can make a beautiful lamp look awkward or top-heavy. In tropical climates like the Philippines, where high humidity can affect certain materials and ambient temperatures influence heat dissipation, selecting the right size and material is also a matter of long-term durability. By taking systematic measurements and understanding how different fitters connect, you can easily restore or upgrade your favorite table lamp.
Step 1: Measure Your Existing Table Lamp Base
Before browsing for new lamp shades, you must gather the exact physical dimensions of your existing lamp base. Start by placing the lamp on a flat, level surface and switching off the power. Unplug the cord from the wall outlet to ensure absolute safety before handling any components or taking measurements.
Products mentioned in this guide
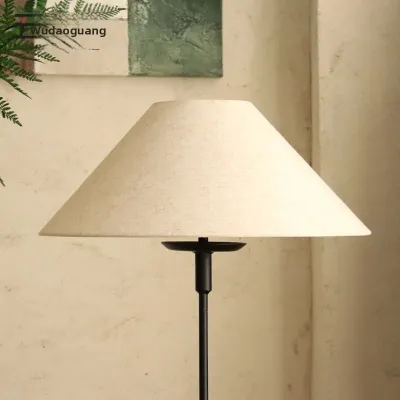
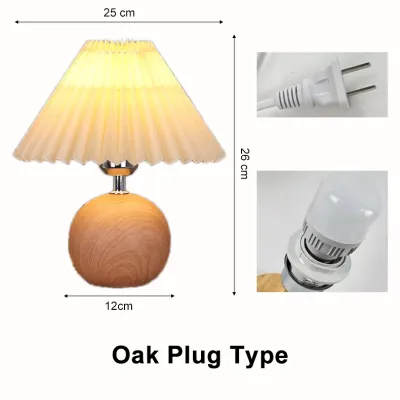
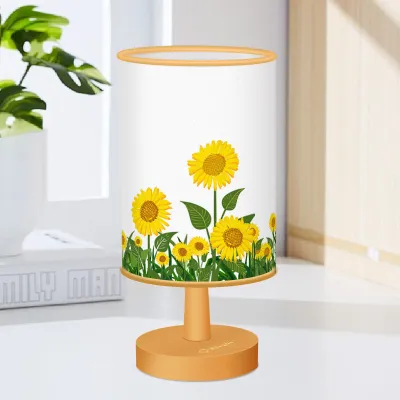
Prices are valid at publication and may change. Please refer to the product page for the latest price.
To find the base height, place a tape measure at the very bottom of the lamp’s foot or pedestal. Extend the tape measure straight up to the junction where the decorative base ends and the electrical socket begins. Do not include the socket itself, the metal neck, or the U-shaped harp in this measurement; you only want the height of the physical base that sits on your table.
Next, measure the width or diameter of the lamp base at its widest point. For a round or cylindrical base, measure straight across the bottom or the widest portion of the body to find the diameter. If you have a square, rectangular, or multi-sided base, measure the widest side from edge to edge. This dimension is crucial because the bottom opening of your new shade must be wider than this point to maintain physical and visual stability.
Take a moment to analyze the shape, profile, and visual weight of your lamp base. A heavy, ornate ceramic urn or a thick wooden block has a high visual weight, which generally requires a larger, more substantial shade to look balanced. Conversely, a slender metal rod or a delicate glass base has a lighter visual presence and pairs better with smaller, more streamlined shades.
Finally, inspect the location of your lamp’s switch. Note whether the lamp uses an inline cord switch, a rotary switch on the socket, or a push-button on the base itself. If your lamp has a socket or neck switch, you must ensure the bottom of the new shade does not sit so low that it blocks your hand from comfortably reaching and operating the switch daily.
Step 2: Calculate the Ideal Lamp Shade Dimensions
Once you have recorded your base measurements, you can use standard interior design guidelines to calculate the target dimensions for your new shade. These rules help maintain a natural proportion where neither the base nor the shade overwhelms the other.

To determine the ideal shade height, use the two-thirds rule. The height of the lamp shade should be approximately two-thirds of the height of the lamp base. For example, if your lamp base measures 12 inches (about 30 cm) from the bottom to the neck, your target shade height should be roughly 8 inches (about 20 cm). Alternatively, the shade height should represent about one-third of the total assembled height of the lamp, including both the base and the shade.
To calculate the ideal shade width, the bottom diameter of the shade should be roughly twice the width of the widest part of your lamp base. Additionally, the shade should be at least two inches wider than the base on all sides when centered. If your lamp base has a diameter of 6 inches at its widest point, your new shade should have a bottom diameter of at least 12 to 14 inches to ensure the fixture does not look bottom-heavy or cramped.
The slant or depth of the shade also plays a significant role in the overall silhouette. A steep slant, common in empire or coolie shades, creates a classic, traditional look and directs light downward over a wider area. A straight-sided drum or cylinder shade offers a modern aesthetic, distributing light equally upward and downward. If you have an exceptionally tall and thin base, a taller, narrower shade helps preserve the sleek vertical lines; a short, squat base benefit from a wider, shallower shade.
Because these rules are guidelines rather than absolute laws, it is highly recommended to create a physical mockup before making a purchase. Cut a piece of cardboard, stiff paper, or old newspaper to your calculated width and height dimensions, tape the ends together to form a rough 3D shape, and hold it up against your lamp base. This simple visual check allows you to verify the balance and make adjustments before investing in a new shade.
Step 3: Identify the Correct Lamp Shade Fitting
Even a perfectly proportioned shade will not work if it cannot connect securely to your lamp. The “fitter” is the inner metal structural ring or frame built into the shade that mounts onto the lamp’s hardware. You must match the fitter type of the new shade to the existing hardware on your lamp base.
Spider Fitters and Harps
The spider fitter is the most common mounting style for table lamps. This system consists of a U-shaped metal wire called a harp, which attaches to a metal saddle located directly beneath the lamp socket. The shade features a central ring with three or four metal spokes (the spider) that sit flat on top of the harp. A decorative screw-on cap, known as a finial, is then tightened onto the threaded top of the harp to lock the shade in place.
To ensure a proper fit, measure the inner diameter of your existing spider ring and check the height of your current harp. If your new shade is taller or shorter than your previous one, you may need to purchase a new harp of a different height to position the shade correctly. Replacement harps are widely available at local home improvement centers in the Philippines for approximately ₱150 to ₱400, allowing you to easily raise or lower where the shade sits on the base.
Uno and Clip-On Fitters
Uno fitters are commonly found on smaller bedside lamps, accent lights, or imported fixtures. Unlike spider fitters, an Uno fitter does not use a harp. Instead, the shade has a large, built-in center ring that threads directly onto the lamp socket or is held in place by a threaded plastic or metal collar. When replacing an Uno shade, you must verify the socket’s outer diameter to ensure the shade’s center ring can slip over the socket threads snugly.
Clip-on fitters are designed for small, lightweight accent lamps and offer the simplest installation method. The metal frame of a clip-on shade features two wire loops that expand and clip directly onto the glass bulb itself. If you choose a clip-on shade, make sure the clip size matches your bulb shape; standard round clips are designed for classic A19 or A60 bulbs, while smaller, narrow clips are made for flame-shaped candelabra bulbs.
Step 4: Check Bulb Clearance and Heat Safety
Ensuring proper clearance between the light bulb and the inner walls of the lamp shade is a critical safety step. If a shade sits too close to a hot bulb, it can cause scorching, discoloration, structural warping, or even pose a serious fire hazard.
As a general safety standard, maintain a minimum clearance of 2 to 3 inches (5 to 7.5 cm) on all sides between the light bulb and the inner fabric or lining of the lamp shade. For highly enclosed styles, such as narrow drum or cylinder shades, this clearance is especially important because heat can quickly become trapped inside the chamber.
The heat output of your bulb dictates how strict you must be with these clearances and material choices. Traditional incandescent or halogen bulbs generate substantial heat, which can easily scorch delicate paper, parchment, or untreated silk shades over time. If you prefer these traditional bulbs, stick to wider shades with robust metal frames and heat-resistant linings. Alternatively, switching to modern LED bulbs drastically reduces heat emission, offering greater flexibility with delicate or compact shade materials while lowering energy consumption.
Always check the maximum wattage rating printed directly on your lamp’s socket casing (for example, “Max 60W”). Never exceed this physical limit, regardless of the size or material of your shade. In the hot and humid climate of the Philippines, ambient room temperatures can compound heat buildup inside enclosed fixtures, making energy-efficient, low-heat LED bulbs the safest and most reliable choice for daily use.
When shopping for new lamp shades, inspect the interior lining for safety labels or fire-retardant certifications. High-quality shades often feature a white or silver backing made of heat-resistant virgin styrene, which protects the outer fabric from degradation and helps reflect light outward more efficiently.
Step 5: Final Fit and Visual Alignment
With the correct measurements, proportions, and fitters confirmed, you are ready to assemble your lamp and perform the final visual alignment. Carefully place the shade onto the harp or socket mount, ensuring it sits level and centered.
Secure the shade by gently tightening the finial or socket collar. Avoid over-tightening, as excessive pressure can strip metal threads, crack plastic socket rings, or warp the delicate metal spokes of the shade’s spider frame. Once secured, give the shade a soft nudge to verify that it does not wobble or tilt.
Next, perform a sightline check from your typical seated position in the room, whether that is on a living room sofa or lying in bed. When sitting down, the bottom edge of the lamp shade should completely cover the electrical socket, the neck of the lamp, and any harsh metal hardware. You should only see the decorative base and the warm glow of the shade; if the bare bulb or socket is visible and causes glare, the shade is sitting too high, and you should swap your harp for a shorter version.
Finally, step back and look at the entire room setup. Ensure the bottom edge of the shade does not block the view of nearby decorative items, photo frames, or the unique artistic details of the lamp base itself. A well-matched shade should look like a natural extension of the base, blending seamlessly with your home’s interior decor while providing comfortable, glare-free illumination.
Frequently Asked Questions (FAQ)
Can I use a lamp shade designed for a floor lamp on a table lamp?
While the fitter type (such as a standard spider fitter) might physically match, using a floor lamp shade on a table lamp is generally not recommended. Floor lamp shades are scaled much larger and are significantly heavier than those designed for table bases. Placing a massive floor shade on a smaller table lamp base will create a top-heavy fixture, resulting in a serious tipping hazard and a highly unbalanced, awkward visual appearance.
How do I measure for a lamp shade if my lamp base has a curved or slanted neck?
If your table lamp base features a curved, gooseneck, or slanted design, measure the vertical height from the bottom of the base straight up to the highest point of the curve before the socket. When selecting a shade, look for options with a deeper slant or an adjustable drop fitter. A drop fitter allows the shade’s mounting ring to sit lower or higher within the shade frame, helping you keep the shade level and preventing it from tilting forward or backward on the curved neck.
Community discussion
Share your experience or ask a question. Comments are reviewed before publication.