
Replacing a worn, cracked, or outdated ceiling light cover is a straightforward home improvement project that instantly refreshes a room’s appearance and improves light quality. To complete this task successfully, you must accurately measure the fixture’s mounting hardware, identify the attachment mechanism, and select a replacement that accommodates your existing bulbs. In the tropical climate of the Philippines, high humidity can accelerate the wear of metal clips and cause older plastic covers to yellow or become brittle, making a timely replacement essential for both safety and aesthetics.
Finding the perfect replacement requires a systematic approach to safety, removal, and measurement. Because ceiling fixtures are connected directly to your home’s electrical system, taking proper precautions before you begin is paramount. By understanding the specific dimensions of your fixture and the physical requirements of your light bulbs, you can easily find a compatible cover that restores the beauty and functionality of your lighting.
Safety Preparations and Tools Needed
Before touching any part of your ceiling light fixture, you must ensure the workspace is entirely safe. Never rely solely on the wall switch to turn off the power, as some wiring configurations leave live current at the fixture even when the switch is in the off position. Locate your home’s main electrical panel or circuit breaker box and switch off the breaker that controls the specific lighting circuit you will be working on.
Products mentioned in this guide
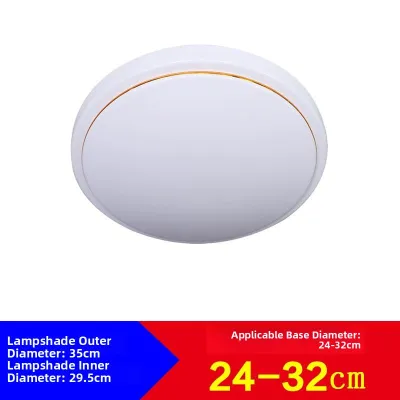
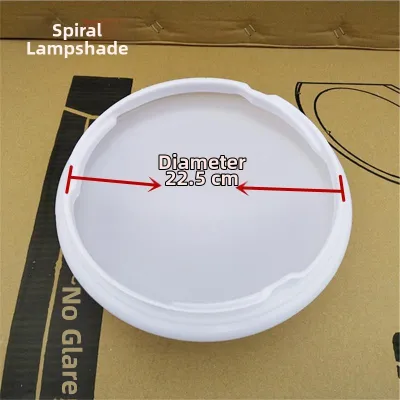
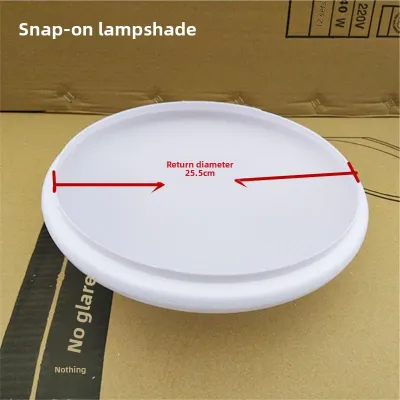
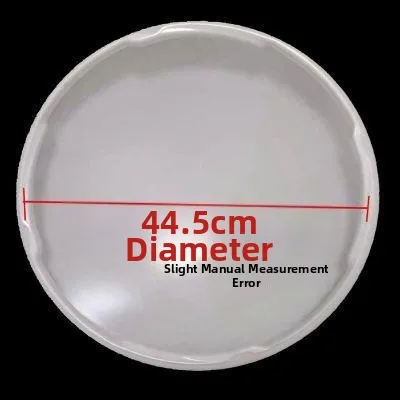
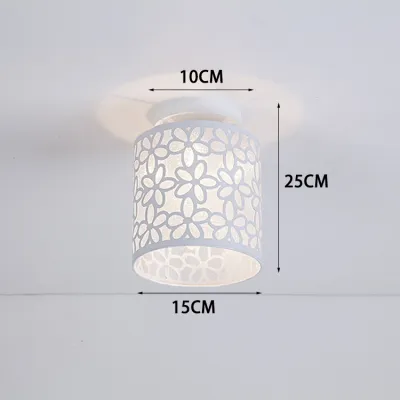
Prices are valid at publication and may change. Please refer to the product page for the latest price.
Once you have switched off the breaker, verify that the power is completely disconnected. Use a reliable non-contact voltage tester near the fixture canopy and the edges of the cover to confirm there is no active electrical current. This simple step takes only a few seconds but is crucial for preventing accidental electrical shock during the removal and installation process.
Gather all the necessary tools and equipment before you begin to avoid unnecessary trips up and down. You will need a stable step ladder that allows you to reach the fixture comfortably without standing on the top step. Additionally, prepare a standard flathead screwdriver, a Phillips-head screwdriver, a flexible measuring tape, a pair of protective work gloves, and safety glasses to shield your eyes from falling dust or debris.
Set up your step ladder on a flat, dry, and even surface directly beneath the light fixture. If you are working on polished tiles or smooth concrete floors, ensure the ladder’s rubber feet are clean and slip-resistant. Clear the immediate area below the fixture of any furniture, toys, or decorative items to prevent accidents or damage if a tool or the old cover is accidentally dropped.
Removing the Existing Ceiling Light Cover
To remove the old cover without damaging the ceiling or the fixture itself, you must first identify how it is attached. Ceiling light covers generally use one of four common mounting mechanisms. These include twist-lock (bayonet) systems, spring-loaded metal clips, decorative thumb screws along the collar, or a central threaded rod secured by a decorative nut or finial.

For fixtures with decorative thumb screws, carefully loosen each screw counterclockwise using your fingers or an appropriate screwdriver. Do not remove the screws entirely from the metal collar; loosen them just enough so the lip of the cover can slip past them. If your fixture uses a twist-lock mechanism, gently press upward on the cover and rotate it counterclockwise about a quarter-turn until the tabs align with the release slots.
If your fixture features spring-loaded clips, identify the single clip that is designed to pull outward. Gently pull this active clip away from the rim of the cover while supporting the cover with your other hand, allowing the glass or plastic to tilt out safely. For center-nut designs, hold the bottom of the cover securely with one hand while unscrewing the decorative finial counterclockwise with your other hand.
Always support the full weight of the cover with at least one hand while releasing the final attachment point. Glass covers can be surprisingly heavy and slippery, especially if they have accumulated a layer of household dust or grease over time. Carefully lower the cover to the ground and place it in a safe area away from your workspace.
With the cover removed, take a moment to inspect the exposed fixture, bulb sockets, and visible wiring. Look for any signs of heat damage, such as charred plastic, brittle wire insulation, or discoloration on the metal base. If you notice frayed wires or damaged sockets, pause the project and consult a qualified professional electrician to repair the fixture before installing a new cover.
How to Measure the Fixture and Fitter Accurately
To ensure your new cover fits perfectly, you must measure the fitter size rather than simply measuring the widest part of the decorative dome. The fitter is the specific portion of the cover that directly contacts the metal housing or mounting hardware of the fixture. An incorrect fitter measurement is the most common reason replacement covers fail to install securely.
Use your measuring tape to record the precise dimensions of the existing cover if it is still intact. Measure the outer diameter of the fitter lip, which is the raised rim that slips into the fixture collar. If the original cover is broken or missing, measure the inner diameter of the fixture’s metal collar where the cover is meant to sit, subtracting about 1/16 to 1/8 of an inch to allow for a comfortable, non-binding fit.
For covers that rely on multiple mounting screws, measure the exact distance between the screw holes or the slots where the hardware grips the cover. If you are replacing a drum-style cover that uses a central threaded rod, measure the diameter of the center hole in the cover. Additionally, measure the total depth or height of the cover from the fitter lip to the lowest point of the dome to ensure it provides adequate clearance.
Document the type of bulbs currently installed in the fixture and measure the internal clearance space. There must be sufficient physical space between the bulb and the inner surface of the new cover to prevent heat buildup. In warm, tropical environments, trapping excess heat inside a tight cover can drastically shorten the lifespan of LED bulbs or create a potential safety hazard with older incandescent bulbs.
Selecting a Compatible Replacement Cover
When shopping for a replacement, prioritize matching the exact fitter size and mounting mechanism you recorded. A cover that is even slightly too large will not fit into the collar, while one that is too small can slip through the hardware and fall. Ensure the replacement cover is explicitly designed for your specific mounting type, whether it is a lip fitter, a neckless fitter, or a center-hole mount.
Evaluate the material options based on your room’s lighting needs, weight limits, and maintenance preferences. Glass covers offer excellent light diffusion, do not yellow over time, and provide a classic look, but they are heavy and fragile. Acrylic or polycarbonate plastic covers are lightweight, shatterproof, and highly durable, making them excellent choices for high-traffic areas or children’s rooms, though they can degrade if exposed to high-wattage heat.
Consider the humidity levels of the room where the fixture is located. For bathrooms, kitchens, or covered outdoor patios in the Philippines, select materials and designs that can withstand moisture without trapping condensation. Ensure the replacement cover’s specifications match or exceed the heat dissipation requirements of your bulbs, and never exceed the maximum wattage rating printed on the fixture’s socket.
When purchasing your replacement cover from online marketplaces, carefully verify the seller’s return and exchange policies. Because minor measurement discrepancies can occur, choose sellers that offer straightforward returns or exchanges. Keep in mind that return shipping fees for bulky or fragile items like glass domes can sometimes cost ₱100 or more, so double-checking your measurements before ordering is always the most economical approach.
Installing the New Cover and Testing
Before installing the new cover, wipe it down with a dry microfiber cloth to remove any manufacturing dust or fingerprints. Carefully align the fitter lip of the new cover with the mounting collar of the ceiling fixture. Ensure the cover is sitting completely level and flush within the hardware before you begin securing any of the attachment points.
For fixtures with thumb screws, tighten each screw gradually and evenly by hand. Avoid tightening one screw completely before starting the others, as this can tilt the cover and cause it to crack or sit unevenly. Tighten the screws until they make firm contact with the fitter lip, but do not over-tighten them, as glass and plastic can crack under excessive pressure.
If you are installing a twist-lock cover, align the tabs on the cover with the slots on the fixture base, push upward gently, and rotate clockwise until you feel the cover lock securely into place. For spring-clip systems, insert one side of the cover’s rim into the fixed clips, pull the active spring clip outward, tilt the cover flat against the base, and gently release the clip onto the rim.
Once the cover is physically secured, step down from the ladder and visually inspect the fixture from the floor to ensure it is level and centered. Return to your main electrical panel and switch the circuit breaker back to the on position. Turn on the wall switch to illuminate the fixture and verify that the light functions correctly.
Observe the fixture continuously for the first few minutes of operation. Check for any flickering, unusual shadows, or rattling sounds that might indicate a loose component. Carefully place your hand near the cover (without touching it directly if using high-wattage bulbs) to ensure there is no rapid, excessive heat buildup, confirming your new ceiling light cover is safe and secure.
Frequently Asked Questions (FAQ)
Can I use a larger cover if the fitter size matches?
Yes, you can often use a cover with a larger outer dome or decorative diameter as long as the fitter size matches the fixture hardware exactly. However, you must consider the overall weight of the larger cover to ensure it does not exceed the load capacity of your ceiling box. Additionally, ensure the larger dimensions do not interfere with nearby cabinet doors, walls, or the visual proportions of the room.
What should I do if the new cover's mounting holes do not align?
If the mounting holes or slots on your new cover do not align with your existing fixture, do not attempt to drill new holes into the metal fixture housing or the cover itself. Drilling can damage internal electrical wiring, compromise the structural integrity of the cover, and void product warranties. Instead, return the cover to the retailer for a compatible model or look for a universal adapter ring designed for your specific fixture type.
Is it safe to replace a glass cover with a plastic or acrylic one?
Replacing a glass cover with a plastic or acrylic cover is safe provided you verify the wattage and heat limits of your light bulbs. Plastic and acrylic materials are more sensitive to heat than glass and can warp, discolor, or melt if exposed to high temperatures. Ensure you are using low-heat LED bulbs or that the bulbs do not exceed the maximum wattage rating specified by the plastic cover’s manufacturer.
Community discussion
Share your experience or ask a question. Comments are reviewed before publication.