
Replacing a worn, yellowed, or broken light cover is one of the quickest ways to restore the clean look and bright output of your home’s lighting. To find the correct round light diffuser replacement, you must gather precise measurements of your existing fixture base, determine the required clearance depth for your bulbs, and identify the exact mounting style. Taking these steps prevents common issues like purchasing a cover that slips off, rattles, or traps excessive heat.
In tropical climates like the Philippines, high humidity and ambient temperatures can cause materials to degrade differently over time. Plastic covers can become brittle, while metal mounting clips may rust or seize. Knowing how to safely measure your fixture ensures a secure, long-lasting fit that keeps your living spaces beautifully lit.
Safety First: Preparation and Tools Needed
Before attempting to inspect or measure your ceiling fixture, establishing a safe working environment is critical. Working with overhead electrical installations carries inherent risks of electrical shock and falls.
Products mentioned in this guide
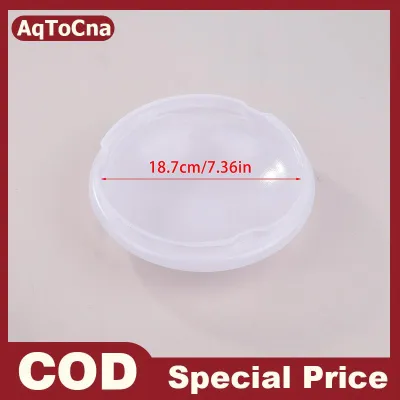
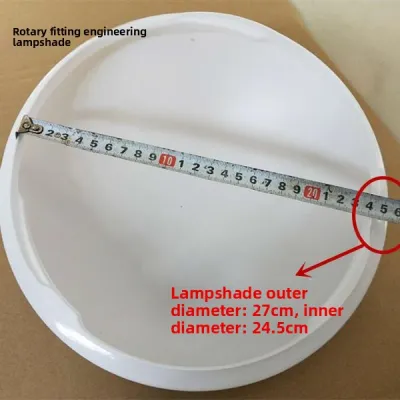

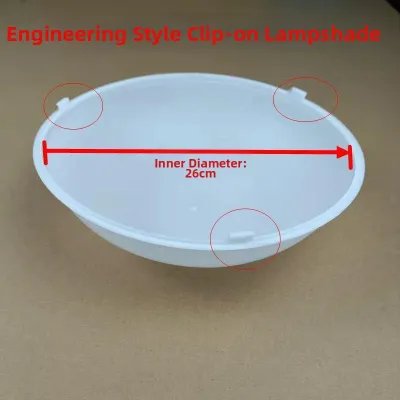
Prices are valid at publication and may change. Please refer to the product page for the latest price.
Always isolate the power at the main circuit breaker or consumer panel rather than relying solely on the wall switch. Wall switches only interrupt the hot wire, and improper or older wiring configurations can leave neutral or ground wires live, presenting a shock hazard. Turning off the main breaker guarantees that no electrical current reaches the fixture while you work.
Gather your tools beforehand to avoid making multiple trips up and down. You will need a sturdy step ladder positioned on a flat, dry surface, a precise tape measure or a rigid steel ruler, a bright flashlight or headlamp to illuminate the dark fixture, and a notepad or smartphone to write down your measurements.
Allow the light fixture and the bulbs to cool down completely before touching them. Standard incandescent, halogen, and even some high-wattage compact fluorescent (CFL) bulbs generate significant heat that can cause severe burns. In warm, humid environments, fixtures retain heat longer, so wait at least 15 to 20 minutes after isolating the power before proceeding.
For any tasks involving fixed wiring, installation in damp areas, working at significant heights, dealing with high heat, or handling heavy suspended loads, always prioritize safety by isolating the power at the breaker, following the manufacturer’s installation instructions, and hiring a qualified professional if the task exceeds your comfort level.
Step 1: Safely Remove the Existing Diffuser
Removing the old round light diffuser requires patience and a steady hand. Because these covers are often made of glass or aged, brittle plastic, a single slip can result in shattered material and potential injury.

Always support the weight of the diffuser with one hand while using your other hand to release the mounting mechanism. Never let the cover hang unsupported, even for a second, as older tension springs or worn plastic threads can fail suddenly under pressure.
Begin with a careful visual inspection of the fixture’s perimeter. Look for external screws, spring-loaded clips, or a central decorative nut holding the cover in place. Understanding the mounting mechanism beforehand prevents you from applying force in the wrong direction and breaking the tabs or glass lip.
If you encounter resistance, do not force the cover off. In humid regions, metal components can oxidize and bind, while plastic threads can swell or warp. Forcing a stuck cover can damage the ceiling plaster, bend the internal fixture pan, or shatter the glass.
If you observe exposed or frayed wires, scorched plastic, or severe rust on the structural parts of the fixture during removal, stop immediately. Do not attempt to force the cover or install a replacement. Keep the power isolated at the breaker and consult a qualified, licensed electrician to inspect the wiring and determine if the entire fixture needs replacement.
Step 2: Measure the Diameter and Depth Accurately
To find a replacement round light diffuser that fits seamlessly, you must measure your fixture with high precision. Standard sizes can vary by tiny increments, meaning a general guess will likely lead to an incompatible purchase.
Record all your measurements to the nearest millimeter or eighth of an inch. Avoid rounding your numbers to the nearest half-inch, as even a minor discrepancy can prevent the diffuser’s lip from sitting flush inside the mounting channel.
To ensure your fixture is perfectly circular, measure the diameter across the exact center from at least two different angles. Because a straight line that does not pass through the absolute center (a chord) is always shorter than the true diameter, slide your tape measure slowly across the widest part of the circle until the measurement reaches its maximum point. Some cheaper metal or molded plastic bases can warp over time due to heat or ceiling tension, resulting in a slightly oval shape. If your measurements differ by more than a few millimeters, use the smaller measurement as your guide or check the manufacturer’s original specifications.
Measuring the Inner and Outer Diameter of the Round Light Diffuser
When shopping for a replacement, you must distinguish between the outer diameter of the fixture base and the inner diameter of the opening where the cover rests.
First, measure the outer diameter of the ceiling fixture’s metal or plastic base. This is the widest part of the housing that sits flush against the ceiling surface.
Next, measure the inner diameter of the opening or collar. This is the precise channel or lip where the diffuser’s neck or flange inserts and locks into place.
A compatible replacement’s mounting lip must match this inner diameter to slide in smoothly, while its outer flare must be wide enough to cover the base opening completely. This prevents light from leaking around the edges and stops insects and dust from entering the fixture.
Checking Depth and Bulb Clearance
Ensuring your replacement cover provides adequate depth is a critical safety step that prevents overheating and fire hazards.
Measure the distance from the flat ceiling base of the fixture to the lowest, most protruding point of your installed light bulbs. This represents the absolute minimum internal clearance your new cover must accommodate.
Compare this distance with the internal dome height or depth of the replacement diffuser. You must maintain a safety clearance margin of at least 12 millimeters (approximately half an inch) between the bulb glass and the inner surface of the diffuser.
This clearance is especially important if you are using older incandescent or halogen bulbs, which emit high levels of radiant heat. In tropical climates, keeping a generous air gap inside the fixture prevents the diffuser material from warping, yellowing, or cracking due to thermal stress.
Step 3: Identify the Mounting Mechanism
Having the correct dimensions is only half the battle; the new cover must also match the physical mounting style of your existing ceiling fixture.
Manufacturers use several distinct methods to secure round diffusers. Identifying which system your fixture uses will narrow down your search to compatible product designs.
Spring Clips and Tension Mounts
Many modern flush-mount ceiling fixtures utilize three or four spring-loaded metal clips positioned around the inner rim of the base. One of these clips is usually spring-loaded to pull outward, allowing you to insert the diffuser lip before snapping back into place.
To measure for this style, measure the distance between the clips in their relaxed, holding position.
You must also measure the height and thickness of the flange or lip on your old diffuser. The replacement lip must be thick enough for the metal clips to grip securely without slipping, but thin enough to allow the spring mechanism to close completely over the edge.
Threaded Rings and Center Holes
Some classic or schoolhouse-style fixtures feature a central threaded metal rod that projects downward from the middle of the base. The round light diffuser is secured by sliding its center hole over this rod and tightening a decorative metal nut or finial.
For these fixtures, measure the diameter of the center hole in your old diffuser. The standard hole size is typically 13 millimeters (about half an inch), but you must verify this to ensure the central rod can pass through.
Additionally, check the length of the threaded rod. If your replacement diffuser is deeper or has a thicker center profile than the original, the rod may not extend far enough to attach the finial securely. You may need to adjust the rod’s mounting nuts inside the fixture base to extend it downward.
Twist-Lock and Notched Fittings
Twist-lock or bayonet-style diffusers feature small molded tabs or notches along their mounting rim. These tabs slide into corresponding slots in the fixture base, and a quick quarter-turn clockwise locks the cover securely in place.
Count the exact number of tabs or notches on your fixture base—most designs use either three or four.
Measure the width, depth, and spacing of these tabs. Because twist-lock mechanisms are highly proprietary and vary significantly between brands, generic replacements rarely fit. If your fixture uses this system, it is best to search using the specific brand and model number of your lighting fixture.
Step 4: Verify Measurements and Select the Right Round Light Diffuser
With your detailed measurements and mounting style identified, you are ready to select a compatible replacement.
Create a quick checklist of your specifications: outer diameter, inner collar diameter, minimum depth, mounting type, and any specific center-hole or tab measurements. Use this checklist to cross-reference product descriptions on online marketplaces or at local home improvement stores. Broad price bands for replacement diffusers typically range from ₱200 to ₱600 for acrylic models, and ₱500 to ₱1,500 or more for premium glass options.
When choosing between materials, consider the following trade-offs:
- Glass: Excellent light transmission, does not yellow under UV or heat, and resists scratches. However, it is heavy, fragile, and requires a highly secure mounting mechanism.
- Acrylic: Lightweight, highly shatter-resistant, and cost-effective. However, it can become brittle and yellow over time when exposed to high heat.
- Polycarbonate: Extremely impact-resistant and virtually unbreakable, making it excellent for outdoor or high-traffic areas. However, it scratches more easily than glass or acrylic.
Before finalizing your purchase, verify that the replacement diffuser does not interfere with your fixture’s operational specifications. This includes checking the voltage compatibility of any integrated LED modules, matching the bulb base or interface, respecting the maximum wattage limit, ensuring compatibility with your dimming method, and verifying that the installation environment (such as a damp bathroom or an outdoor porch) matches the diffuser’s material limits and electrical certifications. In the Philippines, ensure any electrical fixtures or replacement components you purchase comply with local safety regulations, carrying the Philippine Standard (PS) mark or the Import Commodity Clearance (ICC) sticker.
Keep in mind that decorative style, perceived color temperature (such as warm white versus cool daylight), and the overall spatial effect of the light are conditional preferences based on your personal taste and room design, rather than universal performance facts.
If you cannot find an exact match online, do not guess. Take clear photos of your fixture base, its mounting hardware, and your tape measure showing the key dimensions. Send these photos to the seller’s customer service team; they can often help identify a compatible product from their inventory.
Frequently Asked Questions (FAQ)
Can I use a slightly larger round diffuser if the exact size is unavailable?
No, you should not use a larger diffuser if it does not match your fixture’s mounting specifications. If the diffuser is too large, tension clips, twist-locks, or collar rims will not align properly, meaning the cover cannot be secured. This creates a serious falling hazard that could cause injury or property damage.
Additionally, an oversized cover will leave gaps around the fixture base. These gaps allow light to leak unevenly, ruin the clean aesthetic of your ceiling, and permit dust, moisture, and insects to accumulate inside the fixture, which can damage the electrical sockets over time.
What if my ceiling light has a proprietary mounting system?
If your ceiling light uses a unique, brand-specific mounting system, check the original manufacturer’s documentation or contact their customer support team with your fixture’s model number to find an official replacement part.
Alternatively, some specialized lighting stores offer universal adapter rings or conversion brackets. These adapters can convert proprietary bases to accept standard threaded or tension diffusers, provided the base dimensions allow for a safe modification. If a safe adapter is unavailable or if you are unsure about compatibility, consult a qualified electrician to replace the entire fixture.

Community discussion
Share your experience or ask a question. Comments are reviewed before publication.