
Finding the perfect green lamp shade requires a careful balance of precise measurements, matching fitting hardware, and selecting materials that suit both your home’s aesthetic and your local climate. Whether you are replacing a worn-out shade or updating your room’s color scheme, understanding how these elements interact ensures a successful installation. By taking accurate dimensions and identifying your lamp’s hardware, you can avoid common pitfalls like exposed sockets, unstable fixtures, or safety hazards.
Understand Your Lamp's Fitting Type Before Measuring
Before picking up a measuring tape, you must identify how your current lampshade connects to the lamp base. Lampshades are not universally interchangeable; they rely on specific structural designs called fitters to remain stable. If you purchase a replacement green lamp shade with the wrong fitter type, it will not physically attach to your lamp, regardless of how perfect the color or size might be.
The most common hardware configuration is the spider fitter, which is standard on many medium-to-large table and floor lamps. This system relies on a metal wire support frame called a harp, which rises from beneath the socket to protect the bulb and support the shade. The spider fitter itself consists of small metal arms radiating from a central ring that rests on top of the harp, secured firmly in place by a decorative screw-on cap known as a finial.
Products mentioned in this guide
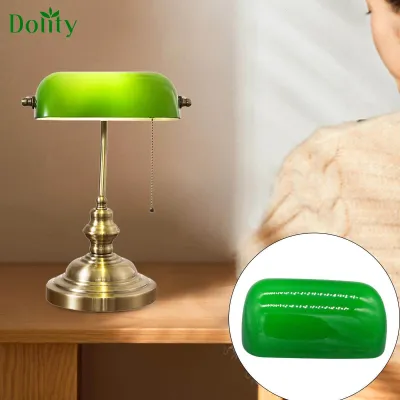
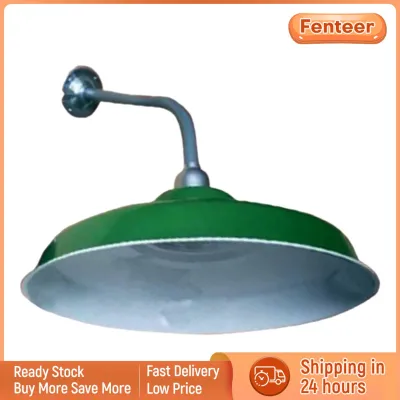
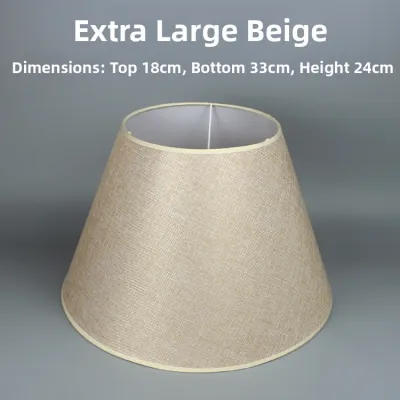
Prices are valid at publication and may change. Please refer to the product page for the latest price.
Another frequent configuration is the uno fitter, which is highly common on smaller bedside lamps and reading lights. Unlike spider fitters, an uno fitter does not use a separate wire harp. Instead, the shade’s built-in metal ring threads directly onto the electrical socket itself, holding the shade securely from the base of the bulb. This design is compact and highly stable, making it a popular choice for minimalist or modern lamp styles.
Lastly, the clip-on fitter is the simplest design, featuring flexible wire loops that squeeze directly onto the glass of the light bulb. This style is typically reserved for small accent lamps, wall sconces, or chandeliers where the weight of the shade is minimal. Because it grips the bulb itself, a clip-on fitter requires no additional hardware on the lamp base, though it does require a standard-shaped bulb to grip securely.
How to Measure Your Lamp Base and Harp Accurately
Achieving a balanced look requires matching the proportions of your lamp base to the dimensions of your new shade. A shade that is too large can make the lamp look top-heavy and unstable, while a shade that is too small looks disconnected and fails to hide the electrical components.

Measuring the Lamp Base and Proportions
To determine the ideal dimensions for your replacement green lamp shade, start by measuring the visible portion of your lamp base. Place the lamp on a flat, level surface and measure from the very bottom of the base up to the point where the electrical socket begins. This vertical measurement serves as the foundation for calculating the correct height and width of your new shade.
A classic design rule states that the height of your lampshade should be roughly two-thirds the height of the visible lamp base. For example, if your lamp base measures 30 centimeters from bottom to socket, the ideal shade height is approximately 20 centimeters. Keeping to this ratio ensures that the lamp maintains a cohesive, professional appearance that does not overwhelm the tabletop.
Additionally, the bottom width of the shade should be wider than the widest part of the lamp base. If you have a wide ceramic or wooden base, a narrow shade will look disproportionate and awkward. Measure the widest diameter of your lamp base and ensure the bottom opening of your new green shade exceeds this measurement by at least several centimeters to ground the design visually.
Measuring the Fitter and Harp Dimensions
For lamps utilizing a spider fitter, you must measure the “drop” of the shade to ensure the bulb and socket remain hidden. The drop is the vertical distance from the top rim of the shade down to the central fitter ring where it rests on the harp. If the drop is too shallow, the shade will sit too high on the lamp, exposing the socket and wires; if it is too deep, the shade will sit too low, potentially touching the lamp base.
Measure the height of your existing harp from the bottom saddle where it hooks into the lamp up to the top threaded post. If your new green lampshade has a deeper drop than your old one, you may need to purchase a shorter harp to compensate and keep the shade at the correct height. Harps are inexpensive and easily swapped, allowing you to fine-tune the final position of your shade.
If your lamp features an uno fitter, you must measure the inner diameter of the fitter ring to guarantee compatibility. Standard uno fitters typically have an inner diameter of 1 5/16 inches (about 3.3 centimeters) to slip over standard threaded sockets. Be cautious of European-style uno fitters, which often feature a larger 4-centimeter opening; these will require an adapter ring to fit securely on a standard socket without wobbling.
Finally, always check the manufacturer’s safety label on the lamp base or socket for the maximum wattage limit before buying your shade. In the Philippines, household electrical systems operate at 220V, and exceeding the recommended wattage can lead to excessive heat buildup. This is especially critical for fabric shades, as trapped heat can degrade the material or create a fire hazard.
Selecting the Perfect Green Lampshade Material and Hue
Green is a highly versatile color that can evoke feelings of tranquility, nature, or vintage luxury depending on the specific hue and material you select. When browsing for a green lamp shade, consider how the color coordinates with your existing furniture, wall paint, and the overall lighting goals of the room.
Deep, rich tones like emerald green or forest green add a sense of luxury and drama, making them excellent choices for study rooms, offices, or cozy living room corners. These darker hues contrast beautifully with warm metallic bases, such as brass or bronze, creating a classic, sophisticated look. Conversely, lighter tones like sage, mint, or olive green offer a softer, more organic feel that complements modern, minimalist, or tropical-inspired interiors.
The material of the shade dictates how light is distributed throughout your living space. Opaque materials, such as dark green velvet, heavy cardstock, or metal, do not allow light to pass through the sides of the shade. Instead, they direct the light strictly upward and downward, creating focused pools of light that are perfect for reading, writing, or highlighting decorative objects on a console table.
Translucent materials, such as light green linen, cotton, silk, or frosted glass, allow light to filter softly through the shade itself. This creates a warm, ambient glow that illuminates the surrounding room, making it ideal for bedrooms or general living areas where a cozy atmosphere is desired. In warm, humid tropical climates like the Philippines, breathable fabrics like linen or cotton are highly practical because they resist moisture retention better than heavy, dense velvet, reducing the risk of fabric degradation over time.
Do not overlook the color of the shade’s interior lining, as it directly influences the color temperature and brightness of the emitted light. A white or silver lining reflects the maximum amount of light, keeping the output bright, clean, and true to the bulb’s original color. A gold lining warms the light significantly, casting a rich, amber glow that enhances the green exterior but reduces overall brightness. A green lining will tint the light green, which is highly atmospheric but less practical for tasks requiring clear visibility.
Step-by-Step Installation Guide for Your New Shade
Preparing the Lamp and Removing the Old Shade
Safety is the absolute priority when working with any electrical fixture. Before you begin the installation process, always unplug the lamp from the wall outlet to isolate the power completely. Never rely solely on the lamp’s inline switch, as a faulty switch or accidental contact with internal wiring can lead to a severe electrical shock.
If the lamp was recently in use, allow the bulb to cool down completely to the touch before attempting to handle it. Once the bulb is cool, unscrew the decorative finial at the top of the harp by turning it counterclockwise. Carefully lift the old shade straight up and off the harp, placing it aside in a safe area. If you need to replace the harp to accommodate the new shade’s dimensions, slide the small metal caps (ferrules) up on the saddle, squeeze the bottom of the harp legs inward, and lift them out of the mounting slots.
Installing Spider, Uno, and Clip-On Fitters
To install a spider fitter, start by mounting the correct size harp if you removed the previous one. Squeeze the lower legs of the harp and insert them into the slots of the saddle, then slide the metal ferrules down to lock the legs securely in place. Lower the central ring of your new green lampshade’s spider fitter onto the top threaded post of the harp. Screw the decorative finial clockwise onto the post until it is snug, ensuring the shade is held firmly without overtightening, which could strip the threads or damage the frame.
For an uno fitter, first remove the light bulb from the socket to access the mounting area. If your socket has a threaded collar ring, unscrew it by turning it counterclockwise. Slide the uno fitter ring of your green lampshade directly over the socket base so it rests flat against the shoulder. Thread the collar ring back onto the socket clockwise, tightening it firmly to lock the shade’s fitter ring in place, then screw the bulb back into the socket.
To install a clip-on fitter, ensure the light bulb is fully screwed into the socket and is completely cool. Gently expand the flexible wire loops of the clip-on fitter with your fingers and align them with the rounded body of the bulb. Push the fitter down slowly until the wire loops grip the bulb securely, taking care not to apply excessive downward pressure that could crack the glass bulb or damage the socket assembly.
Reassembling and Verifying the Setup
Once the shade is physically secured, insert a compatible light bulb that matches the socket’s recommended wattage and base size (typically E27 in the Philippines). Ensure that there is a minimum of 2 inches (5 centimeters) of clear space between the bulb and the interior fabric of your new green shade. This clearance is vital to prevent heat buildup, which can scorch fabric or pose a fire hazard.
Plug the lamp back into the wall outlet and turn on the switch to test the electrical connection. Step back several meters and inspect the lamp from multiple angles to verify that the shade sits perfectly level. The bottom of the shade should completely conceal the metal harp, socket, and neck of the lamp base, presenting a clean, seamless appearance from any seated or standing position in the room.
Troubleshooting Fit Issues and Safety Clearances
Even with precise measurements, you may encounter minor alignment or safety issues during the final installation. Fortunately, most common fitting problems can be resolved quickly with basic adjustments without needing to return your new green lamp shade.
If your lampshade sits crookedly on a spider fitter, do not attempt to force the shade’s delicate wire frame. Instead, gently squeeze or bend the flexible metal legs of the harp itself until the top post is perfectly vertical. If you are dealing with a loose or wobbly uno fitter, check if the socket collar is fully tightened, or use a plastic fitter leveling ring or spacer to fill any gaps between the socket threads and the fitter ring.
Bulb clearance is a critical safety factor that must never be compromised. If you find that the bulb is positioned too close to or is touching the interior fabric of your green shade, turn off the lamp immediately. You can resolve this issue by switching to a lower-profile, shorter LED bulb, or by replacing your existing harp with a taller or wider model to create the necessary physical clearance.
Additionally, be highly cautious of heat damage when using fabric or paper shades. Darker colors, such as deep green velvet or thick paper, absorb and retain heat more readily than lighter shades. To prevent fabric discoloration, scorching, or a potential fire hazard, avoid using high-heat incandescent bulbs. Instead, opt for energy-efficient LED bulbs, which remain cool to the touch even after hours of continuous operation.
Frequently Asked Questions (FAQ)
Can I use an LED bulb with a green fabric lampshade?
Yes, LED bulbs are highly recommended for use with green fabric lampshades. Unlike traditional incandescent bulbs, which convert most of their energy into heat, LED bulbs operate at much lower temperatures. This minimal heat output significantly reduces the risk of scorching or drying out the delicate fabric fibers of your shade. Additionally, keeping the heat low helps preserve the vibrant green color of the fabric, preventing premature fading or yellowing over time.
How do I clean dust off a green fabric lampshade?
To keep your green fabric lampshade looking fresh and vibrant, dust it regularly using a clean, dry microfiber cloth or a soft-bristled makeup brush. For a deeper clean, use the upholstery brush attachment of your vacuum cleaner on its lowest suction setting, gently sweeping in downward strokes from the top of the shade to the bottom. Avoid using liquid cleaners, water, or spot-treatment chemicals unless the manufacturer’s care label explicitly permits it, as moisture can stain fabric, rust the internal metal frame, or encourage mold growth in humid climates.

Community discussion
Share your experience or ask a question. Comments are reviewed before publication.