
Finding the perfect replacement lampshade involves more than just selecting a beautiful fabric or color that complements your interior decor. If the mounting hardware does not align perfectly with your lamp base, even the most stunning shade will remain unusable. To successfully measure your lampshade and purchase the correct replacement, you must identify your existing fitter style and record several precise physical dimensions.
In the Philippines, where tropical humidity can degrade adhesive backings and weaken older shade materials over time, upgrading your lighting with new lampshade accessories is a practical way to refresh your living space. By taking a few systematic measurements with a flexible tape measure, you can avoid the hassle of returning mismatched parts and ensure a secure, safe, and visually balanced installation.
Identify Your Current Lampshade Fitter Type
Before picking up a measuring tape, you must determine how your current shade connects to the lamp itself. In the lighting industry, the term “fitter” refers to the integrated metal wire frame built into the lampshade that physically anchors it to the lamp base or socket assembly. Because different lamps utilize completely distinct mounting mechanisms, buying a shade with the wrong fitter type will prevent installation.
Products mentioned in this guide
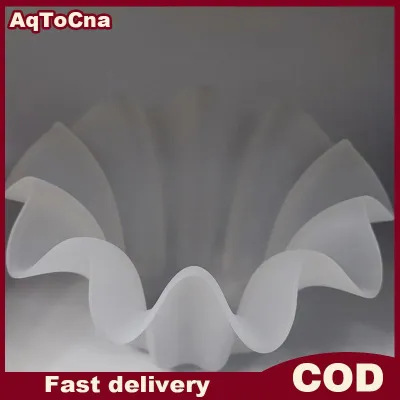

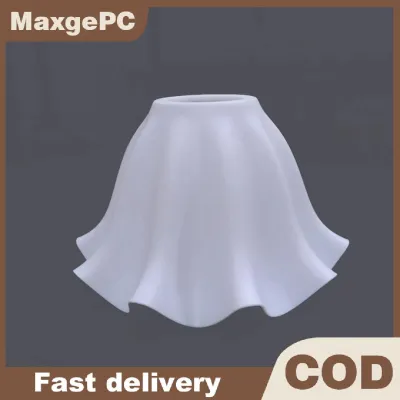

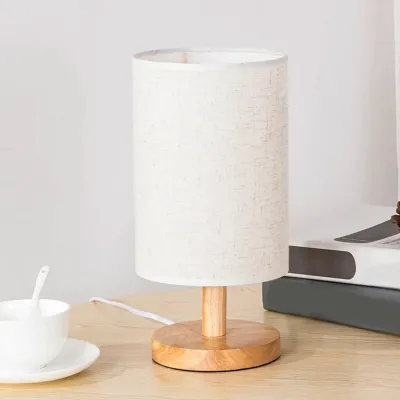
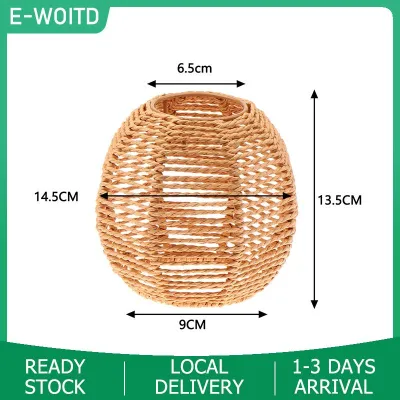


Prices are valid at publication and may change. Please refer to the product page for the latest price.
Identifying your fitter type is the mandatory first step because it dictates which parts of the hardware you need to measure. While thousands of custom lamp designs exist, almost all residential lamps rely on one of three primary fitter configurations. Recognizing these shapes will help you narrow down your search for compatible lampshade accessories on online marketplaces or in local hardware stores.
Spider Fitters (Used with Harps)
The spider fitter is the most common mounting style found on standard table lamps and large floor lamps. This configuration features a metal frame with three or four thin spokes (resembling a spider’s legs) that meet at a small central ring or washer.
This central washer does not connect directly to the lamp socket; instead, it rests on top of a detachable, U-shaped metal wire frame known as a lamp harp. The harp surrounds the light bulb to protect it and provides a stable mounting platform at its peak. Once the spider fitter is placed over the threaded post at the top of the harp, a decorative screw-on cap called a finial is tightened down to lock the entire assembly securely in place. When shopping for these components, high-quality replacement harps or spider converters typically range from ₱150 to ₱600 on local online marketplaces, making them an affordable way to salvage an otherwise perfect lamp.
Uno Fitters (Threaded Socket Mounts)
Uno fitters are designed for a direct connection to the lamp socket, completely eliminating the need for a separate harp or finial. This style features a large circular metal ring in the center, held in place by three sturdy metal spokes extending from the shade’s outer frame.
The inner ring of an Uno fitter is typically threaded, allowing it to screw directly onto the outer threads of the lamp’s electrical socket. In some variations, it may be a slip-on ring held in place by a separate threaded plastic or metal collar. This design is highly common on smaller bedside table lamps, wall-mounted swing-arm lamps, and downward-facing pendant fixtures where a bulky metal harp would be visually intrusive or physically impractical.
Clip-On Fitters (Direct Bulb Mounts)
Clip-on fitters are the simplest mounting style, relying entirely on physical tension to secure the shade. Instead of connecting to a socket or a harp, this fitter features two curved metal wire loops or spring-loaded clips designed to grip the glass body of the light bulb directly.
Because they attach directly to the bulb, clip-on fitters require no additional mounting hardware on the lamp base itself. These fitters are typically reserved for small, lightweight shades used on chandeliers, wall sconces, or compact accent lamps. They are highly convenient but must be matched carefully to the specific shape of the light bulb to prevent slipping or thermal damage.
Measure the Lampshade for Proportional Fit
Once you have identified your fitter type, the next step is to measure the physical dimensions of the existing shade. Recording these dimensions ensures that your replacement shade maintains the visual balance of your room and fits comfortably within your space without hitting nearby walls, shelves, or curtains. Note that decorative style, perceived color temperature, and spatial effects are highly subjective conditional preferences; physical dimensions and safety clearance must always take priority.

To begin, gather a flexible sewing tape measure, a notepad, and a pencil. While a rigid steel tape measure can work, a flexible tape is highly recommended because it conforms easily to the curved slopes and circular rims of traditional shades, yielding much more accurate results.
To get a complete profile of your lampshade, you must measure and record three critical dimensions:
- Top Diameter: Place your measuring tape flat across the very top opening of the shade. Measure straight across the center from the outer edge of one side to the outer edge of the opposite side.
- Bottom Diameter: Place the tape measure flat across the bottom opening. Measure straight across the center from outer edge to outer edge. This is often the largest dimension and determines how much table or desk space the shade will occupy.
- Slant Height: Lay the measuring tape flat against the outer slope of the shade. Measure diagonally from the top rim down to the bottom rim. This diagonal measurement is the industry standard for specifying shade height.
- Vertical Height: If your shade has a straight vertical profile (like a drum or cylinder shade) or if the manufacturer lists vertical height, measure straight down from the top plane to the bottom plane. You can do this by placing the shade on a flat table and holding your measuring tape perpendicular to the tabletop.
If you are measuring non-round shades, such as square, rectangular, oval, or hexagonal designs, you must adapt your approach. For square or rectangular shades, measure both the width and depth of both the top and bottom openings (for example, a top of 8×8 inches and a bottom of 12×12 inches). Additionally, measure the diagonal distance from corner to corner across the bottom opening to ensure the rotating corners will not strike adjacent walls or furniture when the lamp is positioned.
Always record your measurements in both inches and centimeters. While many traditional lighting manufacturers specify dimensions in inches, modern e-commerce platforms and local retailers in the Philippines frequently list lampshade accessories using the metric system. Having both figures written down will significantly broaden your search options and prevent conversion errors when shopping online.
Measure the Fitter and Hardware for Mechanical Compatibility
While matching the outer dimensions of your shade ensures a pleasing visual aesthetic, measuring the physical mounting hardware is what guarantees mechanical compatibility. A replacement shade that is visually perfect but mechanically incompatible cannot be safely installed. You must measure the specific metal components of your existing setup to ensure a precise, secure fit.
Measuring the Spider Fitter Drop
The “drop” is one of the most overlooked measurements in lighting design, yet it dictates exactly how high or low your shade will sit on the lamp. The drop is defined as the vertical distance from the plane of the shade’s top rim down to the center washer of the spider fitter.
To measure the drop, place your lampshade upside down on a flat surface, or lay a straight ruler flat across the top rim of the shade while it is upright. Using your measuring tape, measure straight down from the bottom of that ruler to the center of the spider washer.
This measurement is critical because it must align with your lamp’s harp height. A standard drop is typically 0.5 to 2 inches. If your replacement shade has a drop that is too shallow, the metal harp and electrical socket will be exposed beneath the bottom rim of the shade, creating an unsightly look. Conversely, if the drop is too deep, the shade will sit too low, which can crowd the lamp base, make the power switch difficult to reach, or place the hot light bulb dangerously close to the delicate top fabric of the shade. Measure your existing harp from its bottom saddle to the top of the threaded post to verify that the new shade’s drop will keep the bulb perfectly centered.
Measuring the Uno Fitter Thread
Because Uno fitters screw directly onto the lamp socket, you must measure the inner diameter of the fitter’s threaded ring with extreme precision. Even a tiny deviation can prevent the threads from engaging, leaving the shade loose or completely unmountable.
Use a precise ruler or a digital caliper to measure the exact inner diameter of the threaded metal ring on your old shade. Standard Uno fitters generally come in two primary sizes: a 1-1/4 inch (approximately 31.75 mm) inner diameter, which is common on older or smaller lamps, and a 1-9/16 inch (approximately 40 mm) inner diameter, which is the standard size for European-style E27 sockets widely used in the Philippines.
Compare your measurement directly to the outer threads of your lamp socket. If you do not have the old shade, check the lamp manufacturer’s technical specifications. If you notice that the socket threads are cracked, stripped, or made of brittle, heat-damaged plastic, do not attempt to force a new Uno fitter onto them. Stop immediately and consult a qualified lighting professional or electrician to replace the socket assembly before proceeding.
Measuring Clip-On and Chimney Openings
For clip-on fitters, compatibility depends entirely on the physical shape and size of your light bulb. Standard round clip-on fitters are engineered to grip standard A19 or A60 household bulbs. If you are using smaller, flame-shaped chandelier bulbs (such as B10 or C37 bulbs), you must purchase a flame-clip fitter, which features smaller, narrower wire loops. Measure the widest diameter of your bulb to ensure the metal wire clips will provide enough tension to hold the shade upright without applying excessive force that could crush or crack the glass bulb.
For chimney fitters—frequently found on traditional glass oil lamps, kerosene lamps, or specialized decorative hurricane fixtures—the shade or glass globe rests on a glass chimney. To replace these, measure the exact outer diameter of the glass chimney’s top lip and the inner diameter of the fitter ring. The fitter must sit flush and rest securely without putting mechanical stress on the glass, allowing room for the glass to expand naturally as it heats up during operation.
Verify Safety, Clearance, and Compatibility Before Buying
Before finalizing your purchase of any new lampshade accessories, you must run through a comprehensive safety and compatibility checklist. Lighting fixtures generate heat and carry electrical currents, meaning improper installation can lead to physical damage, electrical hazards, or fire risks.
- Wattage and Heat Limits: Always locate and read the safety label on your lamp socket or base to identify the maximum wattage rating (for example, "Max 40W" or "Max 60W"). The replacement shade's material, overall volume, and top opening diameter must allow for adequate heat dissipation. In the warm, humid tropical climate of the Philippines, ambient temperatures are naturally higher, making proper ventilation inside the shade even more critical to prevent heat buildup from degrading the shade's inner lining.
- Bulb Clearance: Ensure there is a safe physical clearance of at least 1 to 2 inches (2.5 to 5 cm) between the outer glass of the light bulb and the inner fabric, paper, or plastic lining of the lampshade. If the bulb sits too close to the shade material, the continuous heat can cause scorching, unsightly discoloration, melting of plastic backings, or even ignition.
- Weight and Balance: A heavy glass, metal, or densely woven replacement shade can significantly alter the center of gravity of a lightweight table lamp. Ensure your lamp base is heavy and stable enough to support the new shade without tipping over easily. Additionally, ensure that your mounting hardware—such as the harp, saddle, or socket collar—is rated to support the weight of the new shade. If the replacement shade is significantly heavier than the original, or if the mounting setup involves suspended loads or work at heights, consult the manufacturer or a qualified professional.
- Electrical Safety Boundary: Before taking any measurements or attempting to install new accessories, always isolate the power by unplugging the lamp from the wall outlet. If you are dealing with fixed wiring, such as wall sconces or ceiling-mounted fixtures, turn off the corresponding circuit breaker at the main electrical panel. If you observe any signs of wear, heat damage, brittle plastic, or exposed copper wiring on the socket or cord during your inspection, stop immediately. Do not install any new accessories; instead, have the fixture repaired or rewired by a certified electrician.
Frequently Asked Questions (FAQ)
Can I convert a spider fitter lampshade to an uno fitter?
Yes, you can convert a spider fitter shade using specialized adapter rings or converter brackets available among online lampshade accessories. However, you must carefully verify the combined weight of the shade and the adapter to ensure it does not overload your lamp socket or make the fixture top-heavy. Additionally, using an adapter can alter the shade’s drop, potentially exposing the bulb or creating a safety hazard, so always measure the resulting clearance before turning on the lamp.
What if my lampshade measurements fall between standard sizes?
If your measurements do not match standard commercial sizes, always prioritize mechanical compatibility and safe bulb clearance over exact visual proportions. It is safer to select the closest larger standard size rather than a smaller one. A slightly larger shade guarantees that the light bulb will maintain the required 1-to-2-inch clearance from the inner lining, allowing heat to dissipate safely while preventing damage to the shade material.

Community discussion
Share your experience or ask a question. Comments are reviewed before publication.