
To find the correct streetlight bulb cover size, you must measure two primary areas: the fitter or base interface where the cover attaches to the fixture, and the outer body dimensions to ensure physical clearance for the bulb. Because outdoor streetlights are constantly exposed to harsh environmental factors like heavy tropical downpours, high humidity, and intense sunlight, securing an exact fit is not just about aesthetics—it is a critical safety measure that prevents water ingress, electrical short circuits, and premature bulb failure. Taking the time to record precise measurements before purchasing a replacement ensures your outdoor lighting remains safe, functional, and durable for years to come.
Safety Preparations Before Measuring Outdoor Fixtures
Before attempting to touch, measure, or remove any outdoor lighting component, you must isolate the electrical supply. Do not rely solely on a wall switch or photocell sensor to cut the power; turn off the electricity at the main circuit breaker or distribution panel. Outdoor fixtures operate under high voltages and are subject to moisture accumulation, which significantly increases the risk of electrical shock if the system is live.
If the streetlight is mounted at an elevated height, use a stable, slip-resistant A-frame ladder rated for the appropriate weight capacity. Always place the ladder on flat, solid ground, and have a spotter assist you to stabilize the ladder and pass tools up and down. Never attempt to stretch or lean off the side of the ladder to reach a fixture; instead, climb down and reposition the ladder as needed.
Products mentioned in this guide
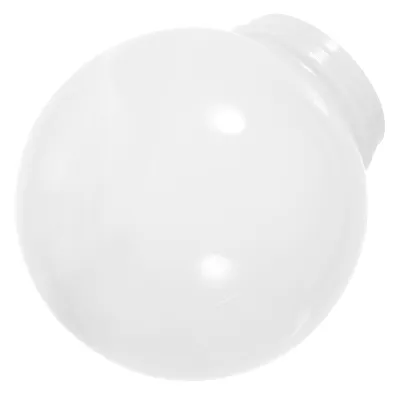
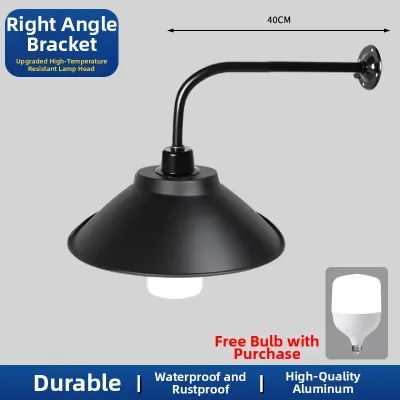
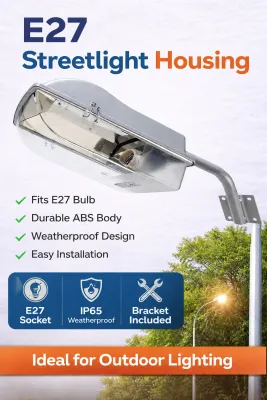
Prices are valid at publication and may change. Please refer to the product page for the latest price.
Given that older covers can become brittle from prolonged UV exposure or may be made of heavy glass, wear heavy-duty protective gloves and safety eyewear. This protects your hands and eyes from sharp edges, sudden shattering, or falling debris during the removal process. If the cover is already cracked or damaged, handle it with extreme care to prevent it from falling and causing injury to yourself or anyone below.
Identifying the Cover Attachment Mechanism
Streetlight bulb covers, often referred to as globes or diffusers, are secured to their fixtures using several distinct mounting styles. The most common is the slip-fitter neck, which slides into a collar and is held in place by three or four set screws tightened against the lip. Other designs feature a threaded collar that screws directly into the fixture base, tension clips that snap over a flanged rim, or a central top finial that bolts the cover down from above.

Before attempting removal, inspect the fixture closely for hidden fasteners, locking pins, or specialized clips that may not be immediately visible. In humid tropical environments, metal screws and clips are highly prone to rust and corrosion, which can seize the hardware. Applying a penetrating lubricant and allowing it to sit can help loosen stubborn screws without stripping the heads or damaging the fixture body.
Additionally, note whether the cover is made of glass, polycarbonate, or acrylic. Glass is exceptionally heavy and fragile, requiring two hands to support it during removal, while plastics like polycarbonate are lighter but can become highly brittle and prone to cracking if they have been baked by the sun for years. Understanding the material helps you gauge how much pressure you can safely apply when loosening the fasteners.
Step-by-Step Measurement Guide
To obtain measurements that ensure a seamless fit, you need the right tools and a systematic approach. Avoid relying on rough visual estimates or standard household rulers, which can easily lead to ordering the wrong size. Instead, gather a pair of digital calipers for precise neck measurements and a flexible tape measure to wrap around curved surfaces. Write down every dimension in both millimeters and inches, as replacement manufacturers on online marketplaces may use either standard. Because older fixtures can warp over time due to heat and physical stress, always take multiple readings at different angles and average them to account for any manufacturing asymmetry.
Measuring the Fitter and Base Interface
The fitter measurement is the most critical dimension because it determines whether the cover will physically attach to the fixture. For slip-fitter covers, you must measure the outer diameter (OD) of the neck lip, which is the flange that inserts into the fixture collar. If you are measuring the fixture itself because the cover is missing, measure the inner diameter (ID) of the receiving collar.
For threaded bases, measure the outer diameter of the threads to ensure the replacement can screw in securely. Do not forget to measure the depth of the neck collar; a neck that is too short may not allow the set screws to grip it safely, while one that is too long might prevent a tight seal.
Additionally, inspect the weather gasket. This rubber or silicone ring sits between the cover and the fixture to block moisture. Measure its thickness and outer diameter, as you will likely need to replace this worn gasket alongside the cover to maintain a weatherproof seal against heavy rains. These gaskets are inexpensive, typically costing around ₱150 to ₱300, but they are vital for protecting the electrical components.
Measuring the Cover Body Dimensions
Once you have verified the fitter size, you must measure the overall body of the cover to ensure it fits within the physical space of the installation. Start by measuring the overall height from the very bottom of the fitter neck to the highest point of the dome or globe.
Next, measure the maximum width or girth at the widest point of the cover. This is particularly important if the streetlight is mounted close to a wall, under an eave, or near tree branches where clearance is limited.
Finally, measure the internal clearance. You must ensure the internal volume of the replacement cover is large enough to house your bulb without the bulb touching the inner walls. If you have upgraded to a larger LED retrofit bulb, which often features bulky heat sinks, it will require more internal space than a traditional incandescent or compact fluorescent bulb. Leaving at least a few centimeters of clearance around the bulb prevents heat buildup and extends the lifespan of both the bulb and the cover.
Selecting a Compatible Replacement Cover
When shopping for a replacement streetlight bulb cover, use your recorded measurements to filter through available options. Keep in mind that minor manufacturing tolerances of one to two millimeters are common, so look for covers that match your dimensions as closely as possible while allowing a tiny margin for the weather gasket to compress.
Always verify the maximum wattage rating, voltage compatibility, base interface, and electrical certifications specified by your fixture’s manufacturer. A cover that is too small or made of the wrong material can trap heat, leading to melted plastic, cracked glass, or premature electrical failure.
In tropical climates with high UV indexes, material selection is paramount. Polycarbonate covers offer excellent impact resistance against windblown debris or falling branches during storms, but they can yellow over time if they lack a UV-resistant coating. Acrylic covers resist yellowing much better and maintain high clarity, but they are more brittle than polycarbonate. Choose the material that best balances the environmental exposure of your specific installation site.
When to Stop and Consult a Professional
While replacing a streetlight bulb cover is often a straightforward task, certain scenarios require you to step back and call a qualified professional. If the streetlight is mounted on a high utility pole, a commercial building exterior, or any location that cannot be safely reached with a standard residential ladder, do not attempt a DIY replacement. These situations require specialized lifting equipment, such as bucket trucks, and operators trained in high-elevation safety.
Furthermore, if you turn off the power and discover severely corroded wiring, melted sockets, or damaged electrical ballasts during your inspection, stop immediately. Handling compromised electrical components poses severe fire and shock hazards that only a licensed electrician should resolve.
Finally, if you are dealing with a custom, antique, or discontinued heritage streetlight, standard replacement covers found on online marketplaces may not fit. A lighting specialist or historical restoration expert can help source custom-molded covers or adapt the fixture safely.
Frequently Asked Questions (FAQ)
Can I use a slightly larger bulb cover if the exact size is unavailable?
Using an improperly sized bulb cover is highly discouraged because it compromises the physical and environmental integrity of the fixture. If the fitter neck is even slightly too large, it will not seat properly in the collar, preventing the set screws or clips from securing it. This leaves the cover vulnerable to falling during high winds or storms. Conversely, if the neck is too small, you will not be able to achieve a tight, weatherproof seal. This allows rainwater, high humidity, dust, and insects to enter the electrical housing, which can lead to short circuits, corrosion of the socket, and rapid bulb failure. Additionally, an oversized cover adds unnecessary weight and mechanical stress to the fixture’s mounting arm, potentially causing structural failure over time.
How do I measure a broken streetlight cover if pieces are missing?
If the original streetlight cover is shattered or missing significant pieces, you can still find the correct replacement size by measuring the fixture itself. Use your digital calipers to measure the inner diameter of the fixture’s receiving collar where the cover neck normally sits. This measurement will tell you the required outer diameter of the replacement cover’s fitter neck. You should also measure the distance between the set screws to ensure they can reach and secure the new neck. To determine the appropriate body height and width, measure the length of the installed bulb and add at least five to ten centimeters of clearance. Finally, look closely at the fixture housing for any manufacturer labels, stamped model numbers, or specification plates. Searching for these identifiers online can lead you directly to the original manufacturer’s specification sheet, which will list the exact replacement part numbers and dimensions.
Community discussion
Share your experience or ask a question. Comments are reviewed before publication.