
To make a small room feel significantly larger, strategic placement of acrylic mirrors is one of the most effective, budget-friendly design strategies you can employ. By understanding how light bounces and how the human eye perceives depth, you can position these lightweight panels to visually push your walls outward. Unlike traditional glass, an acrylic mirror offers a highly flexible, shatter-resistant alternative that is exceptionally easy to mount on various wall types, making it a favorite for modern apartments, condominiums, and rental homes. However, achieving a flawless, spacious illusion requires careful planning, the right mounting techniques, and an understanding of the material’s unique characteristics.
How Acrylic Mirrors Create the Illusion of Space
When light hits a reflective surface, it bounces back into the room, doubling the perceived depth of the space. The human brain interprets the reflection as an extension of the room itself, effectively tricking the mind into seeing a continuous area rather than a solid wall.
Traditional glass mirrors are heavy, fragile, and often require robust wall anchors. This can be a major hurdle if you are dealing with solid concrete walls common in Philippine homes. Acrylic mirrors, made from high-quality vacuum-plated plexiglass, are roughly half the weight of glass. This lightweight profile allows you to mount them using non-invasive methods like heavy-duty double-sided tape, saving you from drilling into tough masonry.
Products mentioned in this guide
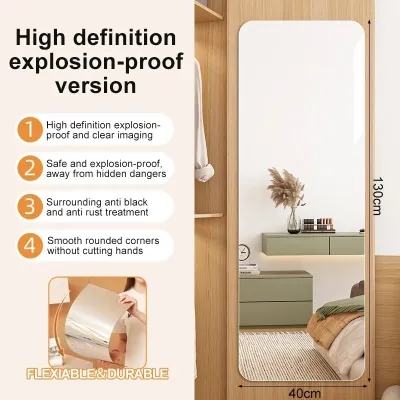
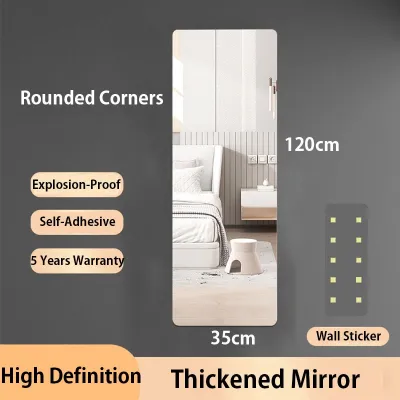
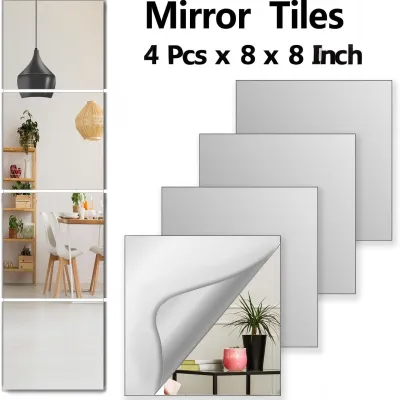

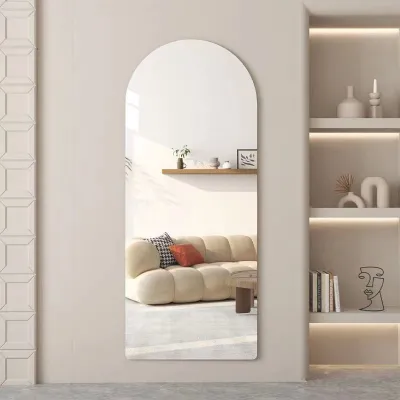
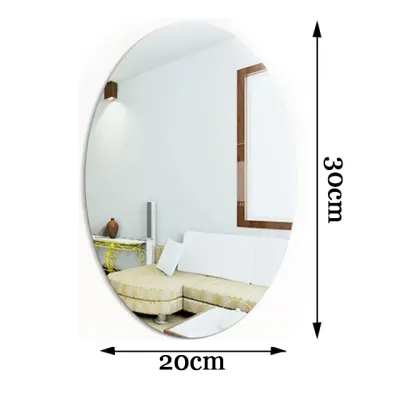
Prices are valid at publication and may change. Please refer to the product page for the latest price.
While highly convenient, acrylic is more flexible than glass. If mounted on an uneven wall, it can bend slightly, resulting in a distorted reflection. To prevent this, you must ensure the mounting surface is perfectly flat or opt for thicker acrylic panels (such as 3mm or 5mm thickness) which offer greater rigidity. Additionally, acrylic is softer than glass, meaning it is more susceptible to surface scratches if handled or cleaned incorrectly.
Strategic Placement Techniques to Expand Your Room
Before peeling off any adhesive backing, you must carefully evaluate your room’s layout. Walk around the space to identify where your eyes naturally land when you first enter. These primary sightlines are the prime real estate for mirror placement, as they immediately establish the perceived scale of the room.

Observe how natural light moves through the space during the day. Note the areas that remain perpetually dark or cramped, such as deep corners, narrow entryways, or the spaces beneath overhead cabinetry. Placing an acrylic mirror in these specific zones can capture stray light and distribute it deeper into the room, instantly softening harsh shadows and making tight quarters feel more breathable.
Opposite Windows and Light Sources
One of the most powerful ways to amplify brightness is to position your acrylic mirror directly opposite or adjacent to a window. In tropical regions where daylight is abundant, this placement acts like an extra window, capturing the outdoor view and bouncing natural light deep into your living space. This not only makes the room feel larger but also connects the indoors with the outside environment, creating an open, airy atmosphere.
For rooms with limited natural light, you can achieve a similar effect by reflecting artificial light sources. Position your mirror so it catches the glow of a warm pendant light, a floor lamp, or wall sconces. By reflecting these light fixtures, you eliminate dark corners and create a layered, multi-dimensional lighting scheme that enhances the room’s overall warmth and depth.
However, you must be mindful of glare. Direct sunlight hitting a mirror at certain angles can create intense, uncomfortable reflections. Avoid placing mirrors directly opposite west-facing windows where the harsh afternoon sun might project blinding light onto your sofa, bed, or television screen. Instead, angle the mirror slightly or place it on an adjacent wall to diffuse the light more gently.
Behind Furniture and Focal Points
Placing large acrylic mirror panels behind solid furniture pieces is an excellent way to break up the visual weight of heavy items. When you position a mirror behind a sofa, a low console table, or a bed headboard, it creates the illusion that the room extends far beyond the furniture itself. This prevents the room from feeling crowded or cut off by bulky decor.
To make this setup work, the reflected view must be carefully curated. A mirror will double whatever it sees; if it reflects a cluttered shelf, an unmade bed, or a pile of laundry, it will make your small room feel twice as messy and cramped. Ensure the mirror reflects an organized, visually pleasing area, such as a clean wall with a piece of art, a healthy indoor plant, or an open doorway.
Safety and material care are also crucial when integrating mirrors with furniture. Because acrylic is prone to scratching, you should always leave a small clearance gap between the back of your furniture and the mirror surface. A gap of at least one to two centimeters prevents the furniture from rubbing against the acrylic when people sit down or move around, preserving the pristine, scratch-free finish of your mirror.
Corners and Narrow Hallways
Tight corners and narrow hallways are notorious for making a home feel restrictive. Fortunately, acrylic mirrors are uniquely suited for these awkward spaces due to their lightweight and customizable nature. Placing a tall, vertical mirror in a dark corner can blur the rigid boundaries of the room, making the corner seem to disappear into an open pathway.
In narrow hallways, the orientation of your mirror plays a decisive role in how the space is perceived. Hanging a series of vertical mirrors along one side of a hallway can make the ceiling feel higher, while a long, horizontal mirror can visually widen a cramped corridor. Experiment with these orientations based on whether your hallway suffers more from a low ceiling or a claustrophobic width.
When decorating tight walkways, keep the surrounding decor minimal. Avoid placing highly detailed wallpaper or busy gallery walls directly opposite the mirror. In a confined hallway, reflecting a busy pattern can create a chaotic, overwhelming visual loop that defeats the purpose of trying to open up the space. Keep the reflected wall simple and neutral to maximize the feeling of openness.
Choosing the Right Size and Grouping Layout
When selecting your acrylic mirrors, you must decide between a single, large statement panel or a creative grouping of smaller pieces. A large, seamless sheet of acrylic mirror provides the most convincing illusion of an extended room because it minimizes visual breaks. This is ideal for creating a “mirror wall” effect above a dining table or along an entryway.
On the other hand, a gallery arrangement of smaller acrylic shapes—such as hexagons, circles, or square tiles—adds a decorative, modern touch while still bouncing light around the room. When planning a grouped layout, proportion is key. As a general rule of thumb, the total width of your mirror arrangement should span approximately two-thirds to three-quarters of the width of the furniture piece sitting directly below it. This ensures the composition looks balanced and anchored.
To maintain a cohesive and intentional aesthetic, pay close attention to the spacing between individual tiles. Keep the gaps consistent, ideally between two to three centimeters. Using a physical spacer, like a small piece of cardboard or wood, during installation will help you achieve uniform gaps. This structured spacing prevents the arrangement from looking cluttered, ensuring it functions as a unified design element that enhances rather than distracts from your space.
Safe Installation and Mounting for Acrylic Mirrors
Proper installation is critical to ensuring your acrylic mirrors look professional and stay securely on the wall. Before choosing your mounting method, inspect your wall type. In many homes, walls are made of solid concrete or plaster, which can be challenging to drill. Because acrylic is lightweight, you can often avoid drilling entirely by using high-quality, double-sided foam mounting tape or acrylic-safe silicone adhesives.
When selecting adhesives, always verify that they are labeled as safe for acrylic or plexiglass. Some standard solvent-based adhesives can react chemically with the mirror backing, causing it to peel, discolor, or lose its reflective coating over time. Additionally, consider your local climate. In hot, humid tropical environments, standard adhesives can degrade and lose their grip. Opt for moisture-resistant, heavy-duty mounting tapes designed to withstand high humidity to prevent your mirrors from falling.
To install, start by thoroughly preparing the wall surface. Clean the area with isopropyl alcohol to remove any dust, grease, or moisture, and let it dry completely. Measure and mark your placement lightly with a pencil. Apply the adhesive tape evenly across the back of the acrylic panel, pressing firmly. When mounting, press the mirror against the wall with even pressure for at least thirty seconds to ensure a strong bond.
While DIY adhesive mounting is perfect for small to medium panels, larger installations require extra caution. If you are planning a full-height mirror wall, mounting panels on the ceiling, or working at significant heights, do not rely solely on adhesive tape. In these scenarios, stop and consult a qualified professional who can install secure mechanical brackets or specialized track systems to guarantee long-term safety.
Common Placement Mistakes to Avoid
To get the most out of your design, avoid several common placement pitfalls. The most frequent mistake is hanging a mirror without considering what it will reflect. A mirror placed directly opposite a blank, unpainted wall or a cluttered utility area will only emphasize those unappealing features, making the room feel cold or disorganized. Always ensure the reflected view offers something pleasant to look at.
Another common error is mounting the mirror at the wrong height. Hanging a mirror too high is a frequent mistake; if the center of the mirror is well above eye level, it will only reflect the ceiling and upper light fixtures, failing to connect with the living space below. Aim to position the center of the mirror at standard eye level, which is roughly 145 to 150 centimeters from the floor, or slightly lower in dining areas where people are primarily seated.
Finally, avoid using improper cleaning tools or harsh chemicals. Standard glass cleaners containing ammonia or alcohol can chemically damage the acrylic, causing it to become cloudy or yellowed. Similarly, using rough paper towels or abrasive sponges will leave permanent micro-scratches on the soft surface, dulling its reflective quality. Stick to gentle, material-safe cleaning practices to keep your mirrors looking crystal clear.
Frequently Asked Questions (FAQ)
How do I clean an acrylic mirror without scratching it?
To clean your acrylic mirror safely, always use a clean, soft microfiber cloth. Prepare a mild cleaning solution by mixing warm water with a single drop of gentle dishwashing liquid. Lightly dampen the cloth and wipe the mirror surface using gentle, circular motions. Avoid using paper towels, tissues, or polyester cloths, as their fibers can easily scratch the soft acrylic. Never use commercial glass cleaners, ammonia, or alcohol-based sprays, as these harsh chemicals can degrade the plastic and ruin the reflective backing.
Can I place an acrylic mirror in a humid area like a bathroom?
Yes, but you must take specific precautions. Acrylic itself is highly resistant to moisture and will not rust or degrade like traditional glass mirrors. However, the primary challenge in humid environments is the adhesive used for mounting. High humidity and steam can weaken standard double-sided tapes, causing the mirror to fall. Always check the manufacturer’s specifications to ensure the mirror and the adhesive are rated for wet environments. For bathroom installations, use moisture-resistant mounting hardware or specialized silicone adhesives, and ensure the room has adequate ventilation to prevent moisture from pooling behind the panel.

Community discussion
Share your experience or ask a question. Comments are reviewed before publication.