
Small bathrooms, common in modern apartments and condominiums across the Philippines, often feel cramped and dimly lit due to limited square footage and minimal window openings. One of the most effective, budget-friendly ways to visually expand these tight spaces is by strategically installing a mirror for bathroom wall sticker. Unlike heavy, traditional glass mirrors that require drilling and robust wall anchors, lightweight adhesive mirror stickers offer a flexible, non-invasive solution that can instantly alter the perception of depth and light, often costing under ₱1,000 for a complete set in local home decor stores or online marketplaces.
To achieve a successful spatial illusion, placement is everything. Simply sticking reflective panels on any open wall space without a plan can lead to disjointed reflections, awkward glare, or a cluttered visual environment. By understanding how light behaves and how the human eye processes reflections, you can transform a compact shower room or powder room into an airy, inviting space. This guide details the exact layout strategies, installation steps, and maintenance practices required to maximize your bathroom’s visual footprint using mirror stickers.
Planning the Layout: Placement Strategies for a Spacious Illusion
The foundational principle of using mirrors to expand a room lies in the physics of light reflection. When light hits a reflective surface, it bounces back into the room, effectively doubling the perceived distance between walls and tricking the brain into seeing a continuation of the space. In a small bathroom, this visual depth breaks the boxy, claustrophobic feel of close-quarters walls.
Products mentioned in this guide
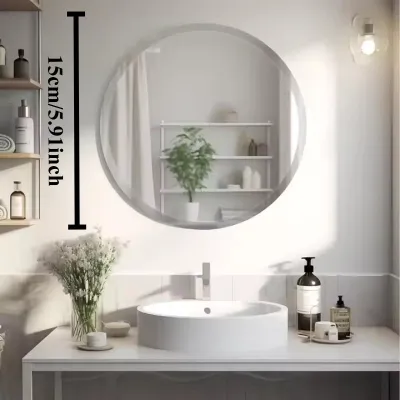

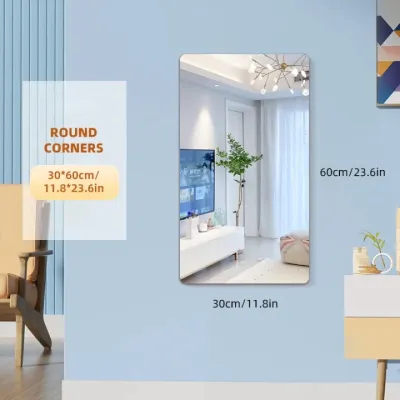
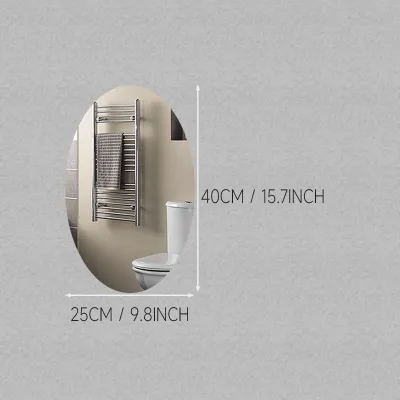
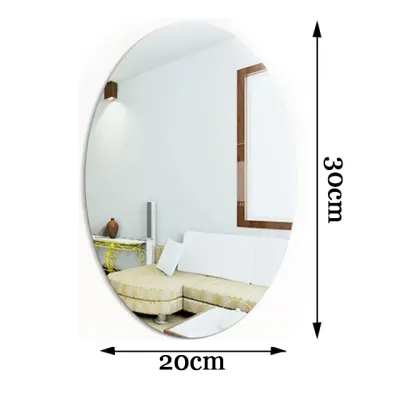
Prices are valid at publication and may change. Please refer to the product page for the latest price.
To maximize this effect, position your mirror stickers directly opposite a primary light source, such as a window or a bright wall-mounted light fixture. In many Philippine homes, bathrooms may only have a small awning window or rely entirely on artificial lighting. Placing the reflective panels where they can catch and scatter this light ensures that even the darkest corners of the room are illuminated, making the entire area feel significantly larger and more open.
Establishing a clear focal point is equally crucial for guiding the eye. Installing the mirror stickers at eye level—typically above the vanity or sink basin—draws attention upward and outward as soon as someone enters the room. However, you must carefully evaluate what the mirror will reflect; placing stickers directly opposite cluttered open shelves, a laundry basket, or the toilet will only double the visual clutter, defeating the purpose of creating a serene, spacious environment.
You will also need to choose between different layout styles, such as a single continuous sheet or a creative geometric mosaic pattern. While a continuous, unbroken mirror surface provides the strongest and most convincing illusion of uninterrupted space, geometric patterns (like hexagons or small square tiles) add a modern decorative touch. Keep in mind that multiple seams can slightly fragment the reflection, so if your primary goal is pure spatial expansion, a larger, continuous layout is generally the more effective choice.
Before finalizing your layout, perform a quick visual check of the reflection angles from various standing points in the bathroom. Stand at the doorway and in front of the sink to ensure the mirrors capture the most open, clean parts of the room, such as a neat accent wall or an elegant shower screen, rather than a blank, dark corner. Adjusting the placement by even a few centimeters can make a dramatic difference in how successfully the illusion of depth is delivered.
Essential Tools and Materials for Bathroom Installation
Before beginning the installation, gathering the correct tools and materials is essential for achieving a professional, long-lasting finish, especially in high-humidity environments. The primary component is the mirror wall sticker itself, which is commonly available in lightweight acrylic or heavier, rigid glass variants. While acrylic is highly shatterproof and easy to handle, it is more flexible and prone to minor bending; rigid glass tiles offer superior clarity but require a more robust adhesive backing to stay secure.

Because bathrooms are subjected to constant moisture and temperature fluctuations, standard adhesives may fail over time. You must verify that the pre-applied adhesive on your stickers, or any secondary double-sided mounting tape you plan to use, is explicitly rated for high-humidity environments and is compatible with your specific wall surface, whether it is glazed ceramic tile, painted drywall, or sealed concrete.
Prepare a complete toolkit to ensure precision during the application process. This should include rubbing alcohol or a specialized residue-free glass cleaner, lint-free microfiber cloths, a reliable measuring tape, a spirit level to prevent crooked lines, and a plastic squeegee or soft cloth for smoothing out air bubbles. Additionally, keep some low-tack painter’s tape on hand for temporary positioning, and a hairdryer or heat gun, which will be invaluable for warming the adhesive during both application and future removal.
Step-by-Step Guide to Applying Mirror Wall Stickers
Step 1: Surface Preparation in Humid Environments
The longevity of your mirror stickers depends almost entirely on how thoroughly you prepare the wall surface before application. In a typical bathroom, surfaces quickly accumulate an invisible layer of soap scum, body oils, moisture, and fine dust that will prevent adhesives from bonding securely. Start by washing the target area with a mild detergent, followed by a thorough wipe-down using rubbing alcohol on a clean microfiber cloth to strip away any remaining oily residues.
After cleaning, allow the wall to dry completely, as any trapped moisture behind the sticker will inevitably compromise the adhesive bond and can create an ideal breeding ground for mold and mildew. In the humid tropical climate of the Philippines, this drying step may take longer, so it is wise to run a bathroom exhaust fan or let the room air out for several hours before proceeding.
Finally, carefully inspect the texture of your wall; mirror stickers require an exceptionally flat, smooth surface to reflect accurately. Attempting to apply these stickers over heavily textured tiles, peeling paint, rough plaster, or unsealed porous concrete will result in poor adhesion and a highly distorted reflection, so you must resolve any surface defects or choose an alternative flat mounting surface beforehand.
Step 2: Measuring, Alignment, and Dry Fitting
Precision is key to a polished look, as even a millimeter of misalignment can ruin the clean lines of your bathroom decor. Use your measuring tape to find the exact center of the wall space or vanity area, and use a spirit level to draw light, erasable pencil guidelines or place strips of painter’s tape to mark the outer boundaries of your layout.
Before peeling off any protective adhesive backing, perform a complete “dry fit” of the mirror stickers. Temporarily secure each piece to the wall using small loops of low-tack painter’s tape, allowing you to step back and evaluate the overall alignment, visual balance, and spacing from a distance.
If you are installing a multi-piece geometric or mosaic design, this dry-fitting phase is the perfect time to plan the exact gap width between each sticker. To maintain a cohesive and professional aesthetic, try to align these gaps with the bathroom’s existing tile grout lines or keep them perfectly uniform using small spacer guides.
Step 3: Peeling, Applying, and Securing the Edges
Once you are entirely satisfied with the dry-fit layout, you can begin the permanent application process. Avoid peeling off the entire protective backing at once, as this makes the sticker difficult to handle and increases the risk of accidental misalignment; instead, peel back only the top section (about two to three centimeters) to expose a small strip of adhesive.
Carefully align this exposed top edge with your marked guidelines on the wall, press it gently into place, and then slowly pull the remaining backing downward with one hand while using a plastic squeegee or a soft microfiber cloth with the other. Work in firm, sweeping motions from the center of the sticker outward to the edges, pushing out any trapped air bubbles as you descend.
Pay special attention to the outer edges and corners of each sticker, as these are the most vulnerable points where steam and moisture can penetrate over time. Apply firm, steady pressure along all borders for at least thirty seconds to ensure the adhesive forms a deep, complete bond with the wall surface.
After securing the sticker, perform a final verification check by removing the front protective film (if applicable) and inspecting the edges for any lifting. Stand back and look at the reflection from multiple angles to confirm that the surface is flat, the lines are straight, and there is no visible warping or distortion in the mirrored image.
Common Installation Mistakes and How to Avoid Them
One of the most common complaints when using thin, flexible acrylic mirror stickers is the “funhouse effect,” where the reflection appears warped, wavy, or distorted. This occurs when the thin material is pressed over uneven surfaces, such as deep tile grout lines, wall bumps, or textured paint. To avoid this, always choose thicker, more rigid mirror panels if your wall is not perfectly flat, or restrict the placement of smaller stickers to the flat centers of individual ceramic tiles.
Another frequent error is neglecting to seal or secure the edges properly in high-steam environments. In a small bathroom, hot showers generate a significant amount of water vapor that can easily seep behind poorly adhered edges, gradually degrading both the adhesive and the delicate reflective backing of the mirror. Ensuring a seamless, airtight bond during installation is the best way to prevent this moisture intrusion.
Rushing the curing time of the adhesive is a recipe for premature peeling. Always refer to the manufacturer’s instructions for the specific curing duration, which typically requires keeping the bathroom completely dry and free from heavy steam for 24 to 48 hours after application. Plan your installation during a weekend or a period when the shower will not be in constant use to allow the bond to reach its maximum strength.
Finally, avoid placing mirror stickers in areas where they will be subjected to constant, direct water splashes or frequent contact with harsh household cleaning chemicals. Over time, exposure to acidic cleaners, strong soaps, and abrasive scrubs will strip away the protective coatings of the mirror, leading to unsightly cloudy spots, dark edges, or permanent scratching on acrylic surfaces.
Safe Maintenance and Removal of Mirror Stickers
Maintaining the clarity and shine of your bathroom mirror stickers requires a gentle touch. For daily or weekly cleaning, use a soft, clean microfiber cloth lightly dampened with water or a mild, non-abrasive glass cleaner. Always avoid using ammonia-based, highly acidic, or alkaline cleaning agents, as these harsh chemicals can seep around the edges and chemically strip the reflective silver backing or permanently cloud sensitive acrylic materials.
When it comes time to redecorate, move, or replace the stickers, a rushed removal can easily damage your walls or shatter the panels. To remove them safely, use a hairdryer or a heat gun on a medium setting to gently warm the surface of the sticker, which softens the underlying adhesive and makes it pliable. Slowly and carefully peel the sticker away from one corner, keeping it at a shallow, steady angle relative to the wall to minimize tension.
Once the panels are removed, you may find some sticky residue left behind on the tiles or paint. Clean this away by applying a small amount of commercial adhesive remover or rubbing alcohol to a cloth and gently rubbing the spot; always perform a quick spot-test in an inconspicuous area first to ensure the solvent does not discolor or damage your wall’s paint or finish.
It is important to establish a clear safety boundary before attempting removal: if the underlying wall paint is old, peeling, or was originally applied over an unprimed surface, the adhesive may pull the paint or drywall paper off with it. If you observe these fragile conditions, or if the manufacturer’s instructions warn of high-strength permanent bonds on drywall, it is best to consult a professional painter or home improvement specialist to avoid costly wall repairs.
Frequently Asked Questions (FAQ)
Can I apply mirror stickers over textured tiles or deep grout lines?
Applying thin mirror stickers directly over textured tiles or deep grout lines is not recommended because the flexible material will conform to the uneven surface beneath it. This contouring creates a warped, distorted reflection similar to a funhouse mirror and leaves hollow gaps where moisture can accumulate. For the best results, stick to flat, smooth walls, or ensure each sticker fits entirely within the flat boundaries of a single tile without crossing any grout lines.
Will high humidity and steam cause the mirror stickers to peel off?
High-quality mirror stickers equipped with moisture-resistant adhesives can withstand normal bathroom steam and humidity, provided they are installed correctly on a pristine, dry surface. However, persistent poor ventilation, direct water contact, or failing to let the adhesive cure fully before using the shower will significantly shorten their lifespan. To protect your investment, ensure your bathroom has adequate ventilation, such as an active exhaust fan or an open window, to help clear out humidity quickly.

Community discussion
Share your experience or ask a question. Comments are reviewed before publication.