
Placing a glass mirror wall sticker strategically is one of the most effective, budget-friendly ways to transform a cramped room into an open, airy sanctuary. By positioning these reflective panels opposite natural light sources, behind key furniture pieces, or along narrow corridors at eye level, you can instantly double the perceived depth of your living space. Unlike heavy, traditional framed mirrors, lightweight glass mirror wall stickers offer unparalleled flexibility, allowing you to design custom layouts that perfectly fit your home’s unique architecture without consuming valuable floor space.
To achieve the ultimate illusion of spaciousness, you must look beyond simple aesthetics and understand how light, angles, and reflection interact with your room’s layout. Whether you are dealing with a compact studio condominium in Manila or a cozy bedroom in a suburban family home, mastering the placement of these stickers can make a dramatic difference. Below is a comprehensive guide to help you plan, arrange, and install your mirror stickers to maximize their spatial impact.
Why Glass Mirror Wall Stickers Expand Small Spaces
The human brain relies heavily on visual cues to determine the boundaries of a room. When you look at a solid, dark wall, your eyes stop at the physical surface, reinforcing the feeling of confinement. A glass mirror wall sticker disrupts this boundary by reflecting the opposite side of the room, creating an optical illusion of extended depth. This visual continuation tricks the brain into perceiving a space that is twice its actual size.
Products mentioned in this guide
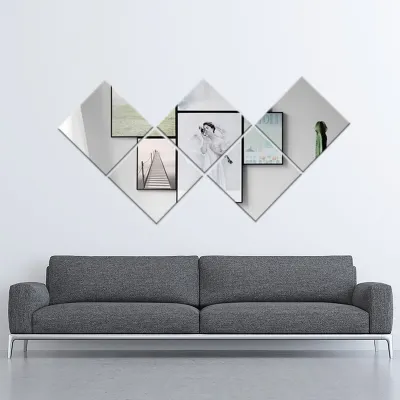
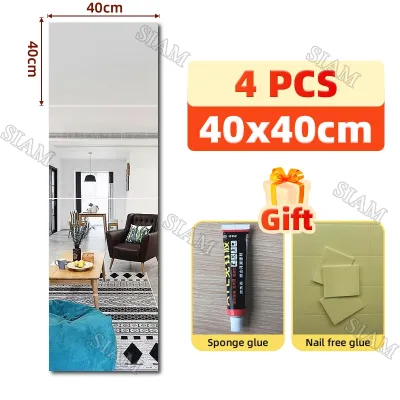
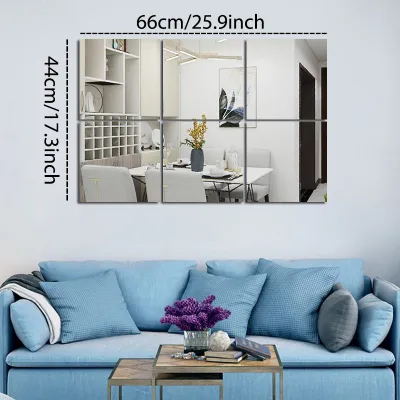
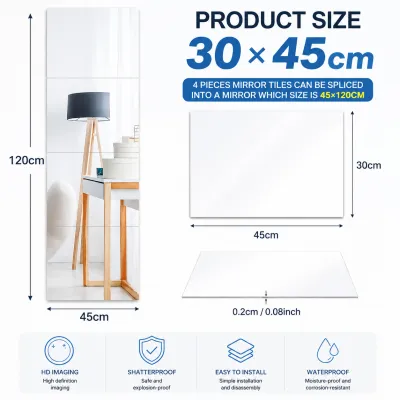
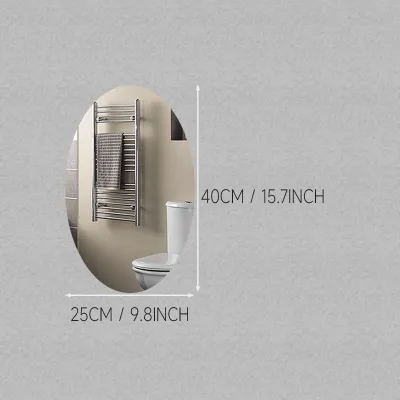

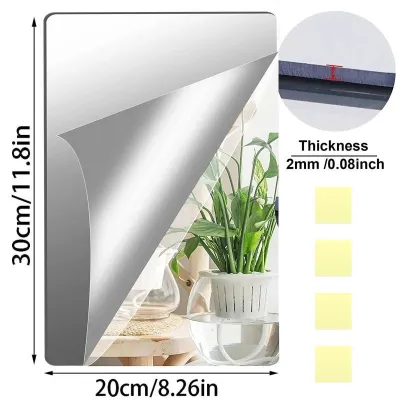
Prices are valid at publication and may change. Please refer to the product page for the latest price.
Beyond depth perception, mirrors act as passive light amplifiers. In small rooms, natural light often struggles to penetrate dark corners, making the area feel smaller and gloomier. When light hits the highly reflective surface of a glass mirror wall sticker, it bounces back into the room, scattering illumination across dim surfaces. This increased brightness instantly makes any room feel more open, clean, and inviting.
Choosing glass mirror wall stickers over traditional framed mirrors offers several distinct advantages for small-space design, especially when working within a budget. With high-quality packs typically ranging from ₱300 to ₱1,500 on online marketplaces, they provide an affordable alternative to heavy glass installations. Key benefits include:
- Zero Visual Bulk: Traditional mirrors require thick, heavy frames that occupy physical and visual space, often making a small wall look cluttered. Frameless glass stickers sit flush against the wall, providing a seamless, minimalist transition.
- Customizable Layouts: Because these stickers come in individual modular pieces—such as squares, hexagons, or diamonds—you can tailor the arrangement to fit specific wall shapes, awkward alcoves, or tight corners.
- Lightweight and Secure: High-quality glass stickers are thin yet durable, reducing the risk of structural strain on your walls. This makes them highly suitable for rental properties where drilling large holes for heavy anchors is not permitted.
- Superior Clarity: Unlike cheap plastic or acrylic alternatives that warp and create a distorting "funhouse" effect over time, real glass stickers maintain a perfectly flat surface, ensuring a crisp, true reflection that enhances the room's elegance.
Strategic Placements to Maximize the Illusion of Space
Where you place your mirrors is just as important as the mirrors themselves. To truly open up a room, you must position them where they can interact dynamically with the existing layout, light, and furniture.

Opposite Windows and Light Sources
In the tropical climate of the Philippines, homes are often blessed with bright, abundant sunlight. To harness this natural resource, place your glass mirror wall sticker directly opposite or adjacent to your largest window. This positioning allows the mirror to capture the incoming daylight and throw it deep into the interior of the room, effectively acting as an extra window.
However, direct midday sun can occasionally create a harsh, blinding glare that makes the room uncomfortable to sit in. To avoid this, observe how the sun moves through your room during the day. If the direct glare is too intense, offset the stickers slightly to the side of the window rather than directly opposite it. This adjustment still captures the ambient brightness and bounces it into dark corners without reflecting the blinding rays directly into your seating area.
Behind Key Furniture Pieces
One of the most effective interior design tricks is layering, which involves placing mirrors behind solid furniture pieces to create a sense of continuation. When you place a set of mirror stickers behind a low-profile sofa, a bed headboard, or a wooden console table, you visually push the wall backward. The eye perceives the furniture as floating in front of an open space rather than being pushed up against a hard boundary.
To make this arrangement work beautifully, avoid covering the entire wall blindly. Instead, leave a deliberate gap of about 10 to 15 centimeters between the top of your furniture and the start of the mirror sticker pattern. This gap prevents the furniture from completely blocking the reflection and creates a clean, intentional frame. For example, arranging a horizontal band of hexagonal stickers just above a sofa backrest draws the eye outward, making the entire seating area feel wider and more luxurious.
In Narrow Hallways and Tight Corners
Narrow entryways, tight corridors, and awkward alcoves are common in modern studio apartments and condominiums. These transitional spaces can easily feel claustrophobic. Fortunately, you can use the orientation of your glass mirror wall sticker layouts to manipulate these tight dimensions:
- Horizontal Layouts for Width: In a narrow hallway, arranging your mirror stickers in a continuous horizontal band along one wall makes the passage feel significantly wider. The horizontal lines stretch the visual field, breaking up the narrow, tunnel-like effect.
- Vertical Layouts for Height: If your room suffers from low ceilings, arrange the stickers in tall, vertical columns. This draws the eye upward toward the ceiling, creating the illusion of height and vertical grandeur.
- Dead-End Dissolution: Placing a cluster of mirror stickers at the very end of a dead-end hallway or inside a dark corner dissolves the solid dead-end. It creates a false pathway, making it look as though the corridor extends further than it actually does.
Arrangement Patterns for Different Visual Effects
Because glass mirror wall stickers are modular, the pattern you choose can dramatically alter the mood and spatial perception of your room. Here are three popular layout styles and how they function:
Grid and Geometric Layouts
A structured grid pattern—such as a 3×3 or 4×4 layout of square mirror stickers—creates a clean, modern aesthetic that mimics a multi-pane window. This architectural look adds structure and symmetry to a living room or dining area. By reflecting organized segments of the room, a grid pattern provides a sense of order and sophistication while quietly expanding the visual boundaries.
Asymmetric and Scattered Layouts
If you prefer a more artistic, dynamic feel, opt for asymmetric or scattered layouts using hexagonal, triangular, or diamond-shaped stickers. You can start with a dense cluster of stickers near the center of the wall and gradually scatter them outward. This movement draws the eye diagonally across the wall, distracting the viewer from the room’s small footprint and creating a lively, energetic focal point.
The Rule of Consistent Spacing
Regardless of the pattern you choose, maintaining consistent spacing between individual glass pieces is crucial. When installing modular stickers, leave a uniform gap of 5 to 10 millimeters between each panel. This small gap acts like a grout line, framing each reflection and preventing minor alignment errors from turning into a chaotic, distorted image. Using physical spacers during installation ensures a professional, cohesive result that looks like a high-end designer installation.
Step-by-Step Installation and Safety Guidelines
Installing a glass mirror wall sticker is a straightforward DIY project, but because you are working with real glass and semi-permanent adhesives, safety and precision are paramount. Before beginning, always check the product packaging for specific adhesive instructions and verify if your wall material is compatible.
Wall Preparation
The tropical humidity in the Philippines can affect how well adhesives bond to surfaces over time. To ensure a long-lasting hold, your wall must be completely clean, dry, smooth, and non-porous:
- Clean the wall thoroughly with a damp cloth to remove dust, grease, and grime, then let it dry completely.
- Avoid applying glass stickers to heavily textured concrete walls, peeling paint, or moisture-prone surfaces, as the adhesive may fail, causing the glass to fall and break.
- If you have recently painted your wall, wait at least two to three weeks for the paint to fully cure before applying any adhesive stickers.
Planning and Marking
Never attempt to stick the glass pieces onto the wall without a plan. Lay your mirror stickers out on a flat floor or table first to finalize your desired pattern:
- Measure your wall space carefully to find the center point of your layout.
- Use painter's tape, a measuring tape, and a spirit level to mark the exact boundaries of each sticker on the wall.
- Drawing light pencil guidelines on the wall will help you keep the alignment perfectly straight during the actual application.
Handling and Application
Because these stickers are made of real glass, safety should be your top priority.
- Wear lightweight protective gloves to prevent cuts from sharp edges and to keep oily fingerprints off the reflective surfaces.
- Apply high-quality, moisture-resistant double-sided mounting tape or mirror-safe silicone adhesive to the back of each sticker. Ensure the adhesive is rated for glass and is compatible with the mirror's backing to prevent chemical damage (desilvering).
- Press the sticker firmly but gently against the wall, applying even pressure across the center and corners. Avoid pressing too hard on the edges, which can cause the glass to crack.
- Safety Note: If you are planning a large-scale installation, working at heights, or installing exceptionally heavy glass panels, always consult a qualified professional to ensure the structure is safe and secure.
Maintenance and Care
To keep your mirrors sparkling and clear, clean them regularly using a soft microfiber cloth and a mild glass cleaner. To protect the adhesive backing from moisture damage, never spray liquid cleaner directly onto the edges of the stickers. Instead, spray a small amount of cleaner onto the microfiber cloth first, then gently wipe the glass surface clean. This prevents liquid from seeping behind the glass and weakening the adhesive bond.
Placement Mistakes That Ruin the Spatial Illusion
While strategic mirror placement can work wonders, poor choices can have the opposite effect, making your small room feel cluttered, chaotic, or disorienting. Avoid these common pitfalls to ensure your mirrors achieve the desired spatial expansion:
Reflecting Visual Clutter
A mirror duplicates whatever is in its line of sight. If you place your glass mirror wall sticker opposite an open wardrobe, a cluttered utility shelf, a messy kitchen counter, or a busy patterned wallpaper, you will double the visual noise in the room. This added clutter makes the space feel twice as crowded. Always position your mirrors so they reflect clean, open areas, pleasant decor, or natural outdoor views.
Incorrect Hanging Height
Placing your mirror layout too high or too low is a common mistake that ruins the illusion of depth. If the mirrors are placed too high, they will only reflect the empty ceiling; if they are too low, they will reflect the floor. For the best spatial effect, the center of your primary mirror arrangement should sit at eye level—typically around 150 centimeters from the floor. This ensures the mirror captures the room’s natural depth and key architectural features.
Overusing Mirrors on Multiple Walls
When it comes to mirror decor in small spaces, moderation is key. It can be tempting to cover multiple walls with glass mirror wall stickers, but doing so can create a confusing “funhouse” effect. Reflecting mirrors off one another causes infinite reflections that disorient the senses and induce visual fatigue. To maintain a calm, balanced, and open environment, limit your mirror layout to a single focal wall per room, allowing it to act as a clean, intentional design feature.
Community discussion
Share your experience or ask a question. Comments are reviewed before publication.