
Using mirror decal stickers is an excellent, budget-friendly way to alter the visual perception of a compact living space. By strategically positioning these reflective accents, you can bounce ambient light around a room, create the illusion of extended depth, and make tight quarters feel significantly more open. Unlike heavy glass mirrors, lightweight decals offer incredible design flexibility, allowing you to experiment with various patterns and placements without the need for heavy-duty wall anchors.
To achieve the best spatial effect, you must focus on how light enters your room and how the human eye naturally navigates the space. A well-placed decal arrangement does not just reflect what is in front of it; it acts as a visual window that breaks up solid, constricting walls. Whether you are dealing with a cozy studio apartment or a narrow hallway, understanding the relationship between reflection, light, and layout is the key to unlocking a brighter, more spacious home environment.
Planning Your Mirror Decal Layout
Before purchasing or applying your mirror decal stickers, a thorough assessment of your room’s physical characteristics is essential for a successful outcome. Start by evaluating the texture and condition of your target wall. For these self-adhesive decals to bond securely, the surface must be exceptionally smooth, clean, dry, and non-porous. In tropical climates where indoor humidity can fluctuate, any existing moisture or wall texture can compromise the adhesive backing, leading to premature peeling or unsightly air pockets.
Products mentioned in this guide
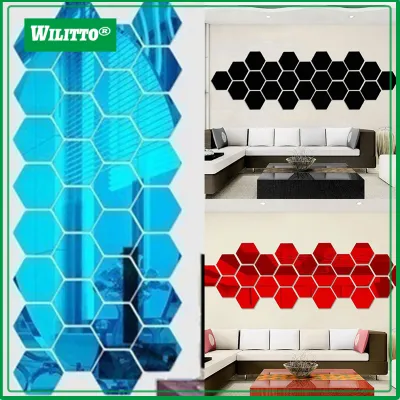
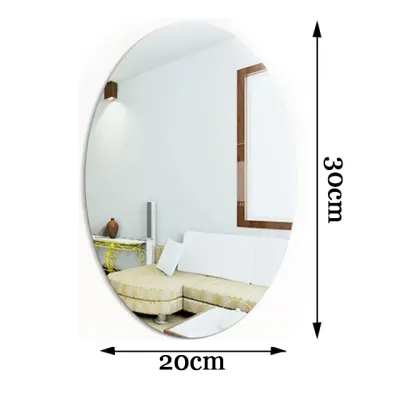
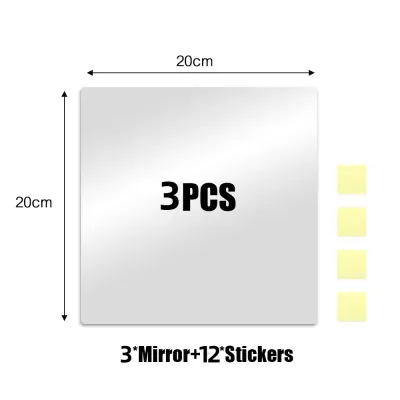


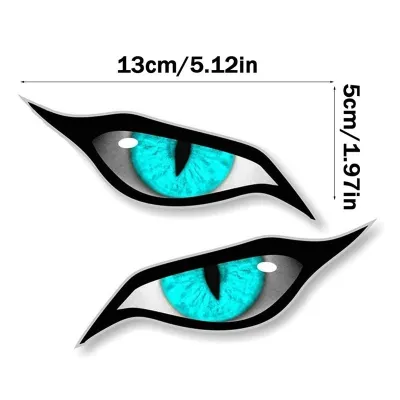
Prices are valid at publication and may change. Please refer to the product page for the latest price.
Next, identify the primary light sources in the room, including both natural windows and artificial light fixtures like floor lamps or wall sconces. Take note of how light moves across the space throughout the day. Positioning your decals where they can directly capture and redirect these light paths will dramatically enhance the room’s overall brightness and perceived volume.
Accurate measurement is your next crucial step. Use a reliable measuring tape to determine the exact dimensions of the wall area you plan to decorate. This allows you to calculate the precise quantity and size of the decals required, preventing a cluttered look or an awkward, incomplete pattern.
Finally, always check the manufacturer’s product specifications before finalizing your design. Pay close attention to the listed dimensions, material composition (such as acrylic or PET), flexibility, and thickness. Thinner decals are highly flexible but require an absolutely flat wall to avoid warping, whereas slightly thicker options provide a more rigid structure that helps maintain a flatter, truer reflection.
Design Arrangements to Maximize Space
The pattern and placement of your mirror decal stickers play a pivotal role in how they manipulate the perception of space. One of the most effective strategies is placing the decals directly opposite a window. This arrangement captures the natural outdoor view and reflects it back into the room, essentially doubling the visual daylight and creating the illusion of an additional window on a solid wall.

You can also use alignment to guide the eye and alter the room’s perceived proportions. If you want to make low ceilings feel higher, arrange your decals in vertical columns. This vertical orientation draws the eye upward, emphasizing the height of the room. On the other hand, if you are trying to make a narrow hallway or a cramped bedroom feel wider, aligning the decals in horizontal rows stretches the visual field outward along the walls.
When deciding between a structured grid or a freeform cluster, consider the overall visual balance of the room. A clean, symmetrical grid layout mimics the appearance of traditional multi-pane window frames, offering a sophisticated and orderly aesthetic that expands the space without adding visual noise. Conversely, scattered or overly dense clusters can quickly make a small room feel chaotic; maintaining consistent, generous negative space between each decal is vital to keeping the design clean and airy.
Framing focal points is another excellent way to anchor a small room. Try arranging your mirror decals around existing architectural features or key furniture pieces, such as above a sofa, a low console table, or a bed headboard. This technique draws attention to a central area, establishing a clear visual hierarchy that makes the surrounding space feel organized, intentional, and less confined.
Step-by-Step Installation Process
Achieving a clean, bubble-free finish requires a methodical approach to preparation and application. Begin by preparing the wall surface. Clean the area thoroughly with a mild, non-greasy cleaning solution—such as a small amount of dish soap mixed with warm water—to remove any accumulated dust, oils, or fingerprints. In humid environments, it is critical to let the wall dry completely for at least 24 hours before application, as any trapped moisture will degrade the adhesive over time.
Once the wall is dry, move on to measurement and marking. Do not attempt to align the decals by eye, as even a minor misalignment will ruin the spatial illusion. Use a spirit level, a measuring tape, and low-tack painter’s tape to map out your layout guidelines directly on the wall. This temporary framework ensures every piece is perfectly straight and evenly spaced before you commit to sticking them down.
If your layout requires working at height to reach the upper sections of a wall, always use a stable step stool or ladder and follow basic safety precautions. Additionally, if you plan to install decals in damp areas like bathrooms, verify that the adhesive is rated for high-moisture environments, or consult a professional installer to prevent premature peeling.
When you are ready to apply the decals, use a careful peeling and smoothing technique. Peel away a small section of the protective backing from the first decal, align it precisely with your painter’s tape guide, and gently press the exposed adhesive onto the wall. Slowly peel away the remaining backing while using a squeegee or a soft, dry microfiber cloth to smooth the decal from the center outward. This outward motion effectively pushes out trapped air and ensures a strong, uniform bond.
After all the decals are mounted, perform a thorough post-installation check. Inspect the surface from multiple angles to identify any trapped air bubbles or lifting edges. If you spot a bubble, gently guide it toward the edge of the decal using your soft cloth, or consult the manufacturer’s instructions for approved methods to resolve minor adhesion issues without scratching the reflective surface.
Avoiding Common Placement and Application Mistakes
While mirror decal stickers are highly forgiving, certain common mistakes can quickly ruin the desired spatial illusion. Overcrowding is a frequent error; applying too many decals without leaving enough wall space between them creates a busy, cluttered environment that actually makes the room feel smaller. Remember that negative space is just as important as the reflective surface itself for maintaining a balanced, open feel.
Another mistake is ignoring what the decals will reflect. If you position your mirrors to reflect a cluttered storage shelf, a trash bin, or a dark, empty corner, you will simply double the visual clutter and make the room feel more chaotic. Always test the sightlines from different seating positions in the room to ensure the decals reflect light, open space, or attractive decor elements.
Skipping proper surface preparation is a recipe for failure. Attempting to apply decals to heavily textured plaster, damp walls, or freshly painted surfaces (which require at least two to four weeks to fully cure) will result in poor adhesion and peeling edges. Taking the time to verify that your wall is fully cured, smooth, and dry is essential for long-term durability.
Finally, avoid physical distortion during application. Flexible acrylic or PET decals can easily bend, stretch, or warp if they are pulled too tightly or applied over uneven wall bumps. This distortion creates a warped, funhouse-mirror effect that ruins the clean, high-end look of your decor and disrupts the illusion of a larger room.
Cleaning and Maintaining Mirror Decals
To keep your mirror decals looking bright and clear, regular and gentle maintenance is required. Avoid using harsh chemical solvents, ammonia-based glass cleaners, or abrasive scrubbing pads, as these can permanently scratch, cloud, or degrade the delicate reflective coating of acrylic and PET materials. Instead, opt for a mild, diluted soap solution or a specialized plastic cleaner paired with a clean, dry microfiber cloth.
When cleaning, use a gentle wiping technique. Wipe the surface using light, circular motions or soft, straight strokes from top to bottom. Avoid pressing too hard against the wall, especially near the outer edges of the decals, to prevent lifting the corners or forcing moisture underneath the adhesive backing.
Incorporate a quick edge inspection into your regular cleaning routine. Periodically check the perimeter of each decal for any signs of lifting or peeling, particularly in high-humidity areas. If you notice any edges starting to pull away, refer to the manufacturer’s care guidelines to determine if the adhesive can be safely reactivated or if a minor touch-up is necessary to maintain a seamless look.
Frequently Asked Questions (FAQ)
Can I apply mirror decal stickers to textured or wallpapered walls?
Mirror decal stickers generally require a completely smooth, flat, and non-porous surface to adhere properly and maintain a clear reflection. Applying them to textured walls or wallpapered surfaces is not recommended, as the uneven texture prevents a secure bond, leading to air bubbles, peeling, and distorted reflections. Additionally, removing decals from wallpaper carries a high risk of tearing or damaging the paper underneath. Always check the specific product label and manufacturer guidelines to verify surface compatibility before starting your project.
Do mirror decals distort reflections like funhouse mirrors?
Unlike rigid glass mirrors, flexible acrylic or PET mirror decals can exhibit slight visual distortion if they are not installed correctly. If the underlying wall is uneven, or if the decal is stretched, bent, or warped during the application process, the reflection will appear distorted. To minimize this effect, ensure your wall is perfectly flat, handle the decals gently without pulling, and check the product specifications for thickness—thicker decals generally offer better structural rigidity and a clearer, more realistic reflection.
How do I remove mirror decal stickers without damaging the paint?
To remove mirror decal stickers safely without peeling your wall paint, use gentle heat to soften the adhesive backing. Run a handheld hairdryer on a low-heat setting over the surface of the decal for a few seconds to warm the glue. Once the adhesive is warm and pliable, slowly and carefully peel the decal away from the wall at a shallow angle. It is always best to test this method on a small, inconspicuous area first and consult the manufacturer’s specific removal instructions to protect your wall finish.

Community discussion
Share your experience or ask a question. Comments are reviewed before publication.