
To make a small room look bigger, the strategic placement of a mirror sticker wall is one of the most effective, budget-friendly design techniques available. By bouncing light, creating artificial depth, and drawing the eye upward, these lightweight reflective decals mimic the spatial benefits of traditional glass mirrors without the heavy cost, weight, or permanent installation requirements. Achieving this illusion depends entirely on where and how you arrange them.
Unlike heavy glass mirrors that require drilling and heavy-duty anchors, acrylic or PET mirror stickers offer incredible flexibility for renters and small-space dwellers. However, simply sticking them to any open wall space will not automatically double your room’s perceived size. To truly unlock their space-expanding potential, you must plan your layout around the existing natural light, room proportions, and functional focal points.
Planning Your Mirror Sticker Layout for Maximum Space Illusion
Before peeling off any adhesive backing, you must design a layout that works in harmony with your room’s architecture. Randomly scattered stickers can create visual noise rather than the clean, expansive reflection you want.
Products mentioned in this guide
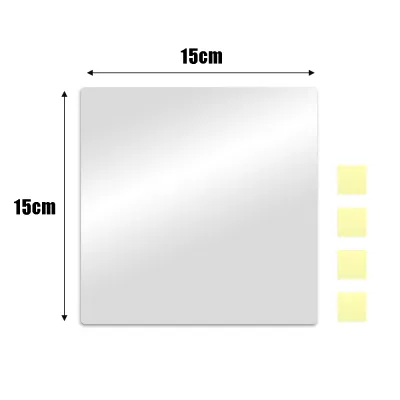

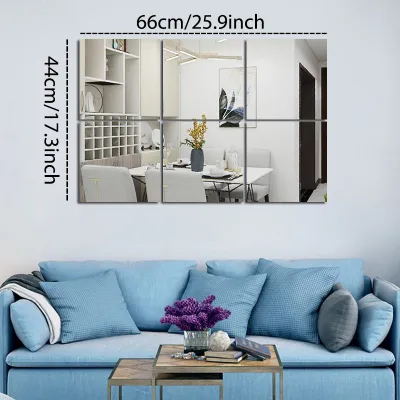
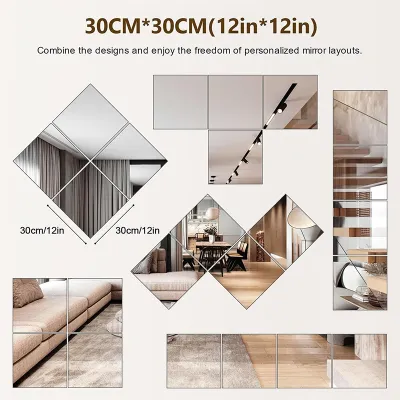
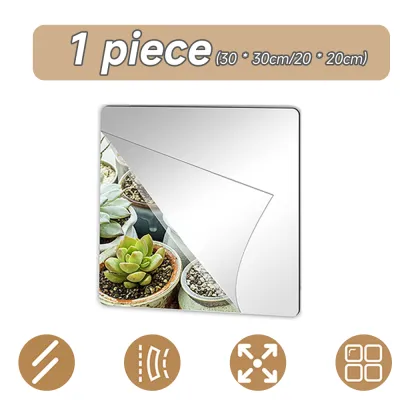
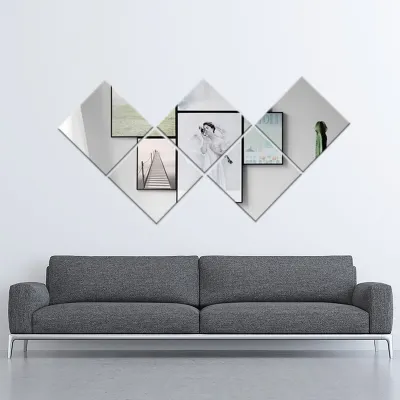
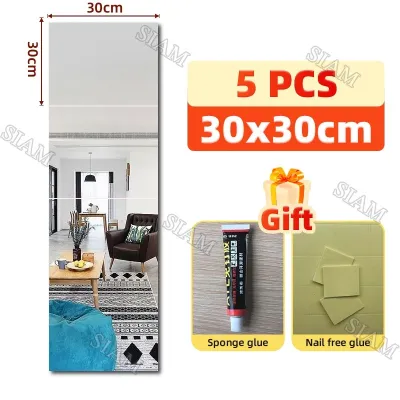
Prices are valid at publication and may change. Please refer to the product page for the latest price.
Reflecting Natural Light
The primary rule of spatial design with mirrors is to maximize available light. Placing your mirror sticker wall opposite or adjacent to a window allows it to catch incoming daylight and bounce it deep into the darker corners of the room. This bounce effect instantly makes the boundaries of the room feel less restrictive.
In tropical climates like the Philippines, where homes often feature deep window overhangs or security grilles that can restrict direct sunlight, maximizing ambient daylight is crucial. By positioning a grid of reflective stickers on the wall adjacent to your main window, you capture the soft, indirect sky glow and distribute it evenly. This reduces the need for artificial lighting during the day and gives the entire room a breezy, open feel.
Creating Depth and Height
The orientation of your sticker arrangement can actively trick the brain into misinterpreting the room’s physical dimensions. If your room suffers from low ceilings—a common issue in modern high-rise condominiums—a vertical arrangement is your best solution.
By stacking rectangular or hexagonal mirror stickers in tall, narrow columns, you draw the viewer’s eye upward toward the ceiling line. This vertical movement creates the optical illusion of height. Conversely, if you are trying to make a narrow hallway, a cramped entryway, or a tight studio living area feel wider, opt for a horizontal grid pattern. Spreading the stickers in a wide, continuous band along the mid-section of the wall stretches the room’s horizontal axis, making the walls feel further apart than they actually are.
Establishing Focal Points
In a small room, clutter accumulates quickly, and the eye can easily get overwhelmed by too many small decorative items. You can use mirror stickers to establish a clear, dominant focal point that anchors the space and creates a sense of layered depth.
An excellent placement strategy is to arrange the stickers directly behind key furniture pieces. For instance, creating a geometric mirror layout behind a living room console table, a bedroom headboard, or a small dining nook table simulates an architectural window or an intentional accent wall. This placement draws attention to the furniture while making the wall behind it appear to recede, giving the impression that there is more physical space behind your belongings.
Choosing the Right Size and Shape
The shapes you choose dictate the overall aesthetic and the effectiveness of the spatial illusion. Uniform shapes, such as perfect squares, rectangles, or neat hexagons, are ideal for creating structured grids. These geometric patterns look clean, modern, and highly organized, which helps minimize visual chaos in tight quarters.
If you prefer a softer, more organic feel, you can experiment with varying sizes of circular stickers to create a gallery-style layout. However, keep in mind that highly fragmented designs with large gaps between the stickers can break up the reflection too much, reducing the overall space-expanding effect. For the most convincing illusion of depth, keep the gaps between your stickers minimal—ideally between 2 to 5 millimeters—so the brain reads the arrangement as a single, large reflective surface.
Preparing Your Walls and Gathering Tools
Proper preparation is the difference between a flawless, professional-looking mirror wall and a warped, peeling disaster. Because mirror stickers are thin and flexible, they conform to the texture of the surface beneath them, meaning any wall imperfection will show through in the reflection.

Wall Condition Check
Before purchasing your stickers, inspect your target wall thoroughly. The surface must be completely smooth, flat, and free of heavy textures, deep orange-peel finishes, or peeling paint. If your wall has prominent plaster bumps or textured wallpaper, the mirror stickers will bend over these imperfections, resulting in a distorted reflection that ruins the illusion of space.
In humid environments, wall moisture is a major concern. High humidity can trap moisture behind the non-porous plastic of the sticker, causing the adhesive backing to degrade, bubble, or completely fail over time. Ensure the wall is not cool or damp to the touch, and avoid applying stickers to walls that share an exterior boundary prone to tropical rainwater seepage.
Surface Cleaning
Even a thin layer of household dust or grease will prevent the adhesive from bonding securely to the wall paint. Wash the designated area with a mixture of mild dish soap and warm water using a lint-free cloth. Avoid using heavy chemical cleaners or oil-based soaps, as these can leave behind a microscopic residue that prevents proper adhesion.
After washing, allow the wall to dry completely. In humid conditions, this drying phase can take longer than expected. It is highly recommended to wait at least 24 hours after cleaning before attempting to apply the stickers, ensuring that no residual moisture remains trapped on the surface.
Essential Tool List
Having the right tools on hand ensures precision during the installation process. Gather these items before you begin:
- Measuring tape: For calculating the exact center of your wall and spacing your layout.
- Spirit level: Essential for keeping your grid lines perfectly straight and parallel to the floor.
- Pencil: For drawing light, erasable guidelines directly on the wall.
- Masking tape: For temporarily holding the stickers in place during the dry-fit phase.
- Soft squeegee or microfiber cloth: For smoothing out the stickers and securing the adhesive bond without scratching the surface.
Step-by-Step Installation Guide
Take your time during the installation. A rushed application often leads to crooked lines, trapped air bubbles, and misaligned panels that are difficult to correct once the adhesive bonds with the wall.
Measuring and Marking
Begin by finding the exact center of your planned layout on the wall. Use your measuring tape to mark this central point with a pencil. From this mark, use your spirit level to draw a perfectly horizontal baseline and a vertical centerline.
These guidelines will serve as your anchor. When installing a grid of mirror stickers, always work from the center outward. This ensures that any slight measurement discrepancies or wall irregularities are pushed to the outer edges of the layout, where they are far less noticeable than in the middle of your visual focal point.
Dry Fitting the Layout
Never stick the panels directly to the wall on your first try. Instead, perform a complete dry fit of your design. Take each mirror sticker—with both the front protective film and the rear adhesive backing still intact—and use small loops of masking tape on the back to temporarily mount them to the wall.
Step back to the opposite side of the room and inspect the layout from multiple viewing angles. Check how the light hits the stickers at different times of the day, and verify that the reflection captures open space rather than clutter. This temporary phase allows you to adjust the spacing, swap shapes, or shift the entire layout up or down without damaging your wall paint or wasting the stickers’ permanent adhesive.
Peeling and Applying
Once you are completely satisfied with the dry-fit layout, you can begin the permanent application. Remove one sticker at a time, starting from the center of your grid. Carefully peel away a small portion of the adhesive backing paper from the top edge.
Align the exposed top edge of the sticker precisely with your penciled guidelines. Once aligned, slowly peel away the rest of the backing paper while gradually lowering the sticker onto the wall. Pressing from the center outward or from the top down helps prevent air from becoming trapped beneath the flexible material.
Smoothing Out Air Bubbles
Immediately after placing a sticker on the wall, use a soft squeegee or a folded microfiber cloth to secure the bond. Start at the center of the sticker and apply firm, even pressure, sweeping outward toward the edges.
This outward sweeping motion pushes any trapped air bubbles out from under the sticker, ensuring a completely flat contact surface. If you encounter a stubborn air bubble that refuses to budge, do not use sharp objects like pins to puncture it, as this will permanently damage the reflective backing and leave a visible dark spot. Instead, gently lift the nearest corner of the sticker, smooth the bubble out, and press the corner back down.
Revealing the Mirror Finish
Most high-quality mirror stickers come with a thin, cloudy protective film on the front surface to prevent scratches during manufacturing, shipping, and installation. Keep this protective film on throughout the entire application process.
Only after every single sticker is perfectly aligned, pressed flat, and secured to the wall should you peel away this front protective layer. Starting from a corner, slowly peel the film back at a sharp angle. Removing this final layer reveals the clear, highly reflective surface, instantly transforming your wall and visually opening up your compact room.
Common Placement Mistakes to Avoid
While mirror stickers are incredibly forgiving compared to heavy glass, certain layout and placement errors can actively work against your goal of making the room feel larger.
Reflecting Clutter or Dark Corners
A mirror simply duplicates whatever is directly in front of it. If you position your mirror sticker wall directly opposite a cluttered bookshelf, an open wardrobe, a laundry basket, or a messy utility area, you will visually double the amount of clutter in the room. This makes the space feel twice as crowded and chaotic.
Similarly, placing mirror stickers in a position where they only reflect a blank, dark wall or a shadowy corner does nothing to enhance the room’s brightness. Always ensure the reflected view consists of open space, attractive decor, a clean wall, or a source of natural light.
Ignoring Material Distortion
It is important to manage expectations regarding the optical quality of flexible mirror stickers. Unlike thick, rigid glass mirrors, acrylic and PET stickers are thin and flexible. If your wall has even minor, imperceptible waves or bows, the flexible sticker will follow those contours, causing a slight visual distortion.
To minimize the impact of this natural distortion, avoid placing large mirror sticker layouts at direct, prolonged eye level in areas where you need high-precision reflections, such as a bathroom vanity or a primary makeup station. Instead, treat them as decorative, ambient design elements. Position them slightly higher or lower, or use them in segmented geometric patterns where minor distortions are visually masked by the gaps between the tiles.
Inconsistent Spacing
When creating a multi-panel grid, consistency is everything. If the gaps between your hexagonal or square stickers vary from one panel to the next, the human eye will immediately notice the misalignment.
Inconsistent spacing breaks the visual continuity of the reflection, drawing attention to the physical stickers themselves rather than the illusion of depth they are supposed to create. Use a physical spacer—such as a small piece of thick cardboard or a plastic tile spacer—to ensure that every single gap in your grid is identical.
Harsh Sunlight Glare
In sunny, tropical regions, the afternoon sun can be incredibly intense. Placing a large cluster of highly reflective mirror stickers directly opposite a west-facing window can result in severe glare during peak daylight hours.
This intense reflection can bounce blinding light directly into your main seating areas, making it uncomfortable to watch television or converse with guests. Furthermore, prolonged exposure to concentrated, direct midday sunlight can cause localized heat buildup on opposite surfaces and accelerate the fading of nearby fabrics or wooden furniture. Observe how sunlight moves through your room throughout the day before finalizing your layout.
Maintenance and Safe Removal
To keep your mirror wall looking pristine and to ensure you can reclaim your security deposit when moving out of a rented space, you must follow proper maintenance and removal procedures.
Safe Cleaning Routine
Acrylic and PET plastic surfaces are significantly softer than traditional silica glass, making them highly susceptible to scratching. Never use abrasive scrubbing pads, paper towels, or dry, dusty cloths to clean your mirror stickers, as these will leave behind micro-scratches that permanently dull the reflective finish.
Instead, use a clean, damp microfiber cloth and a mild solution of soapy water or a specialized acrylic cleaner. Gently wipe the surface in straight lines rather than circular motions. Avoid using standard glass cleaners that contain high concentrations of ammonia or alcohol, as these harsh chemicals can chemically degrade the plastic over time, causing it to turn cloudy or yellow.
Adhesive Softening for Removal
If you are renting or simply want to change your decor, do not attempt to rip the mirror stickers off the wall while they are cold. The strong adhesive backing can easily pull away layers of drywall paper or strip the underlying paint, leaving behind unsightly patches that require patching and repainting.
To remove the stickers safely, use a household hairdryer set to a low or medium warm setting. Hold the hairdryer a few inches away from the sticker and sweep the warm air across the surface for 30 to 60 seconds. The heat will gently soften the adhesive backing, making it pliable. Once warmed, carefully slip a thin plastic putty knife or your fingernail under one corner and slowly peel the sticker away from the wall at a 180-degree angle.
Residue Cleanup and Testing
After peeling away the stickers, you may find a sticky layer of adhesive residue left behind on your paint. To clean this off without damaging your wall, use a gentle solvent such as isopropyl rubbing alcohol or a specialized, mild adhesive remover.
Before applying any solvent to the main wall, perform a critical safety check. Apply a small drop of the solvent to a hidden area of the wall—such as behind a baseboard or inside a closet—and rub it gently with a cloth. Wait a few minutes to ensure the solvent does not strip, discolor, or dissolve your wall paint. Once verified safe, gently blot and wipe away the adhesive residue on your main wall, restoring the surface to its original condition.

Community discussion
Share your experience or ask a question. Comments are reviewed before publication.