
Placing self-adhesive mirror stickers strategically is one of the most effective, budget-friendly ways to make a small room feel significantly larger and brighter. By reflecting both natural and artificial light, these lightweight decorative accents trick the eye into perceiving depth where there is none, effectively doubling the visual boundaries of a compact space. In typical Philippine homes, such as studio condominiums, cozy apartments, or high-density urban bedrooms, maximizing every square inch of visual space is essential for creating a comfortable, airy living environment.
Unlike heavy glass mirrors that require drilling, wall anchors, and professional installation, self-adhesive mirror stickers offer a flexible, DIY-friendly alternative. They allow you to experiment with various configurations, from geometric grids to full-length vertical columns, without permanently damaging your walls or breaking your budget. However, achieving a flawless, distortion-free reflection that genuinely enhances your room requires careful planning, precise wall preparation, and strategic placement.
Assess Your Wall and Choose the Right Mirror Stickers
Before purchasing any mirror stickers, you must thoroughly evaluate your room’s physical conditions to ensure the material and adhesive are compatible with your living space. Start by measuring the exact wall area you intend to cover, taking note of any permanent fixtures such as light switches, electrical outlets, air conditioning vents, or baseboards. Mapping out these dimensions beforehand prevents you from running out of space or having to awkwardly cut the stickers around obstacles during installation.
Products mentioned in this guide
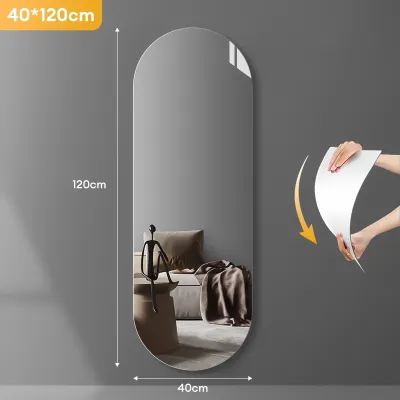
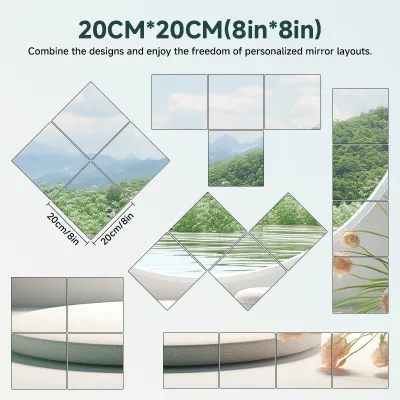

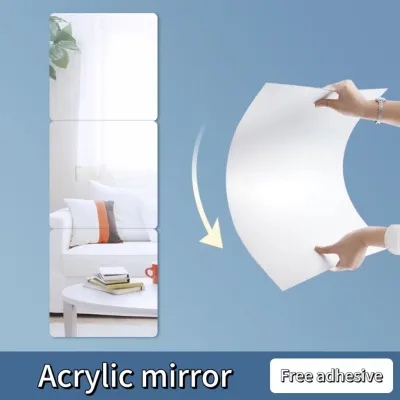
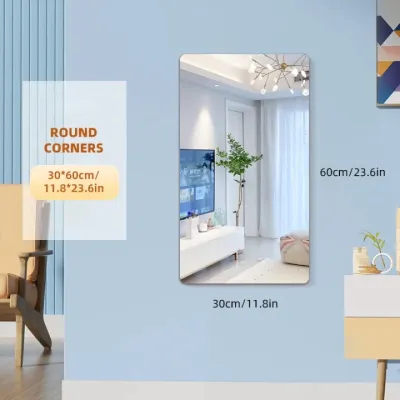
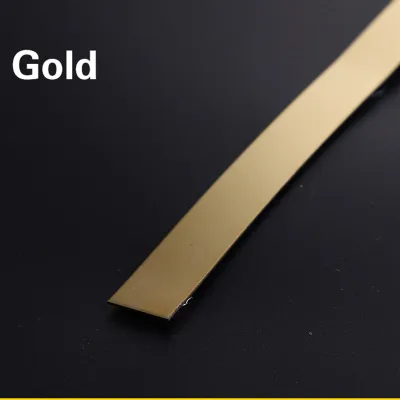
Prices are valid at publication and may change. Please refer to the product page for the latest price.
Next, inspect the texture and condition of your wall surface. Self-adhesive mirror stickers require a completely flat, smooth, and non-porous surface to adhere properly and provide a clear, undistorted reflection. Ideal surfaces include smooth painted drywall, polished wood panels, flat ceramic tiles, or glass. If your wall has a rough plaster finish, prominent paint drips, or textured wallpaper, the adhesive backing will not make full contact, leading to premature peeling or a warped, funhouse-mirror effect.
Additionally, consider the local climate when assessing your walls. In the tropical, high-humidity environment of the Philippines, walls in non-air-conditioned rooms can collect subtle moisture, which weakens standard adhesives over time. If you notice any signs of bubbling paint, dampness, or powdery efflorescence on your concrete walls, these issues must be resolved before application.
Finally, select sticker sizes and shapes that complement your room’s proportions. Large, square panels work exceptionally well for creating simulated window panes, while long vertical strips can make low ceilings appear taller. Hexagonal or organic shapes add a modern, decorative touch but require more precise spacing to avoid looking cluttered in a very tight room.
Plan the Layout to Maximize the Spatial Illusion
The key to making a small room look bigger lies in how your mirror stickers interact with the surrounding light and furniture. To amplify brightness, position your stickers directly opposite or adjacent to your primary natural light sources, such as a balcony door or a window. When sunlight hits the reflective surface, it bounces deep into the room, instantly softening dark corners and making the entire area feel more open and inviting.

If natural light is limited, you can achieve a similar effect by placing the stickers near primary light fixtures. Positioning them where they can catch and scatter the glow from a warm pendant light, a stylish floor lamp, or wall sconces creates a layered, dynamic lighting scheme. This technique is particularly useful in compact dining areas or windowless hallways, where a well-placed mirror layout can make the space feel less enclosed.
When designing your layout, compare different patterns to see which best suits your room’s existing sightlines. A uniform grid pattern of square stickers mimics the look of a multi-pane window, adding architectural interest and a sense of structured depth. A staggered or brick-like arrangement offers a softer, more contemporary feel that draws the eye horizontally, making narrow walls feel wider. Alternatively, a vertical column of mirrors can draw the eye upward, emphasizing vertical space in rooms with low ceilings.
Be mindful of what your mirrors will reflect. Avoid placing them directly opposite cluttered shelving units, laundry areas, or busy utility corners, as reflecting clutter will only make the room feel twice as crowded. Furthermore, ensure the mirrors are not positioned at an angle that catches direct, unshielded light bulbs, which can cause uncomfortable glare and eye strain for anyone sitting in the room.
Prepare the Surface and Gather Your Tools
Proper surface preparation is the single most critical factor in ensuring your mirror stickers stay securely on the wall without peeling or lifting at the corners. Begin by thoroughly cleaning the designated wall area to remove dust, grease, fingerprints, and ambient moisture. A simple mixture of water and a few drops of mild dish soap applied with a damp cloth is usually sufficient; avoid using heavy chemical cleaners that leave a slippery residue behind. Allow the wall to dry completely for several hours before proceeding.
While the wall is drying, gather all the essential tools to ensure a smooth, uninterrupted installation process. You will need a reliable measuring tape, a spirit level (or a leveling app on your smartphone), a pencil for marking guidelines, masking tape, and a soft squeegee or a clean, dry microfiber cloth. Having these items on hand prevents you from rushing or making alignment errors while the adhesive is exposed.
Using your spirit level and measuring tape, carefully map out the exact boundaries of your layout on the wall. Lightly mark the corners and edges with a pencil, then apply strips of masking tape along these lines to serve as physical guides. This step is crucial because even a minor alignment error of a few millimeters can accumulate across a multi-piece grid, resulting in a noticeably crooked final display.
Step-by-Step Installation Guide
Once your guidelines are set and the wall is completely dry, you can begin the application process. To avoid getting fingerprints on the reflective surface, handle the stickers by their edges or wear clean cotton gloves. If your mirror stickers come with a protective film on the front, leave this film on until the very end of the installation to prevent accidental scratches during handling.
Start with the first piece of your layout, typically the top-left or center tile depending on your design. Partially peel back the protective paper from the adhesive backing, exposing only the top two to three inches. Carefully align this exposed edge with your marked pencil lines or masking tape guides on the wall. Once you are certain the alignment is perfectly straight, gently press the exposed adhesive onto the wall surface.
Slowly peel away the remaining backing paper with one hand while using your other hand to press the sticker onto the wall. Work from the center of the sticker outward toward the edges, using a soft squeegee or a folded microfiber cloth. Apply firm, even pressure in a systematic sweeping motion to push out any trapped air bubbles. If you encounter a large bubble, gently lift the sticker from the nearest corner, smooth it down again, and continue pressing outward.
For multi-piece layouts, maintaining consistent spacing is vital for a polished, professional look. If you are aiming for a seamless, continuous mirror wall, ensure the edges butt up tightly against each other without overlapping, as even a tiny overlap can cause the flexible material to bend and distort the reflection. If your design incorporates gaps between the tiles, use small cardboard spacers or pieces of masking tape of equal width to keep the gaps perfectly uniform throughout the entire grid.
After all the pieces are in place, go over the entire layout once more with your cloth, applying firm pressure along all the outer edges and corners. This ensures the adhesive bonds completely with the wall surface. Finally, carefully peel off the protective film from the front of the stickers to reveal the clean, highly reflective surface underneath.
Common Mistakes and Safety Boundaries to Avoid
One of the most common mistakes when installing self-adhesive mirror stickers is applying them to unstable or unsuitable surfaces. Avoid sticking them onto freshly painted walls (wait at least two to three weeks for the paint to fully cure), peeling paint, damp concrete, or delicate wallpaper. Applying stickers to these surfaces can cause the paint or wallpaper to tear under the weight of the mirror, creating a falling hazard and damaging your walls.
Another frequent issue is visual distortion. Unlike rigid glass mirrors, self-adhesive mirror stickers are typically made of flexible acrylic or PET plastic. If the underlying wall has even minor bumps, texture, or curvature, the flexible sticker will conform to those imperfections, resulting in a distorted, wavy reflection. To minimize this, always verify that your wall is exceptionally flat, and avoid stretching or pulling the sticker during application, as tension can warp the plastic material.
Additionally, keep in mind the safety boundaries regarding moisture and heat. Standard self-adhesive backings are not designed to withstand constant exposure to steam, direct water splashes, or extreme heat. If you plan to place mirrors in a high-humidity bathroom or directly behind a kitchen stove, standard stickers will likely peel off within a few weeks. For these challenging environments, it is best to stop and consult a professional installer or opt for traditional glass mirrors secured with moisture-resistant mechanical fasteners.
Routine Maintenance and Safe Removal Techniques
To keep your mirror stickers looking clear and vibrant, establish a gentle routine maintenance schedule. Because acrylic and PET plastic are softer than glass, they are highly susceptible to scratching. Never use abrasive scrubbing pads, harsh chemical solvents, or ammonia-based glass cleaners, as these can cloud the reflective surface and degrade the adhesive along the edges. Instead, gently wipe the surface with a soft, clean microfiber cloth slightly dampened with water or a highly diluted, non-abrasive soap solution.
Before applying any new cleaning solution to the entire layout, always test a small, inconspicuous corner of one sticker. This check ensures the liquid does not seep behind the edges and compromise the adhesive backing. After wiping, immediately dry the surface with a separate dry microfiber cloth to prevent water spots from forming.
When it comes time to remove the stickers—whether you are moving out of a rental or changing your decor—rushing the process can tear the drywall paper or pull off chunks of paint. To minimize damage, use a handheld hairdryer on a low to medium heat setting to gently warm the sticker. The heat softens the adhesive backing, making it pliable. Slowly and carefully peel the sticker away from the wall starting from one corner, keeping the sticker at a sharp angle to the wall as you pull.
Keep in mind that if the underlying paint is older, poorly primed, or applied over chalky plaster, some minor paint lifting may still occur despite using heat. Any remaining adhesive residue on the wall can usually be cleaned off with a mild adhesive remover or by gently rubbing the spot with a warm, soapy cloth.
Frequently Asked Questions (FAQ)
Can self-adhesive mirror stickers be applied to textured or wallpapered walls?
Applying self-adhesive mirror stickers directly to textured walls or delicate wallpaper is generally not recommended. Textured surfaces, such as orange peel plaster or rough concrete, significantly reduce the contact area for the adhesive, which often leads to the stickers falling off or warping. Delicate wallpaper can easily tear under the weight of the sticker or be ruined during removal. If you must use them on these surfaces, consider mounting the stickers onto a thin, smooth plywood or MDF board first, then hanging the board using standard picture-hanging hardware.
How do I remove mirror stickers without damaging the paint?
The safest way to remove mirror stickers without damaging your wall paint is to use heat to soften the adhesive. Direct a hairdryer on a low heat setting toward the edges of the sticker for a few minutes. Once the adhesive becomes warm and soft, slowly peel the sticker back from one corner at a 180-degree angle, pulling parallel to the wall rather than straight outward. While this method greatly reduces the risk of damage, older or poorly bonded paint layers may still experience minor lifting, so patience is key.
Community discussion
Share your experience or ask a question. Comments are reviewed before publication.