
Placing adhesive mirrors strategically opposite or adjacent to light sources, at eye level, or behind key furniture pieces is the most effective way to make a small room feel twice its size. In compact living spaces, such as studio apartments or condominiums in the Philippines, maximizing every square inch of visual space is essential. Using a salamin na dinidikit sa wall offers a budget-friendly, drill-free solution to open up cramped interiors without major renovations. However, simply sticking these mirrors anywhere will not yield the desired effect. To truly expand your room’s visual boundaries, you must understand how to manipulate light, choose the right mirror types for your climate, and position them with deliberate intent.
Understanding Light and Reflection in Small Spaces
When light strikes a reflective surface like a mirror, it bounces off at the same angle it arrived. This reflection tricks the human brain into perceiving depth where a solid wall actually stands. In a small room, solid walls act as visual dead ends. By introducing a mirror, you effectively break that wall, creating the illusion of an adjoining space or an extended hallway.
The primary goal of using mirrors in tight quarters is to amplify ambient light and push back the visual boundaries of the room. When a mirror reflects an open window or a bright light fixture, it doubles the light source, making the entire space feel brighter and more open. However, this technique requires careful planning. If placed incorrectly, a mirror can bounce harsh glare directly into your eyes or reflect cluttered areas, which actually increases visual noise and makes the room feel more chaotic and cramped instead of spacious.
Products mentioned in this guide
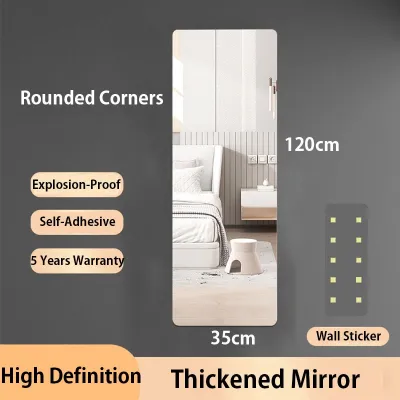
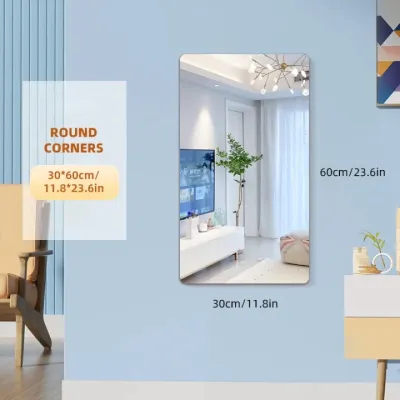
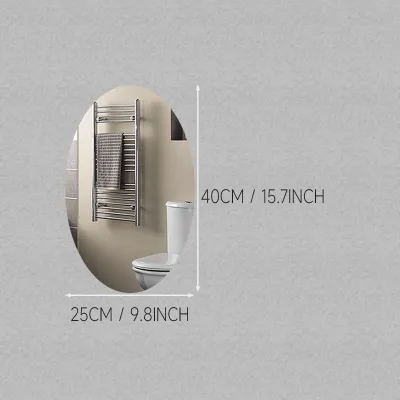

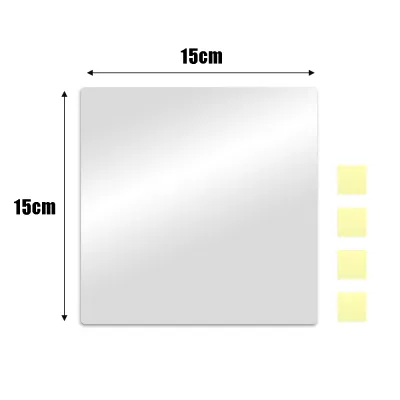
Prices are valid at publication and may change. Please refer to the product page for the latest price.
Selecting the Right Salamin na Dinidikit sa Wall for Compact Rooms
Before purchasing, you must evaluate the options available on the market. Adhesive mirrors generally fall into two categories: lightweight acrylic sheets and heavier glass tiles. Acrylic mirrors are highly popular because they are shatterproof and incredibly light, making them easy to mount with simple double-sided tape. However, acrylic is flexible; if your wall has even minor bumps or texture, the acrylic sheet will bend slightly, resulting in a distorted, funhouse reflection. Glass mirrors offer a perfectly flat, crystal-clear reflection, but they are significantly heavier and carry a higher risk of falling if the adhesive fails.

Frameless mosaic tiles allow you to customize the layout to fit awkward wall spaces, such as narrow pillars or the gaps between shelves. Larger pre-framed stick-on panels provide a more seamless, high-end look but require a much stronger bond. While basic acrylic sets can range from ₱150 to ₱500 on online marketplaces, high-quality glass tile sets may cost ₱1,000 or more, reflecting their superior clarity and weight.
In the tropical climate of the Philippines, humidity levels fluctuate dramatically, especially during the monsoon season. High humidity and heat can rapidly degrade standard double-sided foam tapes, causing the adhesive to turn gooey and lose its grip. When choosing a salamin na dinidikit sa wall, always check the manufacturer’s weight limits and environmental specifications. Look for moisture-resistant adhesives if you plan to install them in areas close to kitchens or bathrooms. Additionally, verify wall surface compatibility on the product label; some adhesives are formulated only for smooth glass, ceramic tiles, or sealed wood, and will fail on painted concrete or drywall.
Strategic Placement Techniques to Expand Your Space
Positioning is everything when working with reflective surfaces. To make a small room look bigger, you must treat your mirrors as visual windows that invite light and depth into the space.
Bouncing Natural and Artificial Light
The most effective way to brighten a dark, cramped room is to place your mirrors directly opposite or adjacent to an existing window. When natural sunlight streams in, the mirror captures it and projects it deep into the room’s darker corners. If your room lacks windows or has limited natural light, you can achieve a similar effect with artificial lighting.
Position your adhesive mirrors behind or directly adjacent to light sources, such as floor lamps, table lamps, or wall sconces. This setup doubles the light output and creates a warm, layered glow that softens harsh shadows. However, avoid placing mirrors directly opposite high-wattage, exposed-bulb fixtures. This can cause blinding glare that makes the room uncomfortable to sit in. Furthermore, always check what the mirror will reflect. Avoid pointing a mirror toward a cluttered clothes rack, a trash bin, or a dark, empty hallway, as this will only duplicate the visual clutter and make the room feel disorganized.
Extending Sightlines Behind Furniture
Placing mirrors behind major furniture pieces is a classic interior design technique that alters the perceived depth of a room. When you place a large adhesive mirror or a series of mirror tiles behind a sofa, a low console table, or a bed headboard, it creates the illusion that the room continues beyond that piece of furniture.
To make this look intentional and seamless, leave a small gap of about 2 to 5 inches between the top of the furniture and the bottom of the mirror. Alternatively, use a low-profile frame or border. This gap prevents the mirror from looking like an accidental architectural mistake and protects the glass from being bumped when someone sits on the sofa or bed. To maintain visual harmony, anchor the reflection by using a symmetrical arrangement of furniture and decor. For instance, placing matching side tables or identical indoor plants on either side of the mirrored area frames the reflection, making the illusion of an extended room feel balanced and natural.
Building Mirror Grids and Gallery Walls
If you want to cover a large wall area but are concerned about the weight of a single, massive glass mirror, building a mirror grid is an excellent alternative. By grouping multiple smaller, lightweight stick-on mirrors together, you can create a striking focal point without risking a heavy fall.
You can arrange these tiles in a precise, symmetrical grid or a staggered, gallery-style pattern. To ensure a clean, professional finish, use physical spacers or painter’s tape to maintain consistent gaps—ideally between 1/4 to 1/2 inch—between each tile. A grid that stretches horizontally across the wall will draw the eye outward, making a narrow room feel wider. Conversely, a vertical column of mirrors will draw the eye upward toward the ceiling, creating the illusion of height in rooms with low ceilings.
Step-by-Step Installation for Secure Adhesion
Proper installation is crucial to prevent your mirrors from falling and breaking, especially on typical painted concrete or drywall surfaces found in Philippine homes. Follow these steps carefully:
- Preparation: Begin by thoroughly cleaning the wall surface. Use isopropyl alcohol (70% concentration is ideal) and a lint-free cloth to wipe down the exact area where the mirrors will be placed. This step is critical because it removes dust, grease, fingerprints, and oily residues that prevent the adhesive from bonding. Do not use household glass cleaners or soapy water, as these can leave a thin film behind. Allow the wall to dry completely for at least 15 to 20 minutes before proceeding.
- Layout: Before peeling off any adhesive backing, perform a dry fit. Lay your mirrors out on the floor in your desired pattern to check the spacing and alignment. Once satisfied, use a spirit level, a measuring tape, and painter's tape to mark the exact outer boundaries and grid lines directly on the wall. This ensures your mirrors will be perfectly straight and level, as correcting a crooked adhesive mirror once it touches the wall is incredibly difficult and can damage your paint.
- Application: If your mirrors do not come with pre-applied adhesive, apply the recommended mounting tape or adhesive glue strictly according to the manufacturer's instructions. If using double-sided foam tape, distribute the tape pieces evenly around the perimeter of the mirror back, leaving a small space from the edges so the tape doesn't squeeze out. Press the mirror firmly against the wall, applying even pressure across the entire surface for at least 30 seconds. For larger panels, use painter's tape to temporarily secure the mirror to the wall while the adhesive begins to grip.
- Curing: Do not touch, clean, or apply any pressure to the mirrors immediately after installation. Allow the adhesive to cure fully according to the manufacturer's specified time frame—typically 24 to 48 hours. Keep windows open or use a fan to maintain good air circulation, especially in humid environments, to help the adhesive set properly.
- Safety Boundary: Heavy or oversized glass mirrors must never rely solely on double-sided adhesive tape. If a mirror exceeds the adhesive's rated weight limit, or if your wall is textured, crumbling, powdery, or freshly painted (less than 4 weeks old), stop the installation immediately. In these conditions, the adhesive will fail, risking severe damage or injury. Under these circumstances, consult the manufacturer's guidelines, use mechanical wall anchors, or hire a qualified professional to mount the mirrors securely.
Common Placement Mistakes and Safety Boundaries
While adhesive mirrors are incredibly versatile, certain placement errors can ruin the visual effect or create safety hazards in your home.
- Visual Mistakes: One of the most common errors is hanging mirrors too high. A mirror should ideally be placed at eye level (roughly 57 to 60 inches from the floor to the center of the mirror) so that it reflects the living space rather than just the ceiling or the tops of door frames. Additionally, avoid using too many mirrors throughout a single room. While a well-placed mirror opens up a space, covering every wall in mirrors creates a disorienting, distracting funhouse effect that makes it difficult to relax.
- Safety Risks: Never place heavy, glass-based adhesive mirrors directly above beds, cribs, baby changing tables, or primary seating areas like sofas. Even the strongest adhesives can degrade over time due to heat, humidity, or wall vibrations. If a mirror must go above these high-traffic areas, ensure it is lightweight acrylic or secured with secondary mechanical supports such as brackets or screws.
- Maintenance: Regularly inspect your adhesive mirrors, especially if you live in a high-humidity coastal area or a tropical zone. Check the edges periodically to ensure they are still flush against the wall. If you notice any lifting, shifting, or peeling, remove the mirror immediately to prevent a sudden fall, clean the wall, and reinstall it using fresh, high-quality mounting hardware.
Frequently Asked Questions (FAQ)
Can I use adhesive mirrors on textured or painted walls?
Adhesive mirrors require a smooth, flat, non-porous, and structurally sound surface to achieve a full, secure bond. Textured walls, such as those with rough plaster, stucco, or orange-peel finishes, prevent the adhesive tape from making 100% contact with the surface, which drastically reduces its holding power. Painted walls are suitable only if the paint is fully cured (usually requiring at least 28 days after painting) and is not peeling, chalking, or crumbling. If the paint is weak, the adhesive will simply pull the paint layer off the wall, causing the mirror to fall. Before proceeding, check the product label for specific surface compatibility, and test a small, inconspicuous area with a piece of mounting tape first to check its grip.
How do I safely remove stick-on mirrors without damaging the paint?
Removing adhesive mirrors requires patience to avoid tearing the drywall paper or pulling off chunks of concrete paint. Use a handheld hairdryer on a low-to-medium heat setting to gently warm the surface of the mirror. The heat will transfer through the glass or acrylic and soften the adhesive backing underneath. Once the adhesive is warm and pliable, carefully slide a long piece of dental floss, strong fishing line, or a flexible plastic scraper behind the mirror. Use a gentle sawing motion to slice through the softened foam tape. Never pull or pry the mirror forcefully away from the wall, as this will damage the wall surface and potentially shatter glass mirrors. Any remaining sticky residue can be cleaned off using a commercial adhesive remover or a small amount of eucalyptus oil on a clean cloth.
Are adhesive mirrors safe for high-humidity areas like bathrooms?
Standard double-sided adhesive tapes are highly susceptible to moisture and temperature fluctuations. In high-humidity environments like bathrooms, steam and condensation can seep behind the mirror, breaking down the chemical bonds of the adhesive over time. If you want to install adhesive mirrors in a bathroom, you must verify that the product and its adhesive are explicitly rated for wet or high-humidity environments. Ensure the bathroom wall is completely dry and free of moisture during the installation and curing process (avoid showering in that bathroom for at least 48 hours after mounting). For safety and peace of mind, always use mechanical fixings, such as mirror clips or brackets, alongside the adhesive for heavy bathroom mirrors to prevent accidental falls.

Community discussion
Share your experience or ask a question. Comments are reviewed before publication.