
Designing a gallery wall dedicated to BLACKPINK is more than just hanging posters; it is an opportunity to translate the group’s high-energy, fashion-forward aesthetic into a cohesive visual statement for your home. Whether you want to showcase official album art, concert photography, or limited-edition memorabilia, a well-planned layout ensures your collection looks curated rather than cluttered. By balancing bold colors, selecting the right framing materials, and using precise installation techniques, you can create a striking focal point that celebrates your favorite music while elevating your interior decor.
To achieve a professional result, you must approach the project systematically. This guide walks you through defining your design concept, preparing your materials for tropical environmental conditions, choosing a balanced layout, and safely mounting your display to ensure it remains secure and visually stunning for years to come.
Define Your BLACKPINK Aesthetic and Wall Space
Before purchasing frames or driving nails into the wall, you must establish a clear visual theme. BLACKPINK’s imagery spans several distinct design eras, from the gritty, high-contrast street style of their early music videos to the ultra-sleek, minimalist luxury of their solo fashion campaigns. You might opt for a classic “black and pink” color scheme featuring high-contrast prints, a vibrant neon-accented theme, or a sophisticated monochrome palette that seamlessly blends with a modern minimalist living room. Deciding on this overarching aesthetic first will guide your choices for frame colors, matting, and supporting decor.
Products mentioned in this guide



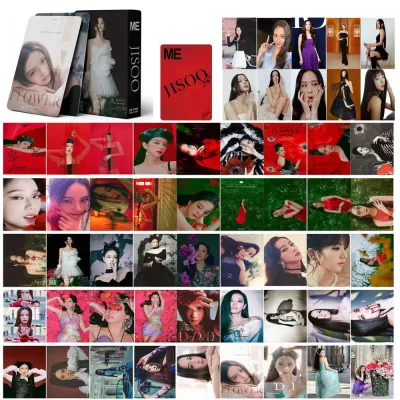



Prices are valid at publication and may change. Please refer to the product page for the latest price.
Once you have chosen your design direction, turn your attention to the physical space. Use a metal measuring tape to record the width and height of the available wall area. To visualize the total footprint of your gallery wall without committing to a layout, mark the outer boundaries on the wall using low-tack painter’s tape. This step is crucial for preventing overcrowding, especially in smaller rooms or apartments where large displays can quickly overwhelm the surrounding furniture.
Finally, assess the construction of your wall. In many homes in the Philippines, walls are constructed from solid concrete, hollow blocks, or plaster-coated masonry, while others utilize drywall over wood or metal studs. Knowing your wall type is essential because it dictates the tools and hardware you will need. Concrete walls require a masonry drill bit and plastic wall anchors for secure mounting, whereas drywall allows for simpler self-drilling anchors or traditional picture hangers. Additionally, consider the room’s humidity levels; tropical climates can introduce moisture that affects both wall adhesives and paper prints over time.
Select and Prepare Your Artwork and Frames
A dynamic gallery wall relies on a thoughtful mix of textures, sizes, and mediums. Instead of using only standard posters, combine official album covers, concert photos, typographic lyric prints, and smaller items like photocards or ticket stubs. Mixing these elements creates layers of visual interest. For instance, you can place a large, high-quality group portrait as the central anchor and surround it with smaller, framed solo shots, minimalist graphic prints of song titles, or even a framed vinyl record.

When selecting frames, choose styles that complement your chosen aesthetic while maintaining structural integrity. Sleek black aluminum frames offer a modern, industrial edge, while glossy pink or clean white wooden frames can soften the look. Always verify the inner dimensions of the frames and matting boards to ensure they fit your prints perfectly without bending or pinching the edges. If you are framing valuable official merchandise or autographed items, look for acid-free mat boards and backing materials to prevent chemical yellowing over time.
Environmental protection is another critical factor, particularly in bright, sunlit rooms. Standard frame glass can create intense glare, making it difficult to see your prints from different angles, and prolonged exposure to ultraviolet (UV) rays will cause vibrant pink inks to fade. To protect your collection, consider frames equipped with UV-resistant acrylic or non-glare museum glass. This is especially important if your gallery wall is positioned opposite a large window that receives direct afternoon sunlight.
Choose a Gallery Wall Layout Template
The arrangement of your frames determines the overall mood of the display. A structured grid layout is excellent if you prefer a clean, symmetrical, and modern look. This template works best when you have frames of identical sizes and orientations, such as a series of four solo member portraits. A grid requires absolute precision during installation, as even a millimeter of misalignment will be highly noticeable.
If you have a diverse collection of frame sizes, shapes, and three-dimensional memorabilia, an eclectic or salon-style layout is the ideal choice. This approach allows you to mix horizontal and vertical frames, shadow boxes, and small decorative shelves around a central focal point. While it appears casual, a successful salon layout still requires balance; distribute the visual weight evenly so that one side of the display does not look significantly heavier or darker than the other.
For unique spaces like stairwells, angled walls, or narrow hallways, a diagonal or staircase layout can create a dynamic sense of movement. This style aligns the bottom or top edges of the frames along an imaginary sloping line, guiding the viewer’s eye through the space. Whichever layout you choose, always test the arrangement on the floor first. Lay out all your physical frames on a clean blanket, adjust their positions until you are satisfied with the balance of colors and sizes, and take a clear reference photo from directly above using your smartphone.
Step-by-Step Arrangement and Hanging Guide
To transfer your floor layout to the wall accurately without making unnecessary holes, use paper templates. Trace the outline of each frame onto kraft paper, newspaper, or wrapping paper, and cut them out. Mark the exact position of the hanging bracket or wire on each paper template. Tape these templates to the wall using painter’s tape, adjusting their positions until the entire composition matches your reference photo and sits level.
When you are ready to hang the frames, select your hardware based on the weight of each frame and your wall type. Always check the hardware manufacturer’s packaging for the certified weight limit. For concrete walls, drill a pilot hole using a masonry drill, insert a plastic wall anchor, and secure a screw or hook. For drywall, use appropriate toggle bolts or threaded anchors for heavier frames. If you are budgeting for tools, investing roughly ₱200 to ₱500 in a reliable spirit level and quality painter’s tape will save you significant frustration during this step.
Maintaining consistent spacing between your frames is key to a cohesive look. A standard guideline is to keep a gap of 5 to 8 centimeters between each frame. If your frames are exceptionally large, you can increase this spacing slightly to give each piece breathing room. Rather than relying solely on strict mathematical measurements, step back frequently to assess the visual balance from a distance, as slight adjustments may be needed to account for thick frame profiles or dark matting.
During installation, safety must be your top priority. Always check for hidden utilities behind the wall before drilling or driving nails. If you encounter unexpected resistance, hollow anomalies, or suspect the presence of electrical conduits or water pipes, halt your work immediately. If you are unsure about the safety of drilling in a specific spot, consult a qualified local professional to inspect the wall.
Add Lighting and Final Styling Touches
Proper lighting transforms a simple gallery wall into a dramatic, museum-quality exhibition. To highlight your collection without the need for complex, expensive electrical work, consider installing plug-in picture lights or battery-operated LED art lights. These fixtures can be mounted directly above your largest frames to cast a soft, focused glow downward. If you prefer a more vibrant, youthful energy, USB-powered LED strip lights can be mounted behind the frames to create a colorful halo effect against the wall.
When selecting lighting fixtures, verify all electrical specifications to ensure safety and compatibility. Ensure that any plug-in devices match the standard 220V electrical system used in the Philippines and carry recognized safety certifications, such as the Philippine Standard (PS) mark or Import Commodity Clearance (ICC) sticker. Choose LED bulbs with a color temperature that suits your preference; warm white (2700K to 3000K) creates a cozy, inviting atmosphere, while cool white (4000K to 5000K) offers a crisp, modern look that makes vibrant pinks pop. Avoid high-wattage halogen bulbs, as they emit significant heat that can damage delicate paper prints and melt adhesives over time.
To complete the display, integrate three-dimensional memorabilia alongside your framed art. You can mount small floating shelves to showcase official lightsticks, album packages, or collectible figurines. Ensure these shelves are securely anchored to the wall using appropriate heavy-duty hardware. Finally, organize all electrical cords neatly using adhesive cable clips or paintable cord covers to keep the setup clean, safe, and free of tripping hazards, ensuring your tribute to BLACKPINK remains the beautiful centerpiece of your room.
Frequently Asked Questions (FAQ)
How far apart should the frames be on a gallery wall?
Standard interior design guidelines generally recommend maintaining a consistent gap of 5 to 8 centimeters between frames to create a unified look. However, you should adjust this spacing based on the size of your room and the scale of your frames. Smaller frames or tight spaces benefit from narrower gaps of around 3 to 5 centimeters, which helps the individual pieces read as a single cohesive collection. For very large frames or expansive walls, wider spacing of up to 10 centimeters can prevent the arrangement from feeling cramped.
Can I use adhesive strips for heavy framed posters?
Adhesive strips are highly convenient for lightweight frames, but you must strictly verify the weight capacity printed on the manufacturer’s packaging before relying on them. For heavy, oversized, or glass-fronted frames, traditional mechanical hardware like screws, wall anchors, or concrete hooks is highly recommended to prevent accidental falls. Additionally, avoid using adhesive strips on heavily textured surfaces, freshly painted walls, or in areas with high tropical humidity, as moisture can compromise the adhesive bond over time and cause your framed memorabilia to fall and sustain damage.
Community discussion
Share your experience or ask a question. Comments are reviewed before publication.