
Planning a cohesive lomocard gallery wall requires balancing the small scale of these prints with the physical characteristics of your wall. Lomocards—compact, lightweight photo cards measuring approximately 5.4 by 8.6 centimeters—are excellent for personalized displays, but their small size means a poorly planned layout can easily look cluttered or disorganized. To achieve a polished, gallery-like result, you must systematically plan your spacing, select a layout that matches your room’s aesthetic, and use mounting methods that withstand local environmental factors. By taking the time to measure, mock up, and safely install your display, you can transform a collection of loose prints into a structured visual narrative that remains secure over time.
Gather Your Materials and Measure the Display Area
Because lomocards are exceptionally lightweight and uniform in size, they offer more display flexibility than heavy framed art, but they also require careful handling to prevent curling. You can choose from several display methods depending on your style and the level of permanence you want. Direct-to-wall mounting using specialized adhesives offers a clean, flush look, while mini photo frames or small clipboards add depth and structural protection. Alternatively, low-voltage LED string lights equipped with small wooden pegs or clips create a warm, casual display. If you select string lights, always verify the electrical specifications: choose low-voltage options (typically 5V USB-powered or battery-operated), check for safety certifications such as the Philippine Standard (PS) or Import Commodity Clearance (ICC) marks, and ensure the wattage limits match your power source.
Before purchasing any mounting materials, you must accurately measure your intended wall space to ensure the gallery fits the room’s proportions. Start by identifying the visual center of your display area, which should ideally sit at eye level—generally between 140 and 150 centimeters from the floor. Use a tape measure to determine the overall width and height of the wall section you wish to fill, then mark the outer boundaries lightly with a pencil or painter’s tape. Having these dimensions on hand prevents you from creating a layout that is either too cramped or swallowed up by a large, empty wall. Keep a spirit level, a pencil, and a roll of low-tack painter’s tape nearby, as these tools are essential for keeping your lines straight and your layout centered.
Products mentioned in this guide
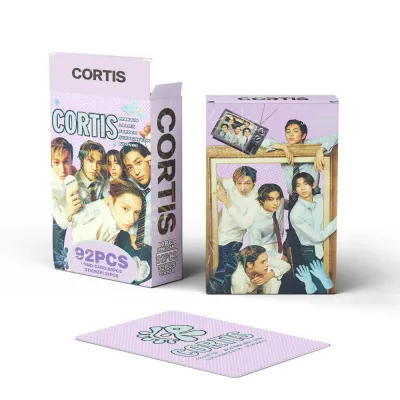

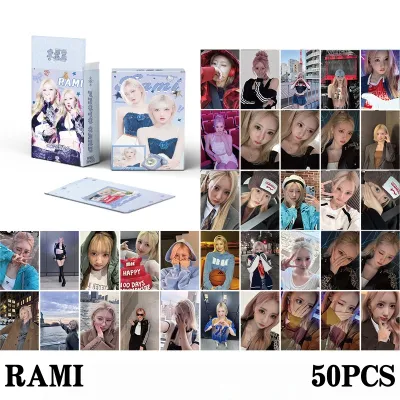

![[55pcs 92PCS 124PCS/box] EN- Lomo Cards / Photo Cards KPOP EN Photocards](https://img.lazcdn.com/g/p/614e6bfccf6a353fb74ae416e536d8b3.jpg_400x400q80.jpg_.webp)


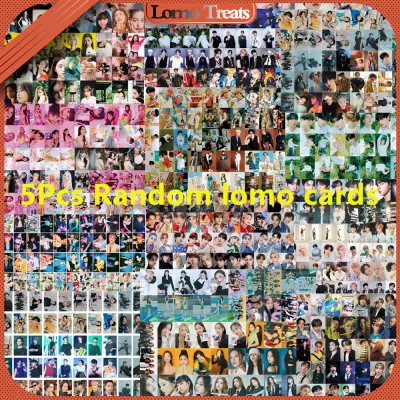
Prices are valid at publication and may change. Please refer to the product page for the latest price.
Choose a Layout Pattern That Suits Small Lomocards
The small footprint of lomocards means that the arrangement pattern you choose will dictate how the eye moves across the display. Unlike larger art pieces that command attention individually, small prints work collectively to form a single visual unit. Selecting a pattern depends on whether you prefer structured, geometric symmetry or a more relaxed, evolving arrangement.

Grid and Linear Arrangements
A grid or linear layout is highly effective if your lomocards are uniform in size and you want a clean, modern, and highly organized aesthetic. This pattern involves aligning your prints in strict rows and columns, creating a balanced block of images that mimics a professional gallery. To execute this successfully, you must use a spirit level to ensure every horizontal and vertical line is perfectly straight. Even a millimeter of misalignment can disrupt the symmetry and make the entire grid look crooked. Because a grid relies on absolute precision, it is less forgiving of physical variations in the cards or slight errors in placement, making careful measurement during the planning phase non-negotiable.
Salon-Style and Organic Clusters
If your collection includes a mix of portrait and landscape orientations, or if you prefer a more eclectic and casual vibe, a salon-style or organic cluster is an ideal alternative. This approach relies on balancing visual weight rather than adhering to strict, symmetrical lines. Begin by placing your largest, darkest, or most visually striking lomocards near the center of the display to act as an anchor. From there, build outward with lighter or smaller cards, mixing orientations to create a dynamic flow. To keep the cluster looking cohesive rather than chaotic, maintain a consistent distance between the cards and ensure the outer boundary of the cluster forms a loose geometric shape, such as an oval or a soft rectangle.
Mock Up the Spacing and Alignment Before Hanging
To avoid damaging your wall paint with trial-and-error placements, you should always create a physical mockup of your gallery wall before using any semi-permanent adhesives or fasteners. Begin by clearing a flat floor space that matches the exact dimensions of your measured wall area. Lay out your physical lomocards, mini frames, or string lights within this boundary, allowing you to experiment with different arrangements without committing to the wall.
As you arrange the cards on the floor, pay close attention to the spacing between each print. For small items like lomocards, keeping a tight, consistent gap of 1.5 to 2 inches (approximately 3.8 to 5 centimeters) helps the individual photos read as a single, unified installation rather than scattered, isolated pieces. If the cards are spaced too far apart, the visual connection is lost, and the gallery will look sparse. Once you are satisfied with the layout on the floor, take a photograph of the arrangement from directly above to use as a visual reference.
Next, translate this floor layout to the wall using the kraft paper template method. Trace the outline of each lomocard or mini frame onto sheets of kraft paper or recycled wrapping paper, cut them out, and label them so you know which photo corresponds to each paper template. Using low-tack painter’s tape, stick these paper templates onto your wall in the exact arrangement you designed on the floor. This step gives you a realistic, three-dimensional preview of how the gallery wall interacts with your room’s lighting, furniture, and overall scale. Step back to the opposite side of the room to evaluate the balance; if a section feels too heavy or misaligned, you can easily reposition the paper templates without leaving marks or peeling the paint.
Install the Gallery Wall Safely and Securely
Once your paper templates are perfectly positioned, you can begin the physical installation. The mounting hardware you choose must match both the weight of your display items and the specific characteristics of your wall surface. For lightweight, unframed lomocards, double-sided adhesive strips designed for posters or high-quality adhesive putty are popular options because they do not require drilling. If you are hanging mini frames, small metal picture hooks or specialized hook-and-loop adhesive strips are more appropriate to support the additional weight securely.
When you are ready to hang the display, follow a systematic sequence to ensure accuracy. Always start with your center anchor piece—the middle card or frame in your layout—and work your way outward. Remove the corresponding paper template, clean the wall area lightly with a dry microfiber cloth, and apply your mounting hardware according to the manufacturer’s instructions. Use your spirit level to verify that the piece is perfectly straight before pressing it firmly against the wall. By working from the center outward, any minor spacing adjustments you need to make along the way will remain balanced across the entire display, rather than accumulating on one side.
Safety and Wall Protection
Before applying any adhesive products, you must evaluate your wall’s surface condition to prevent damage or sudden falls. Do not use adhesive strips or putty on heavily textured walls, freshly painted surfaces, or walls with peeling paint or wallpaper. In tropical climates, such as in the Philippines, high humidity can compromise the bond of standard adhesives, causing them to slip or fail over time. If your walls were recently painted, you must allow the paint to cure fully—typically at least 28 days—before applying any adhesives, as uncured paint is highly susceptible to peeling.
Always prioritize safety and material preservation by checking the adhesive product’s label and your wall paint manufacturer’s guidelines first. If the instructions conflict, if your wall surface is fragile or historic, or if a test adhesive strip fails to hold a card securely, stop the installation immediately. In these scenarios, do not force the adhesive to work; instead, switch to mechanical fasteners, such as small finishing nails or picture hooks, or consult a professional installer to avoid costly repairs to your wall plaster.
Maintain, Protect, and Refresh Your Photo Display
A completed gallery wall requires ongoing care to protect the physical prints from environmental degradation and to keep the arrangement looking fresh. Lomocards printed on standard photo paper are highly sensitive to environmental factors. Direct sunlight is the primary cause of premature fading and discoloration; therefore, you should position your gallery wall away from windows that receive direct afternoon sun. Additionally, high-humidity environments can cause unframed paper prints to absorb moisture, leading to unsightly curling, warping, or even mold growth. If your room is prone to humidity, running an air conditioner or a dehumidifier periodically can help preserve the structural integrity of the paper.
Regular cleaning is also necessary to prevent dust buildup, which can dull the colors of your prints. For unframed lomocards, avoid using liquid cleaners or damp cloths, which can warp the paper or smudge the ink. Instead, use a clean, dry, soft-bristled brush or a manual air blower (such as those used for camera lenses) to gently dislodge dust. If your cards are housed behind glass or acrylic in mini frames, you can use a lightly dampened microfiber cloth to clean the glass, taking care not to let any moisture seep behind the frame backing where it could reach the photo.
When the time comes to refresh your gallery with new photos, removing the old adhesive correctly is crucial to protect both the prints and the wall paint. If you are using stretch-release adhesive strips, never pull the tab outward or away from the wall, as this will tear the paint or bend the card. Instead, hold the top of the strip gently with one hand and slowly pull the release tab straight down, parallel to the wall surface. This action stretches the adhesive polymer, causing it to release its grip cleanly without leaving residue or pulling off the plaster.
Frequently Asked Questions (FAQ)
How do I protect lomocards from fading in bright or humid rooms?
To protect your lomocards from environmental damage, consider placing them behind UV-filtering glass or acrylic within mini frames. If you prefer an unframed look, you can apply a light, even coat of a protective UV-resistant matte spray designed specifically for photo prints, ensuring you test it on a spare print first to verify compatibility with the ink. Keeping the room well-ventilated or using a small dehumidifier will also prevent the paper from absorbing moisture and curling.
Can I hang unframed lomocards on textured or freshly painted walls?
Adhesive putty and mounting strips generally fail to bond securely with textured walls because the uneven surface limits the contact area, and they can easily tear paint away from freshly painted surfaces that have not fully cured. For textured walls, it is safer to hang a grid of string lights from small, discreet nails or hooks, using wooden clips to hold the cards. For recently painted walls, wait at least 28 days for the paint to cure completely, or use small frames suspended from traditional picture hooks and nails to avoid adhesive damage.
Community discussion
Share your experience or ask a question. Comments are reviewed before publication.