
Creating a personalized photo wall, or potohan, transforms an empty wall into a storytelling centerpiece. Planning this project from scratch requires a systematic approach: measuring your space, choosing a layout style, mocking up the frames on a flat surface, and transferring those measurements precisely to the wall before driving in a single nail. By taking the time to plan, you avoid unnecessary holes, misaligned frames, and visual clutter.
In tropical environments like the Philippines, planning a gallery wall also means accounting for unique environmental factors. High humidity can warp paper prints or cause cheap adhesives to fail over time. Selecting the right materials, understanding your wall construction, and using a methodical layout process ensures your display remains secure and visually striking for years to come.
Assess Your Wall Space and Gather Essential Tools
Before unboxing your frames, you must thoroughly evaluate the physical canvas of your wall. Measure the total width and height of the designated area using a reliable metal measuring tape. Note any permanent fixtures that could disrupt your layout, such as light switches, electrical outlets, wall-mounted fans, air conditioning units, or architectural trim. If the wall sits behind furniture like a sofa or a console table, measure the height of that furniture to ensure your lowest frames hang at least 15 to 20 centimeters above the backrest to prevent accidental bumps.
Products mentioned in this guide
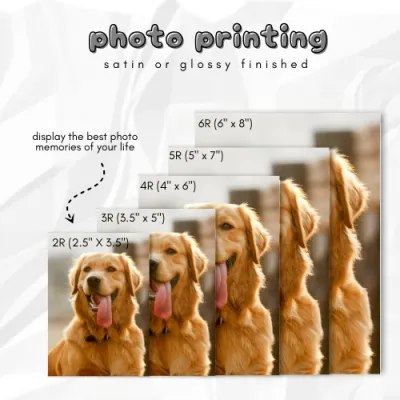

Prices are valid at publication and may change. Please refer to the product page for the latest price.
Gathering the correct tools beforehand prevents interruptions and ensures precision. You will need a standard measuring tape, a reliable spirit level to guarantee straight lines, a pencil for erasable markings, and low-tack painter’s tape. Depending on your wall type, you will also need a hammer, a drill with masonry bits, or specialized adhesive strips. Having a step stool or ladder is also essential if your layout extends toward high ceilings, ensuring you can work safely at eye level.
Select a Layout Style and Mock Up the Arrangement
Choosing a layout style establishes the visual rhythm of your display. A structured grid layout uses identical frame sizes arranged in neat, symmetrical rows and columns, creating a clean, modern, and formal look. This style works exceptionally well for cohesive photo series, such as black-and-white portraits or architectural prints. For a more relaxed and personal feel, an eclectic salon hang mixes different frame sizes, colors, and textures around a central focal point, allowing your collection to grow organically over time. Alternatively, a linear arrangement aligns frames along a single horizontal or vertical centerline, offering a balanced yet flexible compromise.

To avoid turning your wall into a grid of mistaken drill holes, always mock up your arrangement on a flat surface first. Clear a large section of the floor or a dining table that matches the dimensions of your wall space. Lay out your frames and experiment with different configurations. Start by placing the largest or most visually dominant frame near the center or slightly off-center as your anchor piece, then arrange the smaller frames around it.
As you arrange the mockup, focus on balancing the visual weight of the display. Distribute dark and light frames evenly so one side does not feel heavier than the other. Mix horizontal and vertical orientations to keep the eye moving across the layout. Maintain a consistent spacing between frames—typically 5 to 8 centimeters—to ensure the arrangement feels cohesive rather than cluttered. Take a photo of your finalized floor mockup from directly above to serve as your visual reference guide.
Transfer the Layout to the Wall with Precision
Translating your floor mockup to a vertical wall requires a systematic transfer method. One of the most reliable techniques involves using low-tack painter’s tape to map out the outer boundaries of your entire gallery layout on the wall. If you are using a linear or symmetrical grid layout, use the painter’s tape to run a perfectly level centerline across the wall. This physical line serves as a constant visual anchor, ensuring your frames do not slowly drift upward or downward as you hang them.
To pinpoint the exact location for each hanger, you must account for the hardware on the back of each frame. Do not simply measure from the top of the frame; instead, pull the hanging wire or hook upward to simulate the tension of it hanging on a nail. Measure the distance from the top edge of the frame to this taut hanging point. On your wall, measure down from where the top of the frame should sit by this exact distance, and mark that spot with a pencil.
Verify every single pencil mark with your spirit level before picking up a hammer or drill. Hold the level flat against the wall, aligning it with your marked hanging points to confirm they are perfectly horizontal. For multi-frame grids, double-check the vertical alignment between rows. Taking an extra five minutes to measure twice and verify alignments at this stage saves hours of patching and repainting later.
Hang the Frames and Fine-Tune the Display
With your hanging points clearly marked and verified, you can begin installing the hardware. Work from the center outward, starting with your anchor frame. If you are using traditional nails or screws, drive them into the wall at a slight downward angle to provide maximum holding strength. Ensure the hardware is seated firmly before gently hanging the frame.
Once a frame is on the wall, place your spirit level on top of it to make sure it sits perfectly straight. Even a millimeter of tilt can disrupt the clean lines of a gallery wall, especially in structured grid layouts. If a frame tends to shift or tilt on its single hanging point, place a small piece of removable mounting putty or a rubber bumper on the bottom corners of the frame to grip the wall and lock it in place.
After all the frames are hung, step back at least two to three meters to evaluate the entire display. Look at the photo wall as a single, unified composition rather than a collection of individual pictures. Check that the spacing between frames looks uniform and that the overall layout feels balanced within the room. Make minor adjustments to the frame angles or spacing until the entire arrangement feels visually harmonious.
Match Hanging Hardware to Wall Types and Weight Limits
The structural integrity of your photo wall depends entirely on matching your hanging hardware to the specific wall material. In many homes, interior walls are constructed from solid concrete, hollow blocks, or plaster over masonry. Driving a simple nail into these hard surfaces will only bend the nail and damage the plaster. For masonry walls, you must use a drill with a masonry bit, insert plastic wall anchors, and secure them with screws. For lightweight frames on concrete, specialized hardwall plastic hangers with pre-installed steel pins can be tapped in gently with a hammer.
If your home features drywall or plywood partitions, you have different options. Lightweight frames can hang on standard picture hooks driven directly into the drywall. For heavier frames, you must locate the wooden or metal studs behind the wall using a stud finder, or use hollow-wall anchors like toggle bolts or expansion anchors to distribute the weight safely.
Adhesive-based hanging strips are popular for damage-free installation, but they come with strict limitations. Always check the manufacturer’s weight limits on the packaging and weigh your framed photos beforehand. In tropical climates, high humidity can weaken the adhesive bond over time, potentially causing frames to fall. To prevent this, clean the wall surface thoroughly with rubbing alcohol before application, allow it to dry completely, and avoid using adhesives on textured walls or delicate wallpaper. For heavy, oversized, or valuable frames, or when hanging displays in high-reach areas like stairwells, always prioritize safety and mechanical fasteners, or consult a qualified professional installer.
Community discussion
Share your experience or ask a question. Comments are reviewed before publication.