
Creating a DIY gallery wall is an excellent way to personalize a living space, turning a blank wall into a curated visual narrative. The process requires a thoughtful balance of careful measurement, cohesive curation, and precise physical installation. By mapping out your layout beforehand and selecting the appropriate hardware for your wall type, you can achieve a professional-looking display that remains secure over time.
Essential Tools and Materials for Your Project
Before hammering any nails, gathering the correct tools ensures a smooth installation and prevents unnecessary damage to your walls. You will need a reliable measuring tape to calculate spacing, a spirit level to guarantee straight lines, a pencil for marking reference points, and painter’s tape to hold templates in place without peeling off paint. For creating the layout templates, keep a roll of kraft paper or old newspapers and a pair of sharp scissors on hand.
The structural composition of your wall dictates the type of hanging hardware you must use. Drywall typically requires lightweight nails for small frames or plastic toggle anchors for heavier items. Masonry walls, which are highly common in local residential structures, demand masonry nails, concrete screws, or plastic wall plugs paired with a suitable drill. Using the wrong hardware can lead to loose frames or cracked plaster, so identifying your wall material is a critical first step.
Products mentioned in this guide
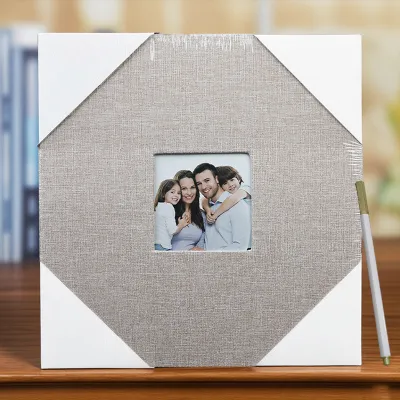
314 Lazada user ratings
DIY customizable layout Sturdy and long-lasting Overall, Five stars well deserved! I’m happy with both the product and the service. Thanks, …Read full reviewShow less
DIY customizable layout Sturdy and long-lasting Overall, Five stars well deserved! I’m happy with both the product and the service. Thanks, Seller, 'Til my next order. ⭐⭐⭐⭐⭐
Sturdy and long-lasting, DIY customizable layout ⭐⭐⭐⭐⭐ Product is as described, I’m satisfied with my purchase. Thanks to the seller. Till next …Read full reviewShow less
Sturdy and long-lasting, DIY customizable layout ⭐⭐⭐⭐⭐ Product is as described, I’m satisfied with my purchase. Thanks to the seller. Till next order. 🙂🙂🙂🙂🙂
good Quality:good Design:good received the items in good condition and the product is nice and made of good materials as advertised by the s…Read full reviewShow less
good Quality:good Design:good received the items in good condition and the product is nice and made of good materials as advertised by the seller.
Sturdy and long-lasting ⭐⭐⭐⭐⭐ Product is as described, I’m satisfied with my purchase. Thanks to the seller. Till next order. 🙂🙂🙂🙂🙂
⭐⭐⭐⭐⭐ Product is as described, I’m satisfied with my purchase. Thanks to the seller. Till next order. 🙂🙂🙂🙂🙂
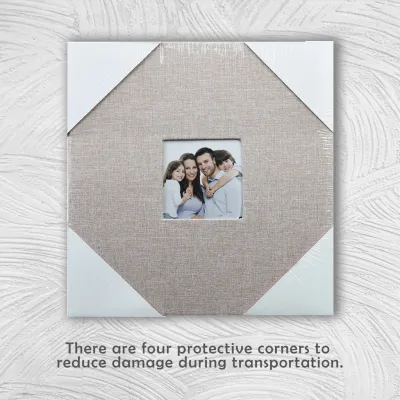
80 Lazada user ratings
I've been wanting to create my 365 days of memories and would love to design my own photo album. This product gives me the freedom to make m…Read full reviewShow less
I've been wanting to create my 365 days of memories and would love to design my own photo album. This product gives me the freedom to make my own styles.
I really like this so much. the quality is so good. Thank you seller. will definitely buy again from this shop. 💖💖
Very good, no damage, I will post the photos when the time comes
Super nice po
ang ganda nya
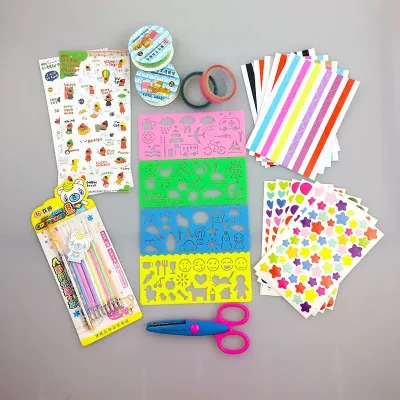
3,839 Lazada user ratings
Quality:9High-quality materials used, Size:10 Design:9 🔨Durability:9 Easy to stick photos with self-adhesive, Variety of color options to ch…Read full reviewShow less
Quality:9High-quality materials used, Size:10 Design:9 🔨Durability:9 Easy to stick photos with self-adhesive, Variety of color options to choose from, Perfect for preserving precious moments, Convenient and user-friendly, Spacious pages for all my memories, Beautiful linen cover design,
Perfect for preserving precious moments, Easy to stick photos with self-adhesive, Variety of color options to choose from, High-quality mate…Read full reviewShow less
Perfect for preserving precious moments, Easy to stick photos with self-adhesive, Variety of color options to choose from, High-quality materials used, Meron lang mga deformation sa shipping siguro . sana next time may bubble wrap na pagshipping para di n ganito.
Beautiful linen cover design, High-quality materials used, Convenient and user-friendly, Great value for the price, Spacious pages for all m…Read full reviewShow less
Beautiful linen cover design, High-quality materials used, Convenient and user-friendly, Great value for the price, Spacious pages for all my memories,
Size:10/10 Design:10/10 Durability:10/10 Good day ok namam un item. di ko nga lang alam kung kasya un toga pic. pero ok lang naman. order ak…Read full reviewShow less
Size:10/10 Design:10/10 Durability:10/10 Good day ok namam un item. di ko nga lang alam kung kasya un toga pic. pero ok lang naman. order ako uli
High-quality materials used, Spacious pages for all my memories,

36 Lazada user ratings
Great for photos, Perfect for memories, Lightweight design, Durable adhesive, Large capacity,
Great for storing photos, the large size works perfectly.
Large capacity, Fast shipping, 🎨Design:10/10
Great! Lots of photos can be stored.
Love it! Thank you seller
Prices are valid at publication and may change. Please refer to the product page for the latest price.
Step 1: Measure and Define Your Wall Space
A successful gallery wall begins with understanding the physical boundaries of your canvas. Start by measuring the width and height of the blank wall section you wish to cover. Multiplying these dimensions gives you the total square footage, which helps you determine how many frames of various sizes can comfortably fit without making the area feel cramped.

To anchor the entire arrangement visually, establish a central focal line. Interior design standards generally place this visual center line at eye level, which is approximately 57 to 60 inches from the floor. If you are hanging the gallery wall in a hallway where people primarily stand, aim for the higher end of this range; for living rooms where seating is the norm, you might adjust it slightly lower to match the seated line of sight.
Additionally, you must maintain balanced margins around the perimeter of your display. Leave at least 12 to 18 inches of breathing room between the outer edges of your frame arrangement and adjacent walls, the ceiling, or architectural trim. If the gallery wall sits above a piece of furniture, such as a sofa or a console table, position the bottom edge of the lowest frames roughly 6 to 8 inches above the top of the furniture to prevent accidental bumps.
Step 2: Curate Artwork and Select Frames
Curation is where your personal style takes center stage, but a cohesive theme keeps the collection from looking chaotic. You can mix family photography, graphic art prints, sketches, and textured memorabilia like postcards or fabric swatches. To tie these diverse elements together, establish a unifying thread, such as a consistent color palette, a single art medium, or a shared subject matter like travel or nature.
Your choice of frames significantly influences the overall aesthetic of the room. Matching frames of identical sizes and colors create a clean, modern, and symmetrical grid that feels highly structured. Conversely, mixing different frame materials, such as warm wood, sleek metal, and ornate painted finishes, produces an eclectic, organic vibe that can grow over time as you add new pieces.
Beyond aesthetics, you must evaluate the physical properties of your frames. Weigh each fully assembled frame, including the glass and backing, before deciding on your installation method. Heavy wooden frames or those with thick glass panels require robust hanging hardware, whereas lightweight plastic or composite frames might only need simple picture hangers. Always verify that the weight capacity of your hooks or anchors exceeds the actual weight of the assembled frames.
Step 3: Plan the Layout Using Paper Templates
One of the most common mistakes in DIY projects is hanging frames directly on the wall without a visual trial run. To avoid turning your wall into a Swiss cheese of misplaced nail holes, use the paper template method. Place each frame face-down on your kraft paper or newspaper, trace its outer perimeter with a pencil, and cut out the resulting shape. Write a brief description of the artwork or frame color on each paper cutout so you can easily identify them later.
Next, use low-tack painter’s tape to stick these paper templates onto the wall. This allows you to experiment with different configurations without risking paint damage. Start by placing your largest “anchor” pieces near the center line you established earlier, then arrange the smaller frames around them to distribute the visual weight evenly across the entire composition.
As you arrange the templates, pay close attention to the spacing between them. A standard guideline is to maintain a consistent gap of 2 to 3 inches between all adjacent frames. Keeping this spacing uniform prevents the layout from looking disjointed, though an eclectic style can tolerate slightly more varied gaps as long as the overall boundary remains balanced. Step back frequently to view the paper layout from different angles and distances within the room.
Step 4: Hang the Frames Securely
Once you are completely satisfied with the paper template layout, you can transition to the physical installation. To find the exact spot for your nail or screw, measure the distance from the top edge of the actual frame to its hanging bracket or wire on the back. Pull the wire taut upward to simulate how it will hang under tension. Transfer this measurement directly onto the corresponding paper template on the wall, marking the spot with a clear pencil cross.
With your hanging points marked, select and install the appropriate hardware directly through the paper templates. For drywall, tap your picture hooks or screw in your self-drilling anchors. For concrete or masonry walls, use a drill with a masonry bit to create a pilot hole, insert a plastic wall plug, and drive in the screw. Always wear protective eyewear when drilling into masonry to shield your eyes from flying dust and debris.
Before fully tightening any screws or hanging the frames, place a spirit level across the top of your hardware or the frame itself to verify that everything is perfectly horizontal. Even a minor tilt of a fraction of an inch can disrupt the clean lines of the entire gallery. Once the hardware is securely anchored, carefully tear the paper templates away from the wall, leaving the nails or screws perfectly positioned. Hang your frames and perform a final level check on each piece.
Step 5: Final Adjustments and Room Styling
With all the frames mounted, take a few steps back to evaluate the completed project from across the room. Walk around the space to ensure the gallery wall looks balanced from different entryways and seating positions. If any frame shifts or hangs slightly crooked, you can apply a small piece of removable mounting putty to the bottom corners of the frame to lock it flush against the wall.
Ensure that all hanging wires, hooks, and brackets are completely hidden behind the frames, as exposed hardware detracts from the polished look. To integrate the gallery wall into the rest of your room’s decor, consider styling the surrounding area. Placing a small potted plant on an adjacent shelf, positioning a floor lamp to cast a warm glow over the display, or aligning a console table underneath can ground the entire arrangement and make it feel like an intentional, permanent feature of your home.
Frequently Asked Questions (FAQ)
How do I hang heavy frames on concrete walls?
Hanging heavy items on solid concrete or masonry walls requires specialized hardware to ensure they do not fall. Start by using a rotary hammer drill equipped with a masonry drill bit that matches the diameter of your plastic wall anchors. Drill a hole slightly deeper than the length of the anchor, clear out any concrete dust from the hole, and tap the plastic anchor in until it sits flush with the wall surface. Drive a compatible masonry screw into the anchor, leaving a small portion protruding to catch the frame’s hanging bracket. If you are dealing with exceptionally heavy frames or are unsure about drilling into structural concrete, it is best to stop and consult a qualified professional to avoid structural damage.
What is the best way to clean framed art without damaging it?
Routine maintenance keeps your gallery wall looking vibrant and prevents dust buildup from degrading the frame materials. Use a clean, dry microfiber cloth to gently dust the frames and the glass surfaces on a regular basis. Avoid spraying any liquid glass cleaner or water directly onto the frame, as the liquid can easily seep under the edges of the glass and permanently stain the artwork or mat board inside. If the glass requires a deeper clean, spray a small amount of mild glass cleaner onto a microfiber cloth first, ensure it is only damp, and then carefully wipe the glass surface while staying clear of the frame joints.

Community discussion
Share your experience or ask a question. Comments are reviewed before publication.