
Positioning LED strip lights in a gaming room for the best visual effect requires shifting focus from direct, blinding illumination to indirect, diffused backlighting. By bouncing light off walls, desks, and monitors, you create an immersive ambient glow that enhances on-screen contrast while eliminating harsh glares. Placing your led strips strategically—behind screens, under desk edges, and along perimeters—transforms your setup into a balanced, high-performance visual space that minimizes eye strain during long sessions.
Planning Your Gaming Room Lighting Zones
Before purchasing any equipment, assess your room’s physical boundaries and map out distinct lighting zones. A common mistake is treating the entire room as a single zone, which often leads to unbalanced brightness or distracting reflections. Start by identifying your primary focal points: the main desk, the monitor array, and any display shelves or PC towers.
Understand the functional difference between task lighting and ambient bias lighting. Task lighting provides focused, functional visibility over your keyboard and desktop, while ambient bias lighting sits behind screens to ease the transition between a bright monitor and a dark room. Separating these zones prevents your eyes from working too hard to adjust to extreme contrast differences.
Products mentioned in this guide
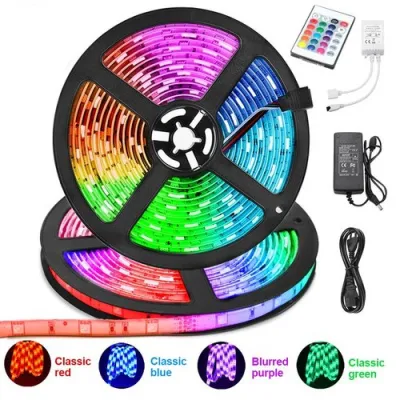
Prices are valid at publication and may change. Please refer to the product page for the latest price.
Sketch a basic layout of your room to trace where light will travel. Plan to hide the light sources completely so that the light bounces softly off matte walls and surfaces, rather than shining directly into your eyes. This simple planning phase ensures you buy only the necessary lengths of strips and avoid over-allocating light to areas that cause screen reflections.
Essential Tools and Materials for a Clean LED Installation
Achieving a seamless look requires selecting the correct components and preparing your installation environment. First, choose the right type of led strip lights for your aesthetic goals. Options include standard RGB (red, green, blue) for vibrant colors, RGBW (which adds dedicated white diodes for cleaner pastel tones and functional white light), or tunable white strips if you prefer shifting from cool daylight to warm amber. Always verify that the power supply unit (PSU) is rated for the local household voltage of 220V at 60Hz and carries proper electrical certifications, such as the Philippine Standard (PS) or Import Commodity Clearance (ICC) marks.

Beyond the lights, gather essential installation accessories to ensure safety and durability. Aluminum diffusion channels with milky white covers are crucial; they scatter the light evenly and eliminate the harsh, pixelated “dot effect” of bare diodes. You will also need mounting clips, cable management sleeves, a measuring tape, and surface cleaning supplies. High-quality isopropyl alcohol (70% or higher) and microfiber cloths are indispensable, especially in humid tropical climates where moisture and dust can easily prevent adhesives from bonding securely to surfaces.
Before finalizing your purchase, review the manufacturer instructions for both the LED strips and any furniture or wall surfaces you plan to mount them on. Ensure that the wattage limit of your power controller matches or exceeds the total draw of your planned strips. If you plan to install strips in areas with high humidity or potential moisture exposure, verify that the strips carry an appropriate IP (Ingress Protection) rating, such as IP65, to prevent electrical shorting.
Step-by-Step Placement Guide for Key Gaming Zones
A successful installation relies on meticulous preparation and precise execution. Begin by thoroughly cleaning all planned mounting surfaces with isopropyl alcohol. Wipe away any dust, oil, or fingerprint residues, and allow the surfaces to dry completely. In warm, humid environments, skipping this step almost guarantees that the adhesive backings will peel off within a few weeks.
Next, measure the exact lengths required for each zone before making any cuts to your strips. Unroll the strips and lay them out along your desk or walls to visualize the run. If cuts are necessary, isolate the power by unplugging the strip completely, then cut only along the manufacturer-designated copper solder pads. Cutting elsewhere will permanently damage the circuitry of that segment.
Finally, map out the path for your power cables. Ensure they can comfortably reach your power outlets or surge protectors without stretching, pinching behind heavy furniture, or creating physical tripping hazards. Keep the power controller accessible so you can easily reset or manually adjust the lights if needed.
Behind the Monitor for Bias Lighting
Bias lighting behind your monitor is the single most effective way to improve screen contrast, deepen perceived blacks, and reduce eye fatigue. Position the strip on the back panel of the monitor or on the wall directly behind it, keeping the diodes completely concealed from your direct line of sight. The goal is to illuminate the wall, not your eyes.
To achieve a soft, uniform halo effect, maintain a consistent gap of at least two to four inches from the monitor’s outer edges. If the light source is too close to the edge, it will create harsh, distracting hotspots of light. If your monitor has heavily textured plastic or prominent ventilation grilles on the back, adhesive tape may fail to hold. In these cases, use small, heat-resistant mounting clips or zip ties secured to the monitor arm to keep the strip firmly in place.
Under the Desk and Along Edges
Accent lighting along your desk defines your gaming station’s boundaries and adds depth to the lower half of the room. Mount your strips under the front lip of the desk to cast a subtle glow down toward your floor, or along the back edge of the desktop to wash the wall behind it with color.
To prevent the bare diodes from reflecting off your floor or shining directly into your eyes when you sit down, always install the strips inside angled aluminum channels with opaque diffusers. These channels direct the light outward or downward at a controlled angle. Be mindful of physical clearance; avoid placing strips in areas where your knees, feet, rotating chair wheels, or under-desk storage units might rub against, kick, or peel the hardware away.
Wall and Ceiling Perimeters
To expand the room’s visual volume and create a fully immersive environment, look to your walls and ceiling. Installing strips in cove lighting setups, behind crown molding, or along the top edges of acoustic wall panels allows light to bounce off the ceiling, creating an expansive, indirect glow.
Keep the strips perfectly parallel to the reflecting surface to ensure a smooth, even wash of light. Avoid pushing the strips too close into corners, as this can cause light to pool awkwardly and create harsh, uneven shadows. When navigating room corners, do not force the strip to bend at a sharp 90-degree angle, as this can crack the delicate internal circuitry. Instead, use dedicated corner connectors or perform precise solder joints to maintain electrical continuity safely.
How to Minimize Screen Glare and Eye Strain
The ultimate goal of a gaming room setup is to enhance visual immersion without causing physical discomfort during extended play. The most common error is leaving LED diodes exposed. Utilizing aluminum channels with milky white diffusers is critical because they scatter the point-source light into a continuous, soft bar. This prevents the “dot effect” and stops bright reflections from bouncing off glossy monitor screens, glass desk mats, or framed wall posters.
Adjusting your brightness levels and color temperatures is equally important. Your bias lighting should complement, not overpower, your monitor’s display. If the background light is excessively bright, it will wash out your screen’s contrast and force your pupils to constrict, defeating the purpose of bias lighting. Keep the background illumination at a moderate level where it softens the room’s darkness without competing with the monitor.
Consider setting up dynamic lighting scenes that adapt to the time of day. For late-night gaming sessions, transition your setup to warmer, dimmer tones like soft amber or deep red. This reduces your exposure to harsh blue light, helping to protect your eyes from strain and supporting your body’s natural sleep-wake cycles after you log off.
Cable Management and Safe Power Routing
A clean visual effect can be ruined by a cluttered tangle of hanging wires. Route all power cables along desk legs, monitor arms, and behind support panels using adhesive cable clips, zip ties, or neoprene sleeves. Keeping cables organized not only looks professional but also prevents accidental snags that could damage your ports or strip connections.
Electrical safety must be a priority when planning your power routing. Calculate the total wattage of your connected strips to ensure you do not overload your power supply unit. Avoid daisy-chaining multiple strips together beyond the manufacturer’s specified limits, as this can cause voltage drops—resulting in dimmer lights at the end of the run—and pose a fire hazard.
Keep power bricks and controllers in well-ventilated areas, ensuring they are never buried under carpets, behind dense foam acoustic panels, or near flammable materials. If you are running extensive perimeter lighting that requires hardwiring into your home’s electrical system, always isolate the power at the circuit breaker first and consult a qualified professional to complete the installation safely.
Testing and Fine-Tuning Your Visual Setup
Once the physical installation is complete, take the time to test and calibrate your system. Power on the strips and cycle through all color zones, white temperatures, and dynamic transitions. Look closely for any dark spots, uneven diffusion, or dead pixels along the length of the strips.
Sit in your primary gaming chair and look around. Verify that no bare diodes are directly visible from your normal viewing height and that no light spills directly onto your screens. If you detect any light bleed or hot spots in problematic corners, adjust the angle of your diffusion channels or apply small pieces of black electrical tape to block light from escaping where it shouldn’t.
Frequently Asked Questions (FAQ)
Can I cut LED strip lights to fit my desk size?
Yes, but you must only cut them at the designated copper pads, which are typically marked with a scissors icon. Cutting anywhere else will sever the internal circuitry, rendering that section of the strip unusable. Always unplug the power supply before making any cuts.
Do LED strip lights damage painted walls or furniture?
Direct adhesive backing can tear paint or leave stubborn residue on wooden furniture upon removal, especially in warm, humid climates. To protect your surfaces, mount the strips inside aluminum channels secured with small screws, use removable mounting putty, or apply painter’s tape to the wall first before sticking the adhesive down.
What is the best color temperature for gaming at night?
For late-night gaming, choose warmer color temperatures between 2700K and 3000K, or set your RGB lights to soft amber or red tones. These warmer hues reduce blue light exposure, which minimizes eye fatigue and helps your mind wind down for sleep.
Community discussion
Share your experience or ask a question. Comments are reviewed before publication.