
Hanging heavy metal wall art transforms a room, but it requires careful planning to prevent damage to your home or injury to its occupants. Safely mounting a substantial metal piece depends on matching the weight of the artwork to the structural capacity of your wall. Whether your home features solid concrete, concrete hollow blocks, or drywall partitions, selecting the correct anchors and following precise installation steps ensures your decor remains securely in place.
Assess Your Wall Type and Weight Requirements
Identifying your wall material is the first step in a successful installation. Tap the wall gently in several places. A solid, dull thud with no resonance indicates solid concrete or plaster-coated masonry. A hollow, echoing sound suggests either concrete hollow blocks—very common in Philippine homes—or a drywall partition on studs.
To distinguish between hollow blocks and drywall, press firmly against the surface. Drywall has a slight flex and feels warm to the touch, whereas masonry walls are completely rigid, cold, and typically finished with a thick layer of cement plaster.
Products mentioned in this guide

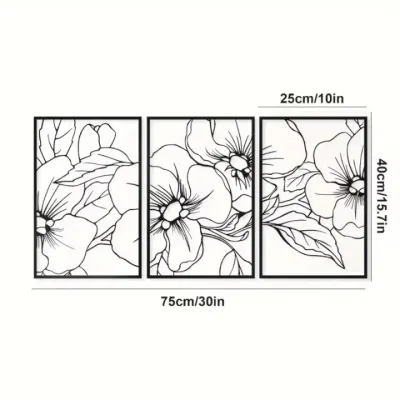
1 Lazada user ratings
🛠️Durability:ok 🎨Design:beautiful
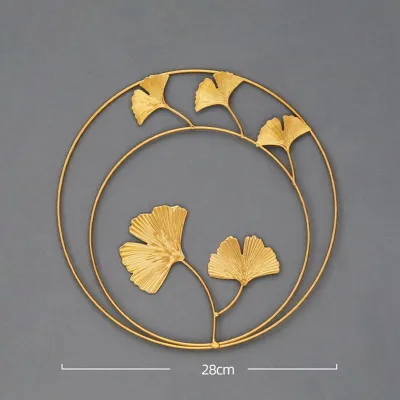
986 Lazada user ratings
very nice item and the price is also reasonable. It brings beauty in the house. this product is highly recommended 👌
Gandaaaaa.... Malaki sya... Napaka elegante... Thank you po.. More more more... Mukhang matibay.. Good quality
fast delivery. delivered within 2 days. securely packed. arrived without any damage. correct designs sent.
fabulous indeed. simple yet sophisticated look. well wrapped ang package. bravo 👏 👏 👏 👏 para kay seller 👍👍👍👌👌👌
wow ang Ganda..ang dami nagka gusto.nicevseller order uli ako Ng mlililit.ok nman ang packaging.

Prices are valid at publication and may change. Please refer to the product page for the latest price.
Determine the exact weight of your metal art before purchasing hardware. Do not guess. Use a reliable scale to weigh the piece, or check the manufacturer’s specifications.
Understand wall thickness before you begin. Standard drywall partitions are usually 9.5mm to 12.5mm thick, while plaster over masonry can add 10mm to 20mm of depth before reaching the structural block.
Before drilling, use a multi-scanner or stud finder with deep-scanning capabilities to check for hidden electrical conduits or water pipes. In many homes, utility lines run vertically or horizontally from outlets and switches. Accidental contact with these utilities poses severe safety risks.
Essential Tools and Mounting Hardware
To complete this installation safely, gather the correct tools. A standard rotary drill is sufficient for drywall, but concrete and hollow blocks require a hammer drill to penetrate the tough material efficiently.

You will also need a high-quality stud finder, a spirit level (at least 24 inches long for accurate alignment), a hammer, a pencil, safety goggles, and a dust mask to protect against fine masonry or drywall dust.
For concrete and hollow block walls, masonry anchors are essential. Sleeve anchors or wedge anchors expand inside the drilled hole, gripping the solid concrete walls tightly. For hollow blocks, choose sleeve anchors that expand within the solid portions of the block or heavy-duty toggle bolts designed for hollow cavities.
For drywall and partition walls, standard plastic plugs are insufficient for heavy metal art. Instead, use heavy-duty toggle bolts or snap toggles. These anchors feature a metal channel or wings that fold to pass through a drilled hole and then open behind the drywall, distributing the weight across a larger surface area.
Always read the hardware packaging carefully. Look for the load rating, which indicates the maximum weight the anchor can support. Ensure the combined capacity of your anchors exceeds the weight of your metal art by a safety margin of at least fifty percent to account for structural variations.
Installing on Concrete and Hollow Block Walls
Begin by positioning your metal art against the wall at the desired height. Have an assistant hold the piece while you use a spirit level to ensure it is straight. Mark the mounting points clearly on the wall with a pencil.
When drilling into masonry, select a carbide-tipped masonry drill bit that matches the exact diameter specified on your anchor packaging. Set your hammer drill to the hammer function for solid concrete.
If you are working with concrete hollow blocks, exercise caution. Drill slowly without applying excessive forward pressure. High pressure can cause the back of the block’s outer shell to blow out, leaving a large, weak cavity that cannot hold an anchor securely.
Once the holes are drilled to the correct depth—usually slightly deeper than the length of the anchor—use a blow bulb or vacuum to remove all dust and debris from the hole. Leftover dust can prevent the anchor from expanding and gripping properly.
Insert the masonry anchor into the hole. It should fit snugly; you may need to tap it gently with a hammer until the collar is flush with the wall surface.
Position your mounting bracket or the art’s hanging mechanism over the anchor, then tighten the nut or screw. Tighten until you feel firm resistance, but do not over-torque. Over-tightening can crack the surrounding concrete or strip the threads of the anchor, compromising its holding power.
Stop drilling immediately if you encounter severe cracking in the wall, hit a metal rebar (which will stop the drill bit’s progress and produce a metallic sound), or if the drill suddenly plunges forward, indicating a large, unstable void.
Installing on Drywall and Partition Walls
Mounting heavy items on drywall requires finding the underlying framing. Use a stud finder to locate the wooden or metal studs behind the wall board. Mark both edges of the stud to find the center, which provides the strongest support.
Whenever possible, align at least one of your mounting points directly with a stud. You can screw directly into the stud using heavy-duty wood screws (for wooden studs) or self-tapping sheet metal screws (for metal studs) without needing an anchor.
If the placement of your metal art does not align with the studs, you must use heavy-duty toggle bolts for the hollow sections of the drywall. Drill a hole matching the diameter of the folded toggle wings.
Squeeze the toggle wings flat, push them through the drilled hole, and listen for the click as they spring open behind the drywall. Pull back slightly on the screw to create tension, then tighten the screw until the metal channel is pulled flush against the back of the drywall.
For exceptionally wide or heavy metal art, distribute the weight across multiple mounting points. Spacing the anchors out reduces the localized stress on any single section of the drywall.
Be alert to warning signs during installation. Stop immediately if the drywall begins to crumble around the hole, if the anchor starts pulling through the surface, or if you hear hollow, cracking sounds that suggest the backing material is failing.
Final Safety Checks and Maintenance
Before fully releasing your grip on the metal art, perform a gradual weight test. Slowly transfer the weight of the piece from your hands to the wall mount, keeping your hands close by to catch it if the anchors slip.
Once the art is hanging independently, place your spirit level on top of the piece to verify it remains level under its own weight. Ensure all brackets, hooks, or French cleats are fully engaged and sitting flush against the wall.
In tropical environments with high humidity, metal art and mounting hardware are susceptible to moisture-induced changes. Periodically inspect the installation site. Check for any signs of loose screws, wall cracking, sagging, or rust formation on the brackets.
If you notice any structural shifting, drywall deformation, or if the piece is exceptionally heavy (exceeding thirty kilograms), stop the installation and consult a qualified structural professional or professional installer to ensure safety.
Frequently Asked Questions (FAQ)
Can I hang heavy metal wall art on a tiled wall?
Yes, but it requires specialized techniques to prevent damage. You must drill through the tile to reach the structural wall behind it. Use a diamond-tipped or carbide-tipped drill bit specifically rated for tile or glass. Apply a piece of masking tape over the marked spot to prevent the drill bit from slipping and scratching the surface. Drill slowly at a low speed without using the hammer function, applying constant water lubrication to keep the bit cool. Once you penetrate the tile and reach the concrete or drywall substrate, switch to the appropriate masonry or standard drill bit to complete the hole, then insert your anchor so it seats firmly in the structural wall, not just the tile.
How do I hide the mounting hardware behind the art?
Achieving a clean, hardware-free look is highly desirable for metal art. Many pieces come with built-in recessed brackets or keyhole slots on the back, which allow the art to sit flush against the wall, completely concealing the screws. Another excellent option is a French cleat system, where one interlocking bracket is mounted to the wall and the other is attached to the back of the art. For pieces that lack built-in hanging points, you can install floating mounts or standoffs. These attach to the rear frame of the metal art, lifting it slightly off the wall to create a beautiful shadow effect while keeping all screws and anchors hidden from view.
Community discussion
Share your experience or ask a question. Comments are reviewed before publication.