
Selecting the right clip-on and USB lights for wall inspection requires focusing on high color rendering, adjustable brightness levels, and a highly flexible mounting system. Wall inspection is a precise task that relies on positioning a light source at an extreme angle to the surface, casting long shadows over minor imperfections like drywall seams, paint runs, and plaster cracks. By choosing a portable light with a strong, padded clamp and a reliable power source, you can easily identify surface flaws before applying final coats of paint or signing off on a home renovation project.
To achieve professional results, the light must be versatile enough to adapt to different wall textures and room layouts. Standard household lamps often fail in this regard because they lack the directional control and color accuracy needed to reveal subtle defects. Investing in a dedicated portable light ensures that your surface preparation is thorough, saving you time and preventing costly touch-ups later on.
Understanding Wall Inspection Lighting Needs
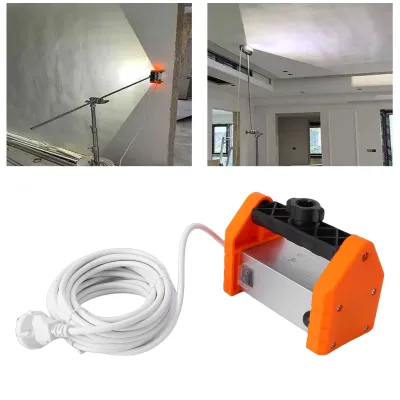
Side illumination, or raking light, is the primary technique used by professional painters and inspectors to detect surface irregularities. When a light source is placed almost parallel to a wall, even the smallest protrusion, dent, or uneven patch casts a pronounced shadow. This shadow effect makes defects highly visible, whereas direct, head-on lighting tends to wash out these details and make the surface appear deceptively smooth.
Products mentioned in this guide
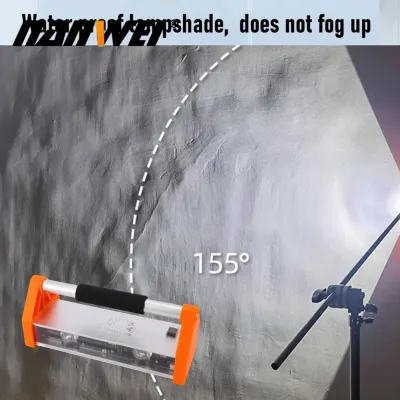
Prices are valid at publication and may change. Please refer to the product page for the latest price.
For general scanning of large wall sections, an even, broad beam spread is essential. A wide beam allows you to evaluate the overall flatness of the wall and spot large-scale issues like bowing or poor joint taping. Conversely, a focused, narrow beam is more useful for close-up detail work, such as inspecting a freshly sanded patch or checking the precision of paint edges along baseboards and trim.
Color Rendering Index (CRI) is another critical factor when assessing paint finishes and patch jobs. A light with a high CRI rating ensures that colors are represented accurately, allowing you to spot subtle color mismatches, thin paint coverage, or poorly blended patches. Inaccurate color rendering can lead to missed spots that only become visible under natural daylight or permanent room lighting later on.
Key Features to Evaluate in Clip-on and USB Lights
Brightness output, measured in lumens, must be easily adjustable. While high brightness is necessary for dark corners or matte finishes, it can cause intense glare and washout on semi-gloss or high-gloss paints. Having multiple dimming levels or a stepless dimming feature allows you to dial in the exact amount of light needed to reveal texture without blinding yourself with reflections.

Color temperature options play a significant role in defect visibility. Cooler light temperatures mimic daylight and are excellent for highlighting physical texture flaws, cracks, and sanding marks. Warmer or neutral temperatures are often better for identifying color inconsistencies, paint holidays, and blending issues on warmer-toned walls. Treating these color temperatures as adjustable tools rather than fixed settings gives you the flexibility to inspect various paint sheens effectively.
The clip mechanism must be robust enough to support the weight of the light at various angles. Look for a strong spring clamp with a wide jaw opening that can securely grip baseboards, door frames, or ladder rungs. To prevent scratching or denting delicate surfaces, the jaws of the clip must be lined with thick, non-slip padding, such as silicone or high-density foam.
Heat dissipation is a crucial safety and performance consideration, especially in warm, humid tropical environments. Extended inspection sessions can cause LED chips to generate significant heat. A well-designed light should feature an aluminum housing or dedicated heat sinks to dissipate this thermal energy efficiently, preventing damage to the light itself and protecting sensitive mounting surfaces like varnished wood or fresh paint from heat-induced bubbling.
Comparing Power and Mounting Configurations
Battery-powered clip-on lights offer unmatched mobility, allowing you to move freely around a room without being restricted by power outlets. When evaluating these models, consider the battery capacity and runtime on high-brightness settings. Pay attention to weight distribution; a heavy battery pack located at the head of the light can cause a flexible gooseneck to droop or the clip to slip under the unbalanced load.
USB-powered lights provide continuous, unfading brightness without the risk of a dying battery mid-job. They can be powered by standard wall adapters or portable power banks, making them highly versatile for construction sites where mains power might be limited. The main trade-off is the tethered cable, which must be long enough to allow comfortable movement, and the need to carry or secure a power bank during mobile inspections.
The flexibility of the gooseneck or adjustable arm is what enables precise beam angling. A high-quality gooseneck should be stiff enough to hold its position firmly when bent at extreme angles, yet flexible enough to allow micro-adjustments. This allows you to position the light close to the wall surface to achieve the perfect raking angle without having to constantly reposition the base clip.
Building Your Shortlist and Verifying Before Purchase
When browsing online marketplaces, it is important to verify manufacturer specifications rather than relying solely on marketing buzzwords. Look for clear listings of lumen output, CRI ratings, and battery capacities. Be skeptical of generic lights that claim impossibly high brightness levels at very low prices, and instead look for products that provide detailed technical specifications.
Verify the electrical safety certifications, voltage compatibility, and wattage limits of any USB light or charging adapter you plan to use. Ensuring the device complies with standard electrical safety marks helps prevent short circuits and overheating during long hours of operation. If you plan to use a USB light with an existing wall adapter, confirm that the adapter’s output voltage matches the light’s input requirements.
User reviews on ecommerce platforms can provide valuable insights into the real-world durability and performance of a light. Look for feedback specifically mentioning the strength of the clip, how well the gooseneck maintains its shape over time, and whether the light beam is uniform or suffers from distracting hot spots. Reviews that mention heat generation during prolonged use in warm rooms are also highly informative.
Set a realistic budget in Philippine Pesos (₱) based on your frequency of use and required features. Basic USB clip-on lights can be found at very affordable price points, while professional-grade models with high CRI and robust build quality will require a larger investment. Always verify the seller’s return policies and warranty terms on the online marketplace to ensure you can easily exchange the product if it does not meet your inspection needs.
To narrow down your choices, create a simple comparison matrix based on your specific wall types and inspection frequency. If you primarily inspect small residential rooms with standard drywall, a lightweight battery-powered clip-on may be sufficient. For large-scale commercial projects or rough plaster walls, a high-output USB-powered light paired with a high-capacity power bank will offer the continuous performance and brightness required.
Safe Setup and Usage Practices for Wall Surfaces
To maximize shadow contrast without causing eye strain, position the light at a shallow angle of 5 to 15 degrees relative to the wall surface. Avoid looking directly into the light source; instead, position yourself slightly to the side or behind the light, looking across the illuminated path. This setup ensures that you see the shadows cast by imperfections rather than the glare of the bulb.
Protect delicate wall finishes, wallpapers, or wooden trims by avoiding over-clamping. Even with padded jaws, excessive pressure can leave indentations on soft wood or fresh plaster. If you must clamp onto a sensitive surface, place a soft microfiber cloth or a piece of cardboard between the clip jaws and the surface to distribute the pressure evenly and prevent marks.
Manage USB cables and power banks carefully to maintain a safe working environment. Loose cables can easily become tripping hazards, especially when working on ladders or in cluttered renovation zones. Secure the power bank to your belt or the ladder frame, and use cable ties or velcro straps to keep excess cordage neatly bundled and out of the way.
When working at heights or handling suspended loads, always prioritize physical safety. Ensure that any clamped light is securely anchored so it cannot fall and cause injury or damage. If your inspection uncovers deep, structural cracks that run diagonally, water stains, or signs of active moisture damage and mold behind the paint, stop your cosmetic work. These issues require professional assessment and remediation before any surface repairs or painting can safely proceed.
Frequently Asked Questions (FAQ)
Can I use a standard desk clip-on light for wall inspection?
While a standard desk clip-on light can provide basic illumination, it is generally not ideal for detailed wall inspection. Standard desk lamps often have a highly focused, uneven beam pattern that creates harsh hot spots, making it difficult to distinguish between actual wall flaws and light distortion. Additionally, generic desk lamps typically have lower CRI ratings, which can mask subtle color mismatches and patch boundaries, and their clips may lack the strength or padding needed to secure the light safely at the extreme angles required for raking light.
What is the ideal color temperature for checking paint defects?
The ideal color temperature depends on the specific type of defect you are trying to identify. For detecting physical texture flaws, cracks, and sanding marks, a cool white light (5000K to 6500K) is highly effective as it provides sharp contrast and mimics bright daylight. For identifying color mismatches, uneven paint coverage, and blending issues, a neutral white light (4000K) is preferred, as it offers a balanced spectrum that represents paint pigments accurately without the blue tint of cooler lights.
How do I prevent the clip from leaving marks on my wall trim?
To prevent the clip from leaving marks on delicate wall trim, first ensure that the light you select features soft silicone or high-density foam padding on the inside of the jaws. If the surface is particularly sensitive, such as freshly painted trim or soft varnished wood, you can create an extra protective barrier. Place a small, folded microfiber cloth, a piece of felt, or a thick strip of cardboard between the clip jaws and the trim before clamping, which will distribute the clamping force and prevent scratches or indentations.
Community discussion
Share your experience or ask a question. Comments are reviewed before publication.