
Setting up a water powered light for the first time is a straightforward process that relies on practical chemistry rather than complex electrical wiring. To get your lamp running, you must dissolve a specific amount of salt in water, pour the solution into the reservoir, insert the metal electrodes carefully so they do not touch, and activate the power switch. Within a few minutes, a natural chemical reaction will generate enough electricity to power the integrated LED bulb.
Whether you are preparing an emergency light source for tropical storms, setting up an off-grid camping lantern, or assembling a novelty patio light, understanding the correct setup steps ensures optimal brightness and a longer lifespan for your device. This guide walks you through the entire process, from mixing the perfect electrolyte solution to maintaining the electrodes for long-term use in warm, humid climates.
How Your Water-Powered Lamp Actually Works
To use and maintain your water-powered light effectively, it helps to understand the science that powers it. These devices operate on the galvanic cell principle, which is the same basic chemistry found in traditional household batteries. Instead of relying on pre-packaged chemical pastes, a water-powered lamp uses a saltwater solution as an electrolyte to facilitate an electrical current between two different metal plates.
Products mentioned in this guide
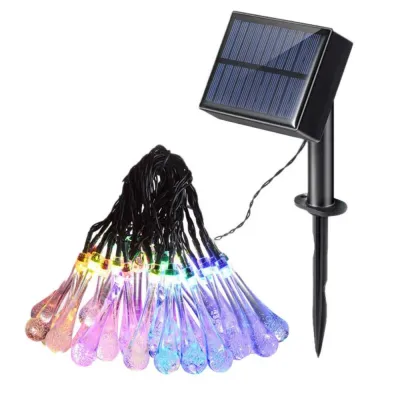
![[BUY 1 TAKE 1]Christmas Light Solar Water Drop String Light 5M/7M 8 Modes LED Solar Fairy Light String Outdoor Waterproof Suitable For Weddings Parties Festivals Courtyards Gardens Balconies Christmas Atmosphere Decoration In BA](https://img.lazcdn.com/g/p/df1a5b01edecf0b780452f2113ed08f3.jpg_400x400q80.jpg_.webp)
![[BUY 1 TAKE 1]Christmas Light Solar Water Drop String Light 5M/7M 8 Modes LED Solar Fairy Light String Outdoor Waterproof Suitable For Weddings Parties Festivals Courtyards Gardens Balconies Christmas Atmosphere Decoration In Phleo](https://img.lazcdn.com/g/p/74116e7b31b1e9d85cbc96b23b26a24f.jpg_400x400q80.jpg_.webp)
![[BUY 1 TAKE 1]Christmas Light Solar Water Drop String Light 5M/7M 8 Modes LED Solar Fairy Light String Outdoor Waterproof Suitable For Weddings Parties Festivals Courtyards Gardens Balconies Christmas Atmosphere Decoration In Kalle](https://img.lazcdn.com/g/p/571732f1988d1664d6034de2298033ae.jpg_400x400q80.jpg_.webp)
Prices are valid at publication and may change. Please refer to the product page for the latest price.
Inside the reservoir, you will find two primary electrodes: an anode (typically made of magnesium) and a cathode (often made of zinc, carbon, or a specialized alloy). When you add saltwater, it acts as a conductive bridge. The magnesium anode undergoes oxidation, releasing electrons that travel through the lamp’s internal circuit to the cathode. This flow of electrons is the electrical current that illuminates the LED bulb.
It is crucial to recognize that this is a consumable battery system rather than a perpetual energy source. The chemical reaction gradually degrades the magnesium electrode over time, causing it to thin out and corrode. Eventually, the metal plates will need to be replaced with a manufacturer-approved refill kit. Understanding this process helps you see why precise salt ratios, clean water, and proper electrode placement are vital to keeping the light shining.
Materials and Tools You Need Before Starting
Gathering the correct supplies beforehand ensures a safe, clean, and successful first-time setup. Because you are working with water and metal components, having the right materials ready will prevent messy spills and protect the delicate parts of your lamp.

Water Type
Standard tap water is generally sufficient for most water-powered lights, but the mineral content of your local water supply can influence performance. In areas with highly mineralized hard water, dissolved minerals can leave a crusty scale or residue on the electrodes over time, reducing their electrical conductivity. If your local tap water is heavily mineralized, or if the manufacturer’s manual specifically recommends it, use filtered or distilled water to ensure a cleaner chemical reaction and easier maintenance.
Salt Type
For the electrolyte solution, standard table salt (sodium chloride) or pure sea salt works best. Avoid using specialty salts that contain heavy anti-caking agents, added iodine, or artificial colorings and fragrances unless the manufacturer explicitly permits them. These additives do not dissolve completely and can form a coating over the metal plates, which insulates the electrodes and dramatically reduces the lamp’s light output.
Essential Tools
Before mixing, prepare a few basic household items:
- A clean measuring cup (preferably with milliliter markings) to measure the water volume accurately.
- A clean stirring spoon or whisk made of plastic or stainless steel to dissolve the salt.
- A small funnel to help pour the saltwater solution into the reservoir without spilling.
- A dry microfiber cloth or towel to wipe away any accidental drips or moisture on the exterior of the casing.
Safety Preparation
Always set up your lamp on a flat, stable, and water-resistant surface, away from sensitive electronics, power outlets, or paper documents. While saltwater is non-toxic, it is highly corrosive to surrounding metals and can leave unsightly salt rings on wooden furniture. Keep a clean towel handy to catch any drips, and wash your hands thoroughly after handling the bare metal electrodes or mixing the concentrated saltwater solution.
In the humid, tropical climate of the Philippines, salt can quickly absorb moisture from the air (a process known as deliquescence). Always store your unused salt in an airtight container to prevent it from clumping or turning into a soggy paste before you can use it.
Step-by-Step Guide to Mixing and Assembling
Once you have gathered your materials, you can proceed with the physical assembly. Follow these steps carefully to ensure the chemical reaction initiates correctly without damaging the lamp’s housing or electrical contacts.
Step 1: Preparing the Saltwater Solution
Begin by checking your manufacturer’s instruction manual for the exact salt-to-water ratio required for your specific model. While a common ratio is approximately 5% to 10% salt by weight (for example, 15 grams of salt dissolved in 300 milliliters of water), models vary. Measure the recommended volume of water into your measuring cup, add the specified amount of salt, and stir vigorously.
Continue stirring until the water is completely clear and no salt crystals remain at the bottom of the cup. Undissolved salt crystals are highly problematic; they can settle at the bottom of the lamp’s reservoir, block the active surface area of the electrodes, or create a thick sludge that hinders the chemical reaction.
Step 2: Filling the Reservoir
Locate the fill opening on your lamp’s reservoir. If the opening is narrow, place your funnel securely inside. Slowly pour the fully dissolved saltwater solution into the chamber.
Pay close attention to the maximum fill line marked on the side of the reservoir. Do not fill the chamber to the very brim. When you insert the metal electrodes, they will displace a significant volume of water. Overfilling the reservoir will cause the saltwater to overflow, which can seep into the dry battery compartment, damage the power switch, or corrode the external electrical terminals.
Step 3: Electrode Placement
Carefully align the metal electrode assembly with the designated slots inside the reservoir. Depending on the design, the anode and cathode plates may be mounted on a single cartridge, or they may need to be inserted individually.
As you lower the plates into the saltwater, ensure they do not bend or touch one another inside the chamber. Direct contact between the magnesium anode and the cathode creates an electrical short circuit. Instead of flowing through the LED bulb to produce light, the electrical current will bypass the circuit entirely, generating localized heat and draining the chemical energy of the metal plates without illuminating the lamp.
Step 4: Sealing the Unit
Once the electrodes are fully seated and making firm contact with the internal circuit terminals, secure the reservoir cap or housing cover. If your lamp features a rubber gasket or silicone seal, verify that it is seated flat and aligned correctly before tightening the cap.
In high-humidity environments, a tight seal is essential. It prevents external moisture from entering the dry compartments of the lamp and keeps the saltwater from leaking out if the unit is accidentally bumped or tipped over on a busy table.
Turning It On and Managing Light Output
With the saltwater added and the electrodes securely in place, your lamp is ready for operation. However, managing your expectations regarding light output and runtime will help you get the most out of your device.
Activation and Warm-Up
Flip the physical power switch to the “on” position. Do not be alarmed if the light is dim or fails to illuminate instantly. The chemical reaction requires a brief warm-up period. It typically takes between two to five minutes for the saltwater to fully saturate the microscopic pores of the metal electrodes and for the galvanic reaction to reach its peak voltage. As the reaction stabilizes, you will notice the LED gradually brightening to its full capacity.
Brightness Expectations
A water-powered light is fundamentally designed for ambient, decorative, or emergency task lighting. It typically produces a soft, low-lumen glow comparable to a nightlight, a small flashlight, or a candle. It is not intended to replace high-lumen, mains-powered overhead room lighting. The perceived color temperature (usually a cool white or warm white depending on the installed LED module) is a fixed characteristic of the light-emitting diode and cannot be adjusted by altering the salt concentration.
Runtime and Conservation
A single fill of saltwater can keep the LED illuminated for several hours, or even days, depending on the volume of the reservoir and the surface area of the electrodes. To extend the lifetime of your consumable metal plates, turn the lamp off when it is not actively needed. Switching the lamp off breaks the electrical circuit, which significantly slows down the rate of metal oxidation and conserves the magnesium anode for future use.
Routine Maintenance and Safe Cleanup
Because a water-powered lamp relies on an active chemical reaction, regular maintenance is required to prevent performance drops and ensure the safety of the device.
Changing the Solution
As the magnesium anode oxidizes to generate electricity, it releases a byproduct called magnesium hydroxide. This byproduct will cause the saltwater solution inside the reservoir to become cloudy, milky, or grey over time. If left unchecked, this accumulation of metal oxides acts as an insulator, coating the electrodes and causing the light output to drop significantly.
When you notice the light dimming or the water turning heavily discolored, turn off the lamp, open the reservoir, and drain the old solution. Rinse the interior of the chamber thoroughly with clean tap water to remove any loose sediment. Gently wipe the electrodes with a soft, damp cloth if recommended by the manufacturer, taking care not to scrub off the active metal layers.
Electrode Care and Replacement
Periodically inspect the physical condition of the metal plates. Over weeks or months of cumulative use, the consumable magnesium anode will exhibit visible pitting, thinning, and dark oxidation. Once the anode is heavily corroded or nearly dissolved, the lamp will no longer produce sufficient voltage to light the LED. At this point, you must replace the degraded plates with an official manufacturer refill kit. These replacement kits are widely available on local ecommerce platforms in the Philippines, typically ranging in price from ₱200 to ₱600 depending on the brand and model.
Safe Disposal of Waste
When disposing of the spent saltwater solution, pour it down the household sink while running plenty of tap water to dilute the salt and dissolved metal oxides. For the degraded metal electrodes, do not throw them into standard household trash. Instead, follow your local municipal guidelines for e-waste or household hazardous waste disposal to ensure they are recycled or discarded safely.
Safety Warnings
Never, under any circumstances, drink the electrolyte solution from the lamp, as it is highly saline and alkaline. Keep the lamp, loose salt, and spare metal electrodes completely out of reach of young children and pets. If your lamp features a hybrid design with an external USB output port for charging small devices, always isolate the unit from any external mains power sources before opening the reservoir or handling the liquid.
Troubleshooting Common Setup Issues
If your lamp does not perform as expected immediately after your first setup, use this troubleshooting checklist to diagnose and resolve the issue.
Light Won't Turn On
- Verify the Switch: Ensure the physical power switch is fully engaged and not stuck in an intermediate position.
- Check Electrode Contacts: Confirm that the metal plates are inserted facing the correct direction and are making firm, direct contact with the metal terminals at the top of the reservoir housing.
- Inspect for Short Circuits: Ensure that the anode and cathode plates are not bent or touching each other inside the saltwater solution.
- Confirm Salt Dissolution: Verify that you did not pour undissolved salt crystals into the reservoir, which can settle and insulate the bottom of the electrodes.
Light is Very Dim
- Check Salt Concentration: If the salt ratio is too low, there will not be enough ions in the water to carry the electrical charge. Remix the solution using the manufacturer's exact measurements.
- Verify Water Level: Ensure the saltwater level is high enough to fully submerge the active surface area of the metal plates. If the plates are only partially wet, the chemical reaction will be weak.
- Allow Warm-Up Time: Give the lamp at least five minutes to reach its peak chemical reaction rate, especially if the water used was cool.
Leaking or Overflowing
- Check for Overfilling: If water is spilling out of the top, you likely exceeded the maximum fill line before inserting the electrodes. Drain a small amount of water to allow for displacement.
- Inspect Seals and Gaskets: Ensure the rubber sealing gasket is flat, clean, and free of grit or sand. Tighten the reservoir cap securely without cross-threading the plastic ridges.
Frequently Asked Questions (FAQ)
Can I use natural seawater instead of mixing tap water and salt?
While natural seawater contains salt and can light the lamp in an emergency, it is not recommended for regular use. Seawater contains highly variable salt concentrations along with organic matter, microalgae, sand, and microscopic organisms. When introduced to the lamp, these organic materials can quickly foul the metal electrodes, clog the reservoir, and decay over time, creating unpleasant odors and making the unit much more difficult to clean. For consistent, reliable performance, stick to clean tap or distilled water mixed with pure table salt.
Are the chemicals and byproducts inside the lamp toxic?
The primary byproduct of the chemical reaction in a magnesium-air or magnesium-water lamp is magnesium hydroxide, which is a low-toxicity compound commonly found in everyday products like antacids and milk of magnesia. Trace amounts of hydrogen gas are also released during the reaction, which naturally dissipates safely in ventilated spaces. However, because the electrolyte solution is highly saline and alkaline, it can cause mild skin irritation or eye discomfort upon contact. Always wash your hands with clean water after handling the internal components, and flush your eyes immediately if any liquid splashes into them.
Community discussion
Share your experience or ask a question. Comments are reviewed before publication.