
Setting up RGB gaming lights in a small condo gaming corner requires a strategic approach that balances space-saving fixtures, smart layout planning, and proper installation to avoid clutter. In a compact condominium unit, every square inch of desk and wall space is premium real estate. By utilizing smart LED strips, light bars, and modular panels, you can transform a cramped desk into an immersive gaming sanctuary. In the Philippines, choosing the right ilaw is not just about aesthetics; proper lighting creates a comfortable, functional environment that does not overheat your small space or overload your electrical outlets. Let’s look at how to plan, select, install, and configure your setup for the ultimate gaming experience.
Plan Your Condo Gaming Corner Layout and Lighting Zones
Before purchasing any fixtures, you must carefully assess the physical limits of your condo’s gaming corner. Start by measuring the exact dimensions of your desk, the adjacent wall space, and the distance to the nearest ceiling fixture. In a small room, oversized lighting setups can quickly feel overwhelming and cluttered. Knowing your measurements ensures you buy the correct lengths of LED strips and select fixtures that fit comfortably within your designated gaming zone without encroaching on your daily living space.
Next, divide your gaming corner into three distinct lighting zones: bias lighting, ambient lighting, and accent lighting. Bias lighting is placed directly behind your monitor to project a soft glow onto the wall, which helps reduce eye strain by balancing the contrast between the bright screen and the dark room. Ambient lighting fills the surrounding space, usually by bouncing light off the walls or ceiling to create a warm, inviting atmosphere. Accent lighting is used sparingly to highlight specific features, such as a shelf displaying your favorite collectibles or the interior of your custom PC case.
Products mentioned in this guide
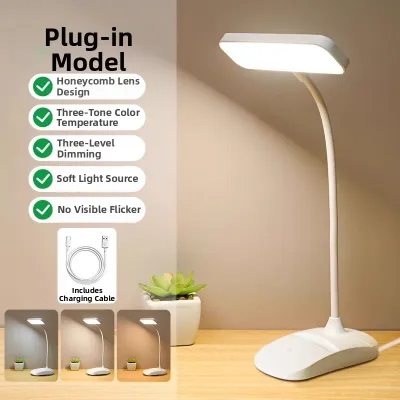
Prices are valid at publication and may change. Please refer to the product page for the latest price.
Finally, map out your available power outlets and plan your cable routing paths. Compact condo layouts often have limited wall sockets, which can lead to a messy tangle of cords if not managed properly. Identify where your main power source is located relative to your desk. Planning your cable paths early allows you to determine how many extension cords or cable management tools you will need, ensuring that all wires remain hidden from view and do not present a tripping hazard in your limited space.
Choose the Right RGB Lighting Fixtures for Small Spaces
Selecting the right fixtures for a compact condo setup involves comparing space-efficient options that deliver high visual impact without taking up valuable physical space. LED strip lights are highly versatile and ideal for small corners because they can be cut to custom lengths and adhered to almost any flat surface, such as the underside of shelves or the back of your desk. Smart light bars are another excellent option; they can stand vertically on either side of your monitor or mount directly to the top of your screen, keeping your desk surface completely clear. Modular wall panels offer a highly customizable, modern look, but they require a dedicated section of empty wall space to avoid looking cluttered.

Before making any purchases, it is essential to verify the electrical specifications of the fixtures to ensure they are safe and compatible with your home. Check the voltage requirements, plug types, and smart home ecosystem compatibility of each product. In the Philippines, the standard household voltage is 220V, though many small RGB lights operate on 5V USB power. Ensure that any USB-powered lights are connected to adapters that match the manufacturer’s specified amperage. Additionally, verify that the smart lights you choose can connect seamlessly to your existing home network or smart assistant ecosystem without requiring excessive hubs that add physical clutter.
Mounting mechanisms are another critical consideration, especially if you live in a rental property where drilling holes is restricted. Prioritize fixtures that utilize high-quality, renter-friendly adhesives that can be removed cleanly without stripping the paint. If you choose heavier fixtures or want a more permanent look, plan to use lightweight aluminum mounting channels. These channels not only provide a secure mounting surface but also feature diffuser covers that soften the light, giving your setup a clean, professional appearance while protecting your walls from direct adhesive contact.
Step-by-Step Installation Guide for RGB Gaming Lights
To ensure a safe and long-lasting installation, start by preparing all mounting surfaces thoroughly. Dust, grease, and humidity can significantly weaken adhesive bonds, causing your lights to sag or fall over time. Wipe down the back of your monitor, the edges of your desk, and any wall surfaces where you plan to mount the lights using a clean microfiber cloth dampened with isopropyl alcohol. Allow the surfaces to dry completely before applying any adhesive backings or mounting brackets.
Once the surfaces are clean, install the lights according to the manufacturer’s product manual. If you are using LED strip lights, peel the adhesive backing off in small sections as you press the strip firmly onto the surface, holding it in place for a few seconds to ensure a strong bond. For a more polished look and better heat dissipation, place the LED strips inside aluminum diffuser channels. These channels help distribute heat away from the LED chips, which is particularly beneficial in tropical climates where ambient temperatures can run high, thereby extending the lifespan of your fixtures.
After mounting the fixtures, focus on routing your cables neatly to maintain a clean, uncluttered aesthetic. Use adhesive cable clips, hook-and-loop straps, or neoprene cable sleeves to bundle your power cords together and secure them along the legs or underside of your desk. Route all power cables toward a properly rated surge protector. Avoid plugging multiple high-wattage devices into a single outlet or daisy-chaining extension cords, as this can overload your condo’s electrical circuits and create a fire hazard.
While most plug-and-play RGB setups are safe for DIY installation, you must recognize when to call in a professional. If your lighting plan requires hardwiring fixtures directly into your condo’s electrical system, modifying existing wall switches, or running new electrical lines through the ceiling, stop the installation immediately. Always consult a qualified electrician for any fixed wiring tasks to ensure compliance with local building codes, condo association guidelines, and electrical safety standards.
Configure Lighting Scenes and Sync with Your Gaming Setup
With your physical setup complete, the next step is to configure your smart lighting system to create an immersive gaming environment. Connect your lighting devices to your local network or dedicated smart hub using the manufacturer’s official application. Avoid using unauthorized third-party apps, as they may compromise your network security or fail to support all the features of your fixtures. Follow the in-app instructions to group your lights together, allowing you to control your entire gaming corner with a single command.
Begin your configuration by adjusting your bias lighting to reduce eye strain during extended gaming sessions. The goal of bias lighting is to balance the contrast between your bright monitor and the surrounding room. Adjust the brightness and color temperature of the lights behind your screen so they complement, rather than overpower, your monitor’s output. A soft, neutral white light is often ideal for reducing visual fatigue, though you can experiment with subtle colors that match your desktop wallpaper or in-game theme.
Next, explore custom color scenes and screen-syncing features to enhance your gaming experience. Many modern RGB systems allow you to sync your lights with the action on your screen, projecting matching colors onto the wall behind your monitor to make the game feel larger and more dynamic. However, be mindful of overall brightness and saturation levels in a small condo room. Highly saturated, rapidly flashing lights can bounce off nearby walls and create distracting glare on your screen, defeating the purpose of your setup and causing quick visual fatigue. Keep the effects subtle and the brightness at a level that enhances, rather than distracts from, your gameplay.
Maintain and Troubleshoot Your RGB Lighting Setup
Maintaining your RGB lighting setup is essential to keep it functioning optimally and looking its best over time. Dust your fixtures regularly using a dry, clean microfiber cloth to prevent dust buildup, which can dim the light output and trap heat. In the Philippines, high humidity levels can affect both the adhesive backing of your light strips and the electrical connections. Periodically inspect the adhesive bonds along your desk and walls, pressing down any sections that show signs of peeling, and ensure all power connections remain tight and dry.
If you encounter issues like flickering lights, unresponsive app controls, or color mismatches, follow a systematic troubleshooting process. Start by checking all physical connections to ensure cables are securely plugged into their ports and power adapters. If the physical connections are secure, try power-cycling your lights and resetting your smart hub or router, as network congestion can often cause smart devices to become unresponsive. If a specific segment of an LED strip fails or a controller stops working, do not attempt to splice wires or perform unauthorized repairs. Always refer to the manufacturer’s warranty and safety guidelines to obtain certified replacement parts or professional support.
Frequently Asked Questions (FAQ)
Can I install RGB lights in a condo without damaging the paint?
Yes, you can easily install RGB lights without damaging your condo’s paint by using renter-friendly mounting techniques. Instead of applying the adhesive backing of LED strips directly to the wall, mount them inside lightweight aluminum channels and secure the channels using removable mounting tape designed for painted surfaces. When it is time to remove the lights, do not pull them off forcefully. Instead, use a hairdryer on a low-heat setting to gently warm the adhesive, which softens the bond and allows you to peel the tape away slowly and cleanly without lifting the paint.
How do I prevent RGB lights from causing glare on my monitor?
To prevent distracting glare, position your bias lighting directly behind the frame of your monitor so the light source is completely hidden from your direct line of sight. If you are using bare LED strips on nearby shelves or walls, always install diffuser covers over them to soften the light and eliminate harsh hotspots. Additionally, angle any wall-mounted light bars or panels away from your screen, directing the glow toward the wall or ceiling to create a soft, indirect ambient effect that enhances your environment without reflecting off your display.
Community discussion
Share your experience or ask a question. Comments are reviewed before publication.