
Illuminating a home effectively requires a balance of functional task lighting and focused accentuation. While traditional recessed downlights provide static, uniform illumination, they lack the adaptability needed for dynamic spaces. Installing track lights for ceiling applications offers a versatile solution, allowing you to direct, adjust, and reposition light sources along a single continuous channel. This adaptability makes them exceptionally effective for highlighting specific focal points, such as a busy kitchen island or a curated gallery wall. By understanding how to configure these systems, select the appropriate fixtures, and place them at the correct angles, you can transform both the visual appeal and utility of your living spaces.
Core Concepts: Track Systems vs. Individual Spotlights
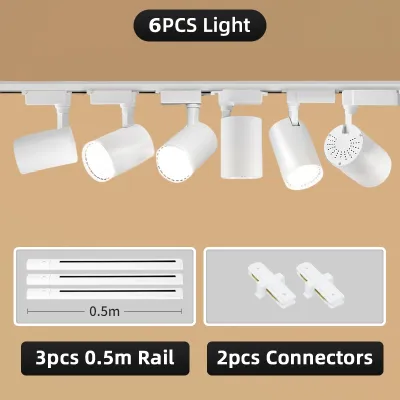
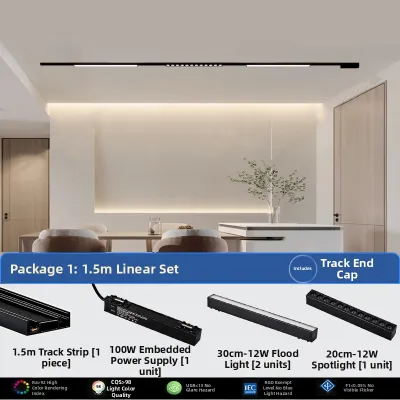
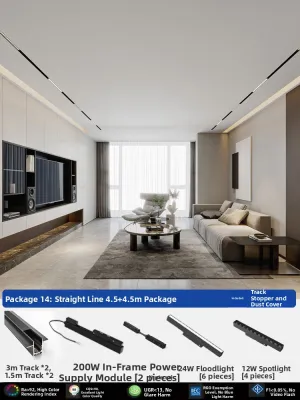
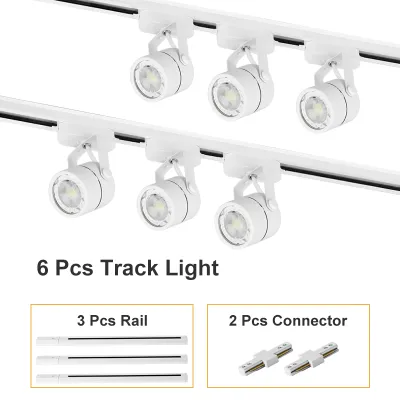
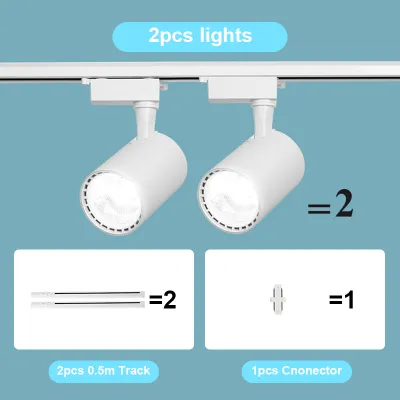
Track lighting systems consist of a surface-mounted or recessed rail housing electrical conductors, allowing multiple adjustable light heads to be attached anywhere along its length. In contrast, individual spotlights are fixed to a single junction box, limiting their illumination to a pre-determined spot unless the entire fixture is uninstalled and rewired. The primary advantage of a track system is its inherent flexibility. As your furniture layout, artwork collection, or kitchen workflow changes over time, you can easily slide, pivot, or add light heads to redirect the illumination without opening up your ceiling.
When planning a track lighting setup, understanding track circuit standards is essential. The three most common standards are H-type (Halo), J-type (Juno), and L-type (Lightolier). These standards refer to the physical design of the track and the corresponding adapter on the light head. Because these systems are not cross-compatible, an H-type light head will not fit or function on a J-type or L-type track. Before purchasing tracks and light heads separately, always verify the manufacturer specifications to ensure they share the exact same system standard.
Products mentioned in this guide
Prices are valid at publication and may change. Please refer to the product page for the latest price.
In interior design, track systems excel at bridging ambient, task, and accent lighting layers. By adjusting the direction and beam spread of individual heads, a single ceiling track can simultaneously wash a wall with soft ambient light, cast a focused beam down onto a workspace, and highlight a decorative piece. This multi-functional capability reduces the need for multiple independent fixtures, streamlining the ceiling plane for a cleaner, more cohesive aesthetic.
Scene 1: Configuring Ceiling Track Lights for a Kitchen Island
A kitchen island is a multi-functional hub where meal preparation, casual dining, and family conversations occur. To light this area effectively, the placement of the ceiling track must be carefully calculated relative to the island’s dimensions. Installing the track directly overhead or slightly behind the user standing at the counter will cast harsh shadows over the workspace, blocking the light with your own body. To prevent this, position the track so that it runs parallel to the island, offset approximately 12 to 18 inches (30 to 45 centimeters) from the working edge of the countertop. This placement directs light slightly from the front and side, keeping the workspace clear of shadows.

Selecting the correct beam angle is crucial for balancing task focus with ambient comfort. A narrow beam angle (15 to 25 degrees) creates highly concentrated pools of light, which can cause intense glare on polished stone or quartz countertops. Instead, opt for a medium beam angle (35 to 50 degrees) for kitchen tasks. This spread provides sufficient downward intensity for chopping and reading recipes while allowing the light to spill softly into adjacent areas, smoothing out harsh transitions between light and shadow.
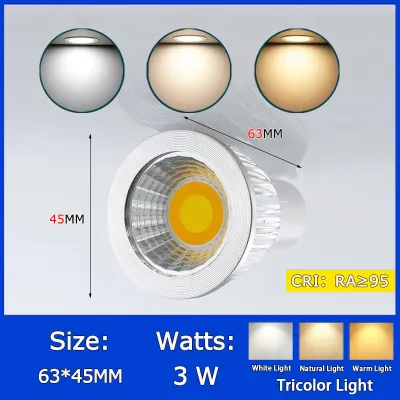
The quality of light is just as important as its direction. When selecting bulbs or integrated heads for a kitchen, prioritize a high Color Rendering Index (CRI) of 90 or above. High-CRI lighting ensures that food colors, fresh produce, and materials like natural wood or marble countertops are displayed accurately and vibrantly. Under low-CRI light, fresh ingredients can appear dull or gray, which diminishes both the cooking experience and the visual appeal of prepared dishes.
In many open-plan homes, homeowners face the dilemma of choosing between decorative pendant lights and streamlined track systems. Rather than viewing them as mutually exclusive, you can integrate them to create a layered lighting scheme. For instance, a pair of low-wattage decorative pendants can provide a warm, low-level ambient glow over the island, while a parallel ceiling track houses discreet spotlights to deliver high-intensity task lighting exactly where it is needed. Alternatively, for a minimalist aesthetic, a single sleek track run can completely replace bulky pendants, keeping sightlines open across the room.
Because kitchen islands often feature sinks or prep areas where water is present, safety and environmental conditions must guide your fixture selection. In the tropical climate of the Philippines, indoor humidity and kitchen steam can accumulate quickly near active cooking zones. Always check the ingress protection (IP) or damp-location ratings of your chosen track and light heads. Fixtures positioned directly above or near a sink should carry a certified damp-location rating to ensure long-term electrical safety and resistance to moisture-induced corrosion.
Scene 2: Lighting a Gallery Wall Without Glare or Shadows
Illuminating a gallery wall requires a precise understanding of physics to avoid two common pitfalls: distracting glare and heavy shadows. When light strikes a framed picture, it reflects off the glass. If the light source is positioned too far from the wall, the angle of reflection will bounce directly into the eyes of anyone standing in front of the artwork, obscuring the image. Conversely, if the light source is placed too close to the wall, it will cast long, dark shadows downward from the top of the frame, hiding the upper portion of the artwork.
To resolve this, apply the 30-degree rule of incidence. Positioning the track light so that the beam strikes the center of the artwork at a 30-degree angle from the vertical ceiling line provides the optimal balance. This angle is steep enough to direct reflections downward toward the floor—well below the viewer’s line of sight—yet shallow enough to prevent frame lips or canvas textures from casting disruptive shadows. If the artwork has a particularly thick or deep frame, you may need to adjust the angle slightly to 35 degrees to push the shadow further down.
When designing your gallery wall, decide whether you want to achieve uniform wall-washing or high-contrast spot-highlighting. Wall-washing utilizes wide-angle light heads or specialized scoop fixtures to bathe the entire wall in an even, continuous plane of light. This technique is ideal for a dense collection of small frames or a changing salon-style display, as it eliminates the need to realign individual fixtures. Spot-highlighting, on the other hand, uses narrow-beam spotlights aimed at specific pieces of art, creating dramatic contrast between the illuminated subject and the darker surrounding wall.
To determine the exact distance to mount your track from the wall, use a simple calculation based on your ceiling height. For a standard ceiling height of 2.7 meters (9 feet), the track should be installed approximately 60 to 90 centimeters (2 to 3 feet) away from the wall. For higher ceilings, such as 3 meters (10 feet) or more, increase this distance to 90 to 120 centimeters (3 to 4 feet) to maintain the proper 30-degree angle of incidence.
Preserving the integrity of your artwork and photographs over time requires careful consideration of the light source. Traditional incandescent and halogen bulbs emit significant amounts of ultraviolet (UV) radiation and infrared heat. Over months of exposure, this heat and UV light will cause organic pigments to fade, paper to yellow, and photographic emulsions to crack or degrade. To protect your valuable pieces, always use LED light sources. LEDs emit virtually no UV radiation and generate very little forward heat, making them the safest and most efficient choice for conservation-grade art illumination.
Selecting Light Heads and Bulbs for Task and Accent Needs
The visual success of your track lighting system depends heavily on selecting the right combination of light heads and light sources. Light heads come in several distinct styles, each designed for specific lighting tasks:
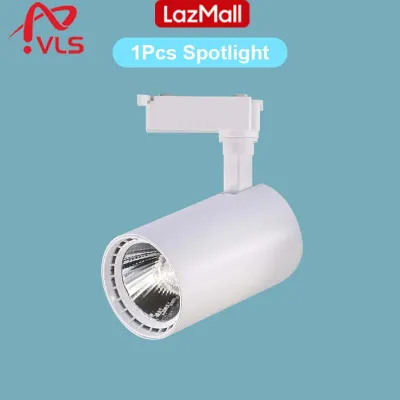
- Cylindrical Heads: Featuring a sleek, tubular body, these heads house the bulb deep within the fixture, minimizing side-glare and projecting a clean, directional beam. They are highly effective for focused spotlighting on individual artworks or specific countertop zones.
- Gimbal Heads: These fixtures feature a ring-within-a-ring design that allows the light head to pivot in multiple directions. Their high adjustability makes them ideal for spaces where the focal points change frequently.
- Step or Scoop Heads: Designed with a wider, asymmetrical opening, these fixtures are engineered to distribute light broadly and evenly across flat surfaces, making them the preferred choice for wall-washing.
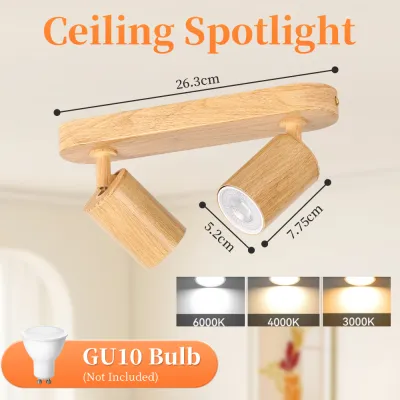
You must also choose between integrated LED track heads and replaceable bulb systems. Integrated LED fixtures feature built-in light-emitting diodes designed to last for tens of thousands of hours, allowing for incredibly compact, low-profile designs with optimized thermal management. However, if the LED eventually fails, the entire fixture must be replaced. Replaceable bulb systems, typically utilizing GU10 or MR16 bulb bases, offer greater flexibility. They allow you to easily swap out individual bulbs to experiment with different beam angles, wattages, or color temperatures without replacing the housing.
Color temperature, measured in Kelvin (K), dictates the color appearance of the light and heavily influences the mood of a room. For residential spaces, a warm white light of 2700K to 3000K is highly recommended for gallery walls and living areas, as it creates a cozy, inviting atmosphere and complements warm paint tones and wood frames. For active work areas like a kitchen island, a neutral white light of 3500K to 4000K is more appropriate. This cooler range enhances alertness, improves visual clarity, and provides a clean, modern look that matches stainless steel appliances and stone surfaces.
Finally, ensure your track system is compatible with dimmer switches to allow for flexible control over light intensity. Adjusting the brightness lets you transition a kitchen island from a bright, high-energy prep station during the day to a softly lit, intimate bar area for evening entertaining. When using LED bulbs or integrated fixtures, you must verify compatibility between the LED driver, the light bulb, and the physical dimmer switch (such as ensuring you are using a compatible trailing-edge or electronic low-voltage dimmer) to prevent flickering, buzzing, or premature bulb failure.
Ceiling Track Layouts and Professional Installation Boundaries
Planning the physical layout of your track is the final step in creating an effective lighting scheme. Tracks are highly modular and can be configured in various shapes to suit your room’s architecture. A simple straight run is ideal for parallel kitchen islands or single gallery walls. For larger, open-plan spaces, L-shaped or U-shaped configurations can define functional zones, such as wrapping around a corner kitchen or framing a living area. Flexible track systems can even be bent on-site to follow curved architectural features or irregular ceiling contours.
Ceiling height can present unique challenges when installing track lighting. In rooms with high or vaulted ceilings, mounting track heads directly at the ceiling level can place the light source too far from the target area, resulting in a weak, overly dispersed beam. To resolve this, use extension rods or drop stems to suspend the track to a more functional height, typically bringing the fixtures down to about 2.4 to 2.6 meters above the floor. This keeps the light focused and makes adjusting or maintaining the fixtures much easier.
Before mounting a track system, consider the structural load capacity of both the track itself and the ceiling junction box. While a single track head is relatively light, mounting multiple heavy metal fixtures on a long track run can exert significant stress on the ceiling supports. Ensure the ceiling junction box is rated to support the total anticipated weight of the track, connectors, and all installed heads.
Electrical safety must be your absolute priority during installation. Before performing any physical work, inspecting existing wiring, or mounting fixtures, you must shut off the electrical power at the main circuit breaker panel and verify that the circuit is dead using a reliable non-contact voltage tester. Because track lighting involves fixed high-voltage wiring, always hire a licensed electrical practitioner (such as a registered master electrician) to install new junction boxes, upgrade your home’s electrical load capacity, or mount tracks on complex ceiling structures like solid poured concrete or suspended gypsum ceilings. Do not attempt to modify structural ceiling supports, guess wire gauges, or perform complex electrical wiring yourself, as improper installation poses severe fire and shock hazards.
Frequently Asked Questions (FAQ)
Can I mix different light head styles on the same track?
Yes, you can mix different light head styles, such as combining a cylindrical spotlight for a kitchen prep station with a scoop head for wall-washing, on a single track. However, this is only possible if all the heads and the track share the exact same circuit standard—such as H-type, J-type, or L-type—and are rated for the same voltage. Always check the manufacturer’s compatibility specifications before mixing different brands or styles of fixtures on one track.
Do track lights use more electricity than recessed downlights?
No, track lights do not inherently use more electricity than recessed downlights. Energy consumption is determined entirely by the wattage and efficiency of the light sources used, not the style of the fixture housing. Utilizing modern, energy-efficient LED bulbs or integrated LED track heads will consume comparable power to equivalent LED recessed downlights, keeping your monthly electricity bills in check.
How should I clean and maintain track light fixtures?
To clean your track light fixtures safely, always turn off the power at the wall switch and allow the bulbs to cool down completely to avoid burns or electrical hazards. Use a dry, clean, and soft microfiber cloth to gently wipe away dust from the track rails and the exterior of the light heads. Never use harsh chemical cleaners, abrasive pads, or excessive moisture, as liquid entering the track channel can damage the electrical contacts and compromise safety.
Community discussion
Share your experience or ask a question. Comments are reviewed before publication.