
Selecting the perfect ceiling lights for your home involves more than just picking a design that matches your decor. To achieve a balanced, comfortable, and functional environment, you must determine the precise physical dimensions and light output required for each individual space. The ideal combination depends heavily on the room’s square footage, its primary activities, and the physical constraints of your ceiling structure.
In Philippine homes, where ceiling construction ranges from suspended gypsum boards and plywood soffits to solid concrete slabs, physical compatibility is just as critical as visual performance. By understanding how to calculate lumen requirements and match them with the correct panel sizes, you can avoid common pitfalls like under-lighting, harsh glare, or purchasing fixtures that physically cannot fit into your ceiling cavity.
How to Calculate the Right Brightness (Lumens) for Your Space
To plan your lighting layout effectively, you must first understand the distinction between light output and light intensity. Lumens measure the total amount of visible light emitted by a source in all directions. In contrast, lux measures the intensity of that light as it strikes a specific surface, with one lux equal to one lumen per square meter. While manufacturers label ceiling lights by their lumen output, your target design goal is always the appropriate lux level on your floors, countertops, or desks.
Products mentioned in this guide
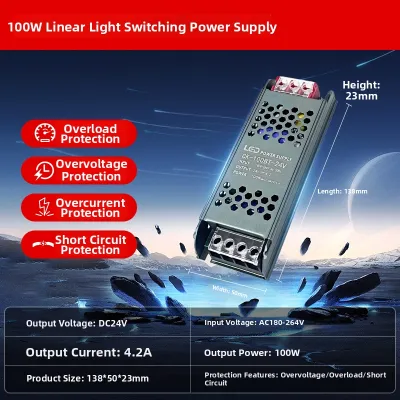
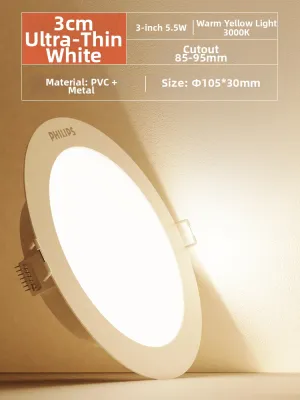
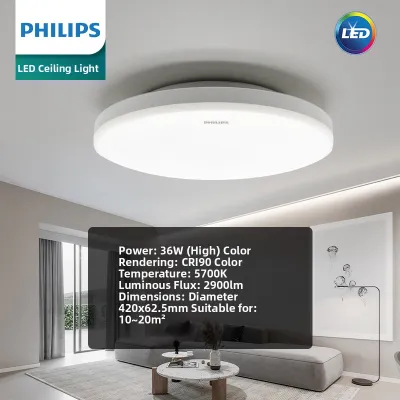
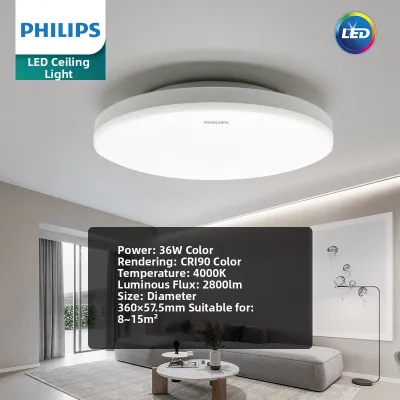
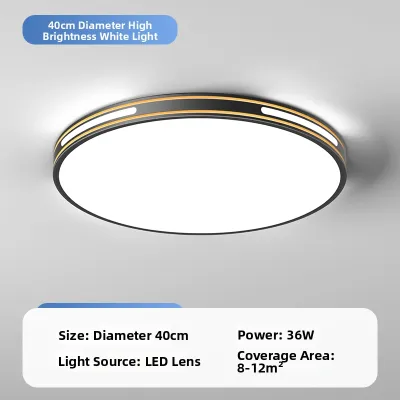
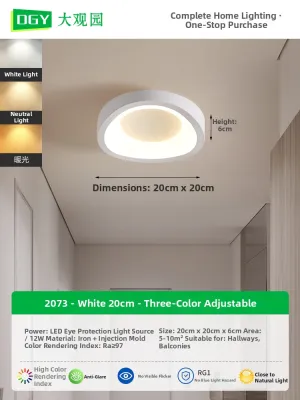
Prices are valid at publication and may change. Please refer to the product page for the latest price.
You can calculate your room’s total brightness requirement using a straightforward formula: multiply the room’s total area in square meters by the target lux level recommended for its primary activity. For example, a standard bedroom measuring 12 square meters that requires a relaxing light level of 100 lux will need a cumulative light output of 1,200 lumens (12 sqm × 100 lux = 1,200 lumens). This total can then be divided among multiple smaller fixtures to ensure even distribution.
However, a basic calculation is only a starting point, as physical room characteristics directly influence how light behaves. Rooms with high ceilings require higher initial lumen outputs because light intensity decreases as the distance between the fixture and the floor increases. Similarly, dark wall paints, wood paneling, or matte floor tiles absorb light, whereas light-colored walls, white ceilings, and polished cream tiles reflect light, making a room feel significantly brighter with the same number of fixtures.
To achieve the best visual comfort, avoid relying on recessed panel lights as your sole source of illumination. Instead, treat these panels as your primary ambient or broad task layer, which provides a uniform baseline of light throughout the space. You can then layer your lighting by introducing secondary accent lights, such as warm LED strip lights in drop ceilings, or localized task lights, like under-cabinet fixtures in the kitchen, to build depth and flexibility.
Choosing the Correct Panel Size and Ceiling Cutout
When shopping for recessed ceiling lights, you will encounter two primary sets of measurements: the outer frame dimensions and the cutout size. The outer frame, or bezel, is the visible portion of the panel that sits flush against the finished ceiling surface. The cutout size, however, represents the actual diameter or dimensions of the hole you must cut into your ceiling material to slide the fixture’s housing inside.

Before making any cuts or purchases, you must inspect the structural cavity behind your ceiling. Use a stud finder or refer to architectural plans to locate wooden ceiling joists, metal framing channels, or concrete support beams. The recessed panel’s housing and its external driver box must fit into the ceiling cavity without touching or putting structural pressure on these supports, meaning your layout must work around the existing framework.
The shape of the panel also dictates how you plan and execute the installation. Round panels are highly popular because cutting circular holes with a standard adjustable hole saw is fast and highly forgiving. Square or rectangular panels, while offering a modern, linear aesthetic, require precise cutting and must align perfectly with your walls, drywall seams, or ceiling grids, as even a minor deviation of a few millimeters will look noticeably crooked from below.
Always verify the manufacturer’s official specification sheet for the exact cutout tolerances of your chosen model. Do not rely on generic size labels like “6-inch light,” as different brands may require slightly different cutout diameters for their version of a 6-inch fixture. Cutting a hole that is even slightly too large can prevent the tension-loaded spring clips from securing the panel, leaving you with gaps or a loose, unsafe installation.
Room-by-Room Guide: Matching Light Size and Brightness to Function
Kitchen and Task-Heavy Zones
Kitchens are high-activity zones that demand excellent visibility for safe food preparation, chopping, and reading recipes. For these reasons, task-heavy culinary spaces require a relatively high target light intensity, typically between 200 and 300 lux. Achieving this level of brightness ensures that you can work safely without straining your eyes or misjudging measurements.
Instead of installing a single, high-wattage panel in the center of the kitchen ceiling, a much more effective strategy is to use multiple smaller, strategically spaced panels. Placing 4-inch or 6-inch panels directly above the edges of your countertops and kitchen island eliminates the harsh shadows that your body would otherwise cast if the light source were positioned directly behind you.
Visual clarity is also heavily dependent on color quality and temperature. When selecting ceiling lights for the kitchen, look for panels with a Color Rendering Index (CRI) of 80 or higher, which ensures that fresh ingredients and cooked dishes appear in their true, natural colors. A neutral white color temperature of 4000K to 5000K is ideal here, as it provides a clean, energizing environment that keeps you alert.
Living Room and Multi-Use Spaces
The living room serves as the social heart of the home, hosting activities that range from watching television and reading to entertaining guests. To accommodate these diverse needs, aim for a moderate ambient light intensity of 100 to 150 lux. This baseline provides enough illumination for safe movement and casual conversation without creating an overly bright, sterile atmosphere.
To achieve a balanced look, distribute your recessed panels evenly across the ceiling to establish a uniform ambient base. Be mindful of placement relative to entertainment centers; positioning panels directly in front of or above high-gloss television screens or polished tile floors can cause distracting reflections and glare. Spacing the fixtures slightly away from these surfaces will keep your viewing experience comfortable.
Because the living room’s function changes throughout the day, flexibility is key. Installing dimmable recessed panels allows you to easily transition from bright, clear lighting for daytime chores to a soft, warm glow for movie nights. Ensure that you pair these fixtures with a compatible dimmer switch to prevent flickering and allow for seamless control over the room’s mood.
Bedroom and Relaxation Areas
Bedrooms are dedicated sanctuaries where lighting should prioritize visual comfort and support healthy sleep cycles. To help your body wind down in the evening, target a low ambient light intensity of 50 to 100 lux. This softer illumination signals to your brain that it is time to rest, creating a cozy and inviting environment.
Strategic placement is critical in a bedroom to prevent discomfort. Avoid installing recessed panels directly above the headboard or pillow area, as looking straight up into a light source while lying down causes immediate eye strain. Instead, position smaller 3-inch or 4-inch panels around the perimeter of the room, near closets, or toward the foot of the bed.
To enhance the relaxing atmosphere, opt for warm white color temperatures between 2700K and 3000K, which mimic the gentle glow of traditional incandescent bulbs. You can supplement these low-intensity ceiling lights with localized bedside reading lamps or wall sconces, allowing you to turn off the main overhead lights entirely when preparing for sleep.
Installation Clearances, Electrical Checks, and Safety Boundaries
Installing recessed ceiling lights requires careful attention to physical clearances and electrical specifications to ensure long-term safety. LED panels, while highly efficient, still generate heat from their internal diodes and external driver boxes. You must verify that your ceiling cavity has a depth of at least 3 to 5 centimeters of clear airspace above the fixture to allow for proper heat dissipation, preventing premature driver failure or fire hazards.
Electrical compatibility is another vital consideration, especially in the Philippines where the standard residential supply is 220V-240V at 60Hz. Before purchasing any fixtures, check the product packaging or driver label to ensure it matches these local electrical parameters. Always look for official safety certifications, such as the Philippine Standard (PS) mark or the Import Commodity Clearance (ICC) sticker, which verify that the product has undergone rigorous safety testing.
Before beginning any physical installation or wiring work, safety boundaries must be strictly observed. Always turn off the main circuit breaker at your home’s distribution panel and use a reliable non-contact voltage tester to confirm that the wires in the ceiling cavity are completely de-energized. Never assume a wall switch is sufficient to isolate the power, as improper wiring could leave the circuit active.
While replacing a pre-existing recessed light is a manageable task for many homeowners, certain scenarios demand professional expertise. If your project involves running new fixed electrical wiring, modifying structural wooden ceiling joists to accommodate a larger fixture, or installing panels in high-humidity areas like bathrooms or covered outdoor terraces, you must hire a qualified, licensed electrician. This ensures your installation complies with the Philippine Electrical Code (PEC) and remains safe under tropical conditions.
Common Sizing and Brightness Mistakes to Avoid
One of the most frequent errors homeowners make is falling into the “more is better” trap. Over-illuminating a room with excessively high-lumen panels creates a harsh, clinical environment that leads to eye strain, headaches, and uncomfortable glare. Good lighting design is about placing the right amount of light exactly where it is needed, rather than flooding the entire space with blinding brightness.
Another common mistake is ignoring the beam angle of your selected ceiling lights. Panels with a narrow beam angle act like spotlights, creating tight, intense pools of light on the floor separated by dark, unlit gaps. For general ambient lighting, choose wide-beam panels—typically between 100 and 120 degrees—which distribute light broadly and blend together smoothly across the room.
Additionally, avoid buying recessed panels based solely on their wattage. Wattage indicates electrical power consumption, not the actual amount of light produced. Because LED efficiency varies significantly across different brands and models, a high-quality 9-watt LED panel might produce the same number of lumens as a poorly engineered 12-watt panel, making lumen output the only reliable metric for brightness comparison.
Finally, remember to account for your room’s natural daylight patterns and permanent furniture layouts. Installing a recessed panel directly above a tall wardrobe or a high bookshelf will block the light and cast deep shadows, rendering that portion of the fixture useless. Map out your lighting layout with your final furniture placement in mind to ensure unobstructed, effective illumination.
Frequently Asked Questions (FAQ)
Can I install recessed panel lights in a solid concrete ceiling?
Standard recessed panel lights require a hollow ceiling cavity, such as a gypsum board, plywood, or suspended ceiling, to accommodate the spring clips, wiring, and external driver box. If your home has a solid concrete slab ceiling, you cannot cut a recessed cavity into it without compromising structural integrity. In this scenario, the most practical alternatives are surface-mounted LED panels, which screw directly onto the concrete surface, or installing a track lighting system. Alternatively, you can construct a shallow dropped false ceiling to create the necessary hollow space for recessed fixtures.
Do I need a special dimmer switch for LED panel lights?
Yes, standard legacy dimmer switches designed for older incandescent bulbs are generally incompatible with LED technology. Using an incompatible dimmer will often cause your recessed panel lights to flicker, buzz audibly, or experience premature electronic failure. To ensure smooth, flicker-free dimming, you must verify that the recessed panel’s driver is explicitly labeled as dimmable by the manufacturer. Furthermore, you must pair it with a modern wall dimmer switch that is specifically rated for LED loads and matches the driver’s dimming protocol.
Community discussion
Share your experience or ask a question. Comments are reviewed before publication.