
Living in a modern high-rise condominium often means adapting to compact architectural realities. One of the most common design challenges in urban condo units is the limited ceiling height, which frequently hovers around 2.4 to 2.7 meters due to structural concrete slab construction. Standard hanging chandeliers or bulky semi-flush fixtures can make these spaces feel cramped, visually lowering the ceiling and creating a claustrophobic atmosphere. To maintain an open, airy feel while ensuring bright, even illumination, a slim square LED flush mount light serves as an ideal solution.
These low-profile fixtures sit almost entirely flat against the ceiling, preserving precious overhead clearance while delivering powerful, diffused light. Choosing a square silhouette over a traditional round one introduces clean, architectural lines that align seamlessly with modern interior layouts, corridors, and built-in cabinetry. By selecting an integrated LED replacement square fixture, you can upgrade your condo’s lighting scheme, improve energy efficiency, and create the illusion of a taller, more spacious room.
Core Requirements for Low-Ceiling Condo Lighting
When selecting lighting for a low-ceiling condo, the physical profile of the fixture is your primary consideration. Traditional flush mounts often feature deep glass bowls or decorative metal collars that protrude 10 to 15 centimeters from the ceiling. In contrast, modern ultra-slim square LED panels are engineered to be incredibly thin, often measuring less than 2.5 centimeters in total thickness. This minimal projection ensures that the light source remains well above the average eye level, preventing the fixture from dominating the visual field or interfering with daily movement.
Products mentioned in this guide
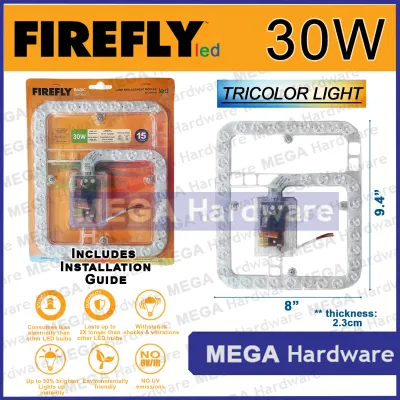
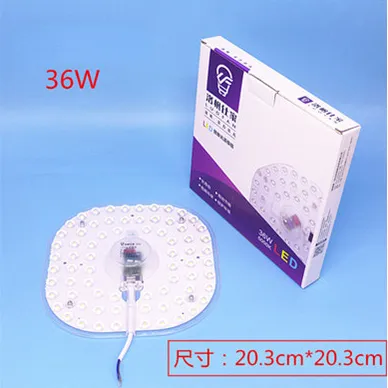
Prices are valid at publication and may change. Please refer to the product page for the latest price.
Balancing this ultra-thin profile with adequate light output requires a basic understanding of integrated LED technology. Because slim fixtures lack the physical space for traditional screw-in bulbs, they rely on a matrix of light-emitting diodes mounted directly onto an internal circuit board. This design allows the fixture to emit a high volume of lumens—the actual measure of brightness—without requiring a deep housing. When shopping for a replacement, you must look for fixtures that optimize this lumen-to-thickness ratio, ensuring you do not sacrifice brightness for a slim aesthetic.
The geometric shape of your ceiling fixtures also plays a significant role in how space is perceived. Square LED flush mounts offer distinct spatial advantages in modern condo layouts, which are typically characterized by straight lines, rectangular rooms, and sharp angles. A square fixture acts as a visual anchor that aligns naturally with the perimeter of the room, the edges of kitchen countertops, or the orientation of a dining table. This alignment creates a sense of order and structural harmony that round fixtures often fail to provide, making the entire living space feel more cohesive and intentionally designed.
Key Dimensions to Evaluate Before Buying
To ensure your new square LED flush mount fits perfectly and performs as expected, you must evaluate several physical and optical dimensions before making a purchase.

Profile and Clearance
The total thickness of the fixture is the most critical dimension for low ceilings. Aim for a profile of 2.5 centimeters or less to maximize headroom. However, you must also consider the clearance required for installation. In many concrete-slab condos, the electrical junction box is recessed directly into the concrete, leaving no room for external wiring or bulky driver units. You must measure the depth and width of your existing junction box to ensure the fixture’s mounting bracket and internal driver can sit flush against the ceiling surface without leaving unsightly gaps or requiring you to chisel into the concrete.
Size and Proportion
Matching the physical dimensions of the square fixture to the size of the room is essential for visual balance. A fixture that is too small will look lost on the ceiling and fail to provide adequate light, while an oversized unit can overwhelm a compact room. As a general guideline, consider these proportions:
- Small Spaces (Bathrooms, Hallways, Walk-in Closets): Look for square fixtures measuring 15 to 20 centimeters per side.
- Medium Spaces (Bedrooms, Kitchens, Study Areas): Opt for fixtures between 22 and 30 centimeters per side.
- Large Spaces (Combined Living and Dining Areas): Choose larger panels measuring 40 to 60 centimeters per side, or install multiple smaller fixtures in a grid pattern to distribute light evenly.
Light Output and Color Temperature
Different zones in your condo require distinct lighting characteristics to support daily activities. Instead of looking at wattage, which only measures power consumption, focus on lumens to determine actual brightness.
- Task-Oriented Zones: Kitchens, home offices, and bathrooms require bright, clear visibility. Aim for 1,500 to 2,500 lumens with a neutral to cool white color temperature (4000K to 6500K) to enhance focus and accurately render colors.
- Relaxation Zones: Bedrooms and living areas benefit from softer, warmer tones. Look for 800 to 1,500 lumens with a warm white color temperature (2700K to 3000K) to create a cozy, inviting ambiance.
- Multi-Purpose Zones: If your living area doubles as a workspace, consider a color-selectable (CCT) fixture that allows you to toggle between warm, neutral, and cool light via a switch or remote control.
Diffuser Quality
Because low ceilings place the light source closer to your eyes, the quality of the diffuser is paramount. A poor-quality diffuser will allow individual LED chips to show through as bright, harsh spots, causing intense glare and eye strain. Look for fixtures equipped with high-grade acrylic (PMMA) or UV-stabilized polycarbonate diffusers. These materials scatter the light evenly across the entire surface of the panel, creating a soft, uniform glow that eliminates harsh shadows and minimizes glare when you look upward.
Electrical Compatibility and Installation Boundaries
Before purchasing any LED replacement square fixture, you must verify that it is fully compatible with your condo’s electrical infrastructure and understand the safety limits of installation.
Voltage and Electrical Standards
In the Philippines, the standard residential electrical supply is 220V to 230V at a frequency of 60Hz. Many lighting fixtures sold on global ecommerce platforms are designed for 110V or 50Hz systems. Installing an incompatible fixture can lead to immediate driver failure, severe flickering, or fire hazards. Always check the product specifications label to confirm it is rated for 220V-240V and 60Hz. Additionally, look for recognized safety certifications, such as the Philippine Standard (PS) mark, the Import Commodity Clearance (ICC) sticker, or international equivalents like CE and RoHS, to ensure the fixture meets basic electrical safety standards.
Dimmer Switch Compatibility
If you plan to control your new square LED light with a wall dimmer, you must verify compatibility beforehand. Standard wall dimmers designed for older incandescent bulbs work by rapidly cutting off the electrical current, which can cause integrated LED drivers to flicker, buzz, or fail prematurely. To avoid this, you must ensure that both the LED fixture is explicitly labeled as “dimmable” and that you install a compatible LED-rated dimmer switch (such as a trailing-edge or triac dimmer). If the fixture is non-dimmable, attempting to dim it can permanently damage the internal circuitry.
Installation Safety and Professional Boundaries
While replacing a basic ceiling light is a common home improvement task, working with electrical wiring carries inherent risks. Always prioritize safety by adhering to these critical boundaries:
- Power Isolation: Before touching any wires, turn off the power supply at the main circuit breaker panel. Do not rely solely on the wall switch, as some wiring configurations may still carry live current to the fixture box.
- Structural Integrity: Concrete slab ceilings require specialized masonry drill bits and heavy-duty anchors to secure mounting brackets. Never drill blindly into a concrete ceiling without verifying the location of embedded electrical conduits or structural tension cables.
- When to Call a Professional: If you encounter outdated wiring, missing ground wires, complex multi-way switch configurations, or if you feel uncomfortable working at heights on a ladder, stop immediately and hire a licensed electrician. Professional installation ensures compliance with local electrical codes and guarantees a secure, flush fit against the ceiling.
Building Your Shortlist: Features and Trade-offs
As you compare different square LED flush mount options, understanding the trade-offs between various design features will help you make a practical, long-term decision.
Edge-to-Edge Lighting vs. Framed Designs
The aesthetic style of your fixture influences both the look of the room and the quality of the light.
- Edge-to-Edge Panels: These fixtures feature a frameless design where the diffuser extends to the very edge of the housing. This maximizes the light-emitting surface, creating a seamless, minimalist look that blends into the ceiling and makes the room feel larger.
- Framed Designs: These fixtures incorporate a visible bezel, often finished in matte black, brushed aluminum, or wood grain. While frames can add a stylish accent that complements your interior decor, they also create a distinct visual boundary on the ceiling, which can make a small room feel slightly more segmented.
Heat Dissipation and Housing Materials
Although LEDs are highly efficient, their internal drivers and chips still generate heat during operation. In a tropical climate characterized by high ambient temperatures and humidity, effective thermal management is crucial for the longevity of the fixture.
- Aluminum Backplates: High-quality slim LED fixtures utilize aluminum backplates or frames. Aluminum is an excellent thermal conductor, drawing heat away from the sensitive LED chips and dissipating it into the surrounding air.
- Plastic Housings: Cheaper fixtures often rely entirely on plastic housings. While lightweight and inexpensive, plastic is a poor heat conductor. Over time, trapped heat can degrade the LED chips, leading to a loss of brightness, color shifting, or premature driver failure. Investing in a fixture with a robust metal heat sink is highly recommended for long-term reliability.
Smart and Remote Features
Many modern square LED flush mounts come equipped with smart technology, allowing you to control brightness and color temperature via a smartphone app, remote control, or voice commands.
- The Pros: Smart fixtures offer incredible flexibility, allowing you to transition from bright daylight for working to a warm, dimmed glow for watching movies without installing complex wall dimmers.
- The Cons: These fixtures require a stable home Wi-Fi or Bluetooth connection to function smart-enabled features. If someone accidentally turns off the physical wall switch, the fixture loses power, disconnecting it from your smart home network and rendering remote controls useless.
Warranty and Replaceability
Unlike traditional fixtures where you simply screw in a new bulb when it burns out, most slim square LED flush mounts feature integrated light sources. This means that if a single component—such as the internal driver or an LED chip—fails, you must replace the entire fixture.
- Budget vs. Quality: A cheap, unbranded square LED light might cost between ₱300 and ₱500, but it may lack a warranty and fail within a year due to poor driver quality.
- Long-Term Value: Opting for a reputable brand that offers a clear 1-to-3-year warranty and uses high-quality components might cost between ₱1,200 and ₱3,500. This initial investment pays off in durability, consistent light quality, and the peace of mind that you won't have to repeatedly uninstall and replace failing fixtures.
Frequently Asked Questions (FAQ)
Can I replace a round flush mount with a square LED fixture?
Yes, you can replace a round flush mount with a square LED fixture, but you must address a few physical and aesthetic details during the transition. First, ensure that the mounting bracket of the new square fixture is compatible with your existing round junction box. Most modern square fixtures include universal mounting plates with multiple slot configurations designed to align with standard round or octagonal boxes.
Second, pay close attention to the ceiling footprint. Over time, the ceiling paint beneath your old round fixture may have faded, discolored, or accumulated dust and grime. If your new square fixture has a smaller footprint or leaves the corners of the old circular outline exposed, you will need to patch, sand, and repaint that section of the ceiling to ensure a clean, professional finish. Finally, remember that square fixtures require precise alignment parallel to your walls; even a slight tilt will be highly visible.
Do slim square LED lights get too hot for low ceilings?
Slim square LED lights do not get dangerously hot, provided they are engineered with proper thermal management. While traditional incandescent bulbs release about 90 percent of their energy as heat, LEDs are far more efficient, converting the majority of their energy into light. However, the electronic driver and the LED chips themselves still generate localized heat that must be dissipated.
To ensure safe operation against a low ceiling, choose fixtures that feature aluminum backplates or dedicated thermal vents. These materials safely conduct heat away from the ceiling surface and release it into the room. Avoid installing slim fixtures in completely enclosed, unventilated spaces unless they are explicitly rated for that environment. Checking for safety certifications on the product packaging will also confirm that the fixture has undergone rigorous thermal testing.
How do I clean a flush mount LED without damaging the diffuser?
Cleaning a flush mount LED fixture requires gentle methods to avoid scratching, clouding, or yellowing the delicate plastic diffuser. Before cleaning, always turn off the wall switch and allow the fixture to cool completely to prevent thermal shock or electrical hazards.
For routine maintenance, use a dry, clean microfiber cloth to gently wipe away dust, cobwebs, and loose debris from the surface of the diffuser. If the fixture has accumulated grease or insect spots—common in kitchen and dining areas—dampen the microfiber cloth slightly with warm water and a single drop of mild dish soap. Never spray water or cleaning solutions directly onto the fixture, as liquid can seep into the housing and damage the internal electronics. Avoid using harsh chemicals, alcohol, acetone, or abrasive scrubbing pads, as these will permanently scratch or degrade the acrylic or polycarbonate material, reducing its light transmission over time.
Community discussion
Share your experience or ask a question. Comments are reviewed before publication.