
Upgrading to a sleek, modern chandelier can instantly elevate your home’s aesthetic, but handling live electrical wires and hanging a heavy fixture from a high ceiling can be an intimidating task. Safely installing a modern chandelier requires a systematic approach: isolating the power at your main circuit breaker, verifying that your ceiling electrical box can structurally support the fixture’s weight, making secure wire connections according to the manufacturer’s instructions, and physically mounting the canopy flush to the ceiling. In tropical climates like the Philippines, where high humidity can affect electrical components and structural materials over time, conducting a thorough inspection of your existing wiring and ceiling boxes is even more critical. By following these precise steps and knowing when to call a professional, you can successfully complete this lighting upgrade without compromising safety.
What tools and safety preparations are required before starting the installation?
Before beginning your installation, you must completely isolate the electrical power at the main service panel and gather specialized tools designed for electrical work. Never rely on a simple wall switch to cut the power; always switch off the dedicated circuit breaker. Once the breaker is off, use a reliable non-contact voltage tester on the existing switch and fixture to verify the absolute absence of current before touching any wires.
Gathering the correct tools beforehand prevents unnecessary interruptions and ensures a safer workflow. You will need insulated screwdrivers, wire strippers, electrical tape, a sturdy A-frame ladder, safety glasses, and work gloves. Because tropical humidity can increase conductivity risks if any residual current is present, ensure your hands, tools, and the workspace are completely dry before starting.
Products mentioned in this guide
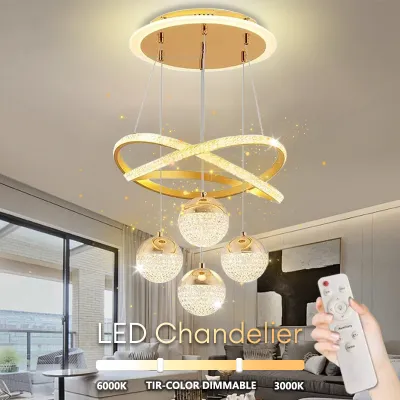
80 Lazada user ratings
There are some dents on the ring and you need to put a cable tie to fix in order get the proper alignment. The design looks elegant but it i…Read full reviewShow less
There are some dents on the ring and you need to put a cable tie to fix in order get the proper alignment. The design looks elegant but it is made of light material hoping that it's safe. The remote control is also not working.
Adjustable hanging height, Aluminum and acrylic material, Fast delivery service, Perfect for dining rooms, Aluminum and acrylic material, Tr…Read full reviewShow less
Adjustable hanging height, Aluminum and acrylic material, Fast delivery service, Perfect for dining rooms, Aluminum and acrylic material, Tricolor dimmable lighting,
Energy-efficient LED technology, Suitable for large spaces, Tricolor dimmable lighting,
sobrang ganda oang mayaman
sira at kulang
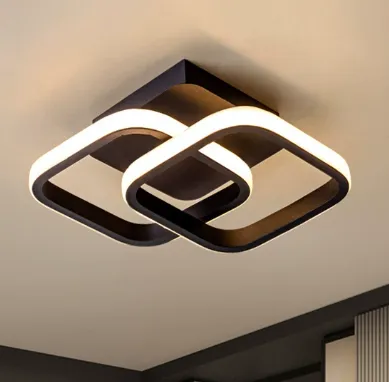
1,056 Lazada user ratings
🛠️Durability:10/10 🎨Design:10/10 💡Brightness:7/10 okey naman .. maganda .. okey na okey kung sa kwarto ilalagay kasi medyo dim sya .. 3 klase…Read full reviewShow less
🛠️Durability:10/10 🎨Design:10/10 💡Brightness:7/10 okey naman .. maganda .. okey na okey kung sa kwarto ilalagay kasi medyo dim sya .. 3 klase ng ilaw nya .. pwde ka mamili High-quality acrylic material, Suitable for various room sizes, Suitable for various room sizes, Easy to install and use, Easy to install and use,
Stylish and modern design, Versatile tri-color lighting options, Bright and powerful illumination, Easy to install and use, Long lifespan of…Read full reviewShow less
Stylish and modern design, Versatile tri-color lighting options, Bright and powerful illumination, Easy to install and use, Long lifespan of 50,000 hours, It makes our living room classy and elegant. Super goods ang quality. Thank you seller!
Suitable for various room sizes, High-quality acrylic material, Easy to install and use, Bright and powerful illumination, Elegant and refin…Read full reviewShow less
Suitable for various room sizes, High-quality acrylic material, Easy to install and use, Bright and powerful illumination, Elegant and refined lighting fixture, Versatile tri-color lighting options, Stylish and modern design,
Bright and powerful illumination, High-quality acrylic material, Elegant and refined lighting fixture,
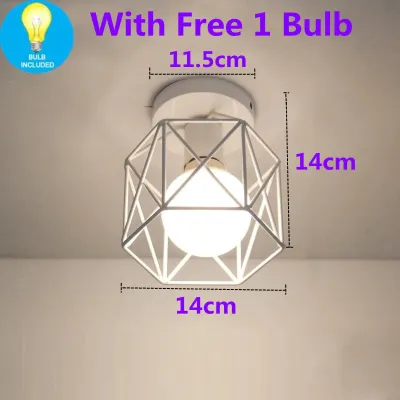
382 Lazada user ratings
maganda maliwanag talaga ang mga ilaw na to quality at maganda ang presyo working po lahat mabilis anh shipment ni seller mabait at maasahan…Read full reviewShow less
maganda maliwanag talaga ang mga ilaw na to quality at maganda ang presyo working po lahat mabilis anh shipment ni seller mabait at maasahan salamat seller
Ang bilis maship! Ang gara din.. maliit lng sya at mura din.. di nga lng ganun kaliwanag yung 5w free bulb.. mapapabili aq ulit s shop n to.
Beautiful vintage design., but not Provides ample lighting so We change a branded e27 led bulb.. Good for Nordic style home.. 💡🏡
easy to install. walang damage. economical but stylistic. thank you lazada at seller. highlyvrecommended sa budget conscoious
late upload..now lng kc nakabit ng mr. ko maganda cia nilagay ko hagdan banda pagakyat..mura pa..thank u 👌
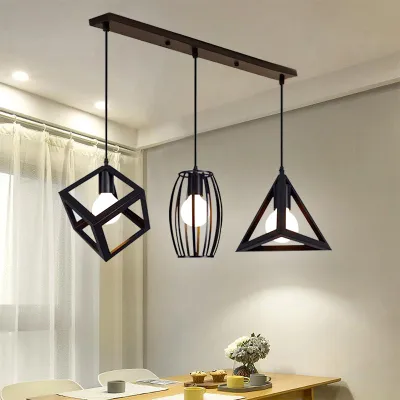
710 Lazada user ratings
Easy to install and use, Great for both small and large spaces, Provides ample lighting, Creates a warm and cozy atmosphere, Excellent value…Read full reviewShow less
Easy to install and use, Great for both small and large spaces, Provides ample lighting, Creates a warm and cozy atmosphere, Excellent value for money, Adjustable length for flexible installation, Perfect for restaurants, bars, and cafes, Perfect for restaurants, bars, and cafes,
Excellent value for money 🎨Design:Great for both small and large spaces, price: very affordable dko palang naikakabit Kasi Hindi pa pla kasa…Read full reviewShow less
Excellent value for money 🎨Design:Great for both small and large spaces, price: very affordable dko palang naikakabit Kasi Hindi pa pla kasama Ang light/bulb dto s inorder ko. mag update nlng Ako kpag naikabit na.
Adds a retro industrial touch, Easy to install and use, gabda lakas makaganda sa bahay live it ang ganda nita super love it thabk you sellwr
Adjustable length for flexible installation, Creates a warm and cozy atmosphere, Adds a retro industrial touch, Unique and stylish design,
Perfect for restaurants, bars, and cafes, Creates a warm and cozy atmosphere, Great for both small and large spaces,
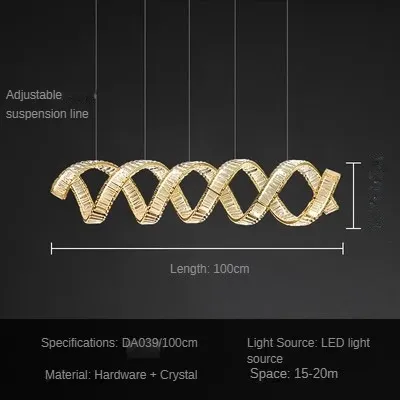
4 Lazada user ratings
3-4 days late delivery due to holidays but worth it and safely delivered, no damage. Tested and it's beautuful.
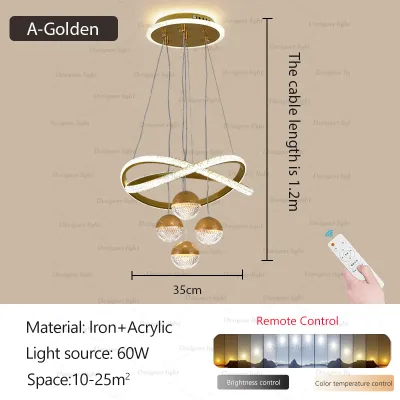
638 Lazada user ratings
Stunning design, perfect for my living room, High-quality materials used, feels sturdy and durable, The LED lights create a beautiful ambian…Read full reviewShow less
Stunning design, perfect for my living room, High-quality materials used, feels sturdy and durable, The LED lights create a beautiful ambiance,
The LED lights create a beautiful ambiance, Stunning design, perfect for my living room, High-quality materials used, feels sturdy and durab…Read full reviewShow less
The LED lights create a beautiful ambiance, Stunning design, perfect for my living room, High-quality materials used, feels sturdy and durable,
Gusto talaga ng pamilya ko. Ang mga ilaw ay maliwanag ngunit hindi kumikinang, ito ay nagkakahalaga ng pagbili pabalik
Ang malambot at hindi mapagkakatiwalaan na liwanag ay konsistente sa paglalarawan ng negosyante
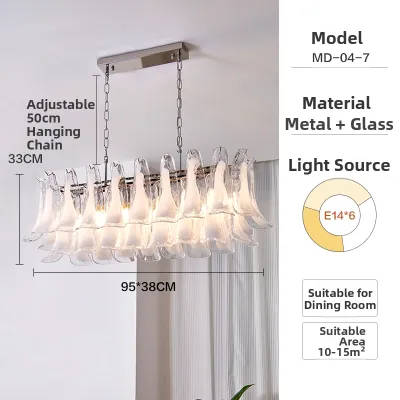
1 Lazada user ratings
It looks absolutely beautiful installed; it instantly leveled up the style of my home.
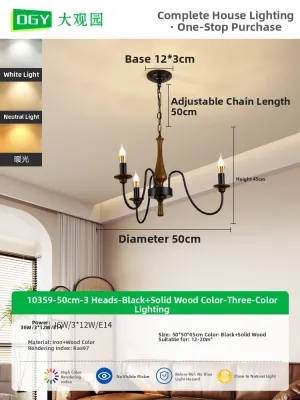
107 Lazada user ratings
I finished the installation today, and the quality is great! My family loves it, and the installer really put in the effort. Definitely reco…Read full reviewShow less
I finished the installation today, and the quality is great! My family loves it, and the installer really put in the effort. Definitely recommending it!
I really like it; it matches the decor style of my living room and the quality is pretty good. It's got that vintage French look to it.
The effect looks really great, and the quality is impressive; we picked out all the lights for the house.
Super pretty, I really love it!
Prices are valid at publication and may change. Please refer to the product page for the latest price.
Next, carefully review the manufacturer’s installation manual. Modern chandeliers often feature delicate integrated LED modules, specific voltage requirements (typically 220V to 240V in local residential systems), and unique assembly instructions. Check the manual for the fixture’s exact weight, dimensions, and wattage limits to ensure compatibility with your existing electrical setup.
Finally, prepare the physical workspace. Clear out all furniture, rugs, and decorative items directly below the installation area to protect them from falling debris or tools. Lay down a soft blanket or a heavy drop cloth over the flooring to protect your tiles or wood floors and provide a safe, cushioned surface to assemble the chandelier’s delicate components.
How do you safely remove the existing fixture and inspect the ceiling electrical box?
Safely removing the old fixture involves carefully unscrewing its canopy, supporting its weight while disconnecting the wires, and thoroughly inspecting the ceiling electrical box to ensure it can support your new chandelier. Never let a light fixture hang solely by its electrical wires during removal, as this can damage the copper conductors and create hidden electrical hazards. Have an assistant support the weight of the old fixture as you loosen the mounting screws.

Once the canopy is lowered and the wiring is exposed, use your non-contact voltage tester one more time on the bare wires to confirm the power is truly off. Unscrew the wire connectors and untwist the wires, starting with the hot wire, then the neutral, and finally the ground wire. Carefully lower the old fixture and set it aside on your protected workspace.
With the old fixture removed, inspect the ceiling electrical box’s structural integrity. For heavy fixtures like modern chandeliers, the electrical box must be securely anchored directly to a ceiling joist or an approved heavy-duty adjustable brace. A standard plastic box designed only for lightweight fixtures or smoke detectors is a major safety hazard and cannot support a suspended load.
Verify the electrical box’s maximum weight rating against the new chandelier’s total assembled weight. Many standard boxes are rated for up to 50 pounds (approximately 22.7 kg), but some modern chandeliers with heavy metal frames or extensive glass elements may exceed this. Additionally, inspect the condition of the existing copper wires; look for brittle insulation, green copper corrosion from humidity, or scorch marks that would require professional repair before you proceed.
What are the correct steps to wire the modern chandelier to the ceiling?
Wiring a modern chandelier correctly requires identifying the hot, neutral, and ground wires on both the fixture and the ceiling, stripping the wire ends to the recommended length, and securing them with appropriate wire connectors. Always follow the manufacturer’s wiring diagram rather than assuming wire colors, as international standards and older home wiring can vary significantly.
In typical modern installations, the ceiling wires consist of a hot wire (often black or red), a neutral wire (often white), and a bare copper or green ground wire. However, your new chandelier might use different wire styles. For instance, some modern fixtures feature a clear cord where the neutral wire is identified by subtle ridges on the insulation, while the hot wire has smooth insulation. Other fixtures may follow European color standards, using brown for hot, blue for neutral, and green/yellow for ground.
Use wire strippers to expose about 1/2 inch to 3/4 inch of bare copper on each wire, ensuring you do not nick or damage the inner metal conductor. Place the bare ends of the matching wires side-by-side, then twist an appropriately sized wire connector clockwise until it is tight. Give each wire a gentle tug to ensure it is firmly locked inside the connector, and wrap the base of the connector with electrical tape for added security against moisture.
A continuous ground connection is vital for safety, especially with metal fixtures. Connect the fixture’s ground wire to the ceiling box’s grounding screw or the house grounding wire. If you are using a metal mounting bracket, ensure the ground wire is also bonded to the bracket’s grounding screw. Once all connections are secure, carefully fold the wires into the ceiling box, keeping them organized to prevent pinching or accidental disconnection when mounting the canopy.
How do you physically mount the chandelier and secure the canopy?
To physically mount the chandelier, you must secure the mounting bracket to the electrical box, hang the fixture’s main body to support its weight, adjust the hanging height, and fasten the canopy flush against the ceiling. This process ensures the fixture remains structurally stable and hides all electrical connections.
Begin by attaching the provided mounting bracket or crossbar securely to the electrical box using the correct machine screws. Ensure the bracket is level and tight against the box, as any wobble here will cause the entire chandelier to hang crookedly. If your fixture is exceptionally heavy, it may require support screws driven directly into the wooden ceiling joists surrounding the box.
Many modern chandeliers include a safety cable or a temporary hanging hook. Use this hook to hang the fixture body from the bracket while you make the final adjustments and wire connections. If no hook is provided, have a helper hold the fixture close to the ceiling. Adjust the chain, cord, or downrod to your desired hanging height, locking the links or set screws firmly in place. For dining tables, a common guideline is hanging the bottom of the fixture 30 to 36 inches above the tabletop, though this is a matter of personal preference and ceiling height.
Finally, slide the canopy up the rod or chain until it is flush with the ceiling. Secure it using the provided collar loop, decorative nuts, or screws. Ensure there are no visible gaps, pinched wires, or loose hardware. The canopy should sit tight against the ceiling surface without wobbling, protecting the internal electrical connections from dust and humid air.
When must you stop the DIY process and hire a licensed electrician?
You must stop the DIY installation immediately and hire a licensed electrician if you encounter structural limitations, damaged or non-standard wiring, or complex electrical configurations that exceed your technical expertise. Prioritizing safety over a DIY completion prevents severe electrical fires, shocks, and structural failures.
If your new modern chandelier weighs more than your existing ceiling box can support, or if there is no joist access to install a heavy-duty brace, a professional is needed to safely reinforce the ceiling structure. Working at height on tall ladders also introduces physical safety risks that are best handled by professionals with proper scaffolding or safety gear.
Do not attempt to connect the new fixture if you open the ceiling box and find knob-and-tube wiring, aluminum wiring, or wires with crumbling, brittle insulation. These materials require specialized handling and potentially a complete circuit upgrade. Additionally, if you do not find a grounding wire in your ceiling box, a licensed electrician must establish a safe grounding path to ensure the fixture is electrically safe.
Complex configurations, such as multi-way switch setups (where multiple switches control the same light), smart-home automation integrations, or incompatible dimmer switches, also require professional troubleshooting. In the Philippines, electrical work must comply with the Philippine Electrical Code (PEC). Hiring a registered master electrician or a licensed electrical contractor ensures your home remains compliant, safe, and fully insured against electrical hazards.
How do you test the new chandelier and finalize the lighting setup?
Testing your new chandelier involves restoring power at the main circuit breaker, operating the wall switch, and conducting a thorough visual and physical check of the fixture in operation. This final phase ensures the electrical connections are stable and the aesthetic setup is complete.
Return to your main service panel and switch the circuit breaker back to the “on” position. Walk back to the room and turn on the wall switch. Observe the chandelier closely for the first few minutes, listening for any unusual buzzing or humming sounds, and watching for flickering. Gently touch the wall switch plate to ensure there is no unusual heat buildup.
If your modern chandelier uses dimmable LED bulbs or integrated LED modules, test the dimming range. Ensure the dimmer switch is compatible with LEDs to prevent flickering, buzzing, or premature bulb failure. Adjust the low-end trim on your dimmer switch if necessary to achieve a smooth dimming transition. Note that perceived color temperature (such as warm white versus cool white) and spatial lighting effects are highly subjective preferences that depend on your room’s function and decor.
Step back and inspect the chandelier from multiple angles to ensure it hangs perfectly level and straight. If your fixture features adjustable arms, decorative crystals, or glass shades, carefully attach them now according to the manufacturer’s instructions, ensuring the weight remains balanced. Finally, clean off any fingerprints or smudges with a soft microfiber cloth to complete your modern lighting upgrade.
Community discussion
Share your experience or ask a question. Comments are reviewed before publication.