
Styling a beautiful table is more than just placing forks and plates where they belong; it is an art form that sets the tone for your entire gathering. Whether you are hosting an intimate Sunday family lunch, a festive holiday dinner, or a casual outdoor gathering under a warm tropical evening breeze, a thoughtful table arrangement makes your guests feel truly welcome. By combining structured etiquette with creative styling, you can transform an ordinary meal into an extraordinary sensory experience.
To achieve a polished look, you do not need expensive designer pieces. Instead, success lies in understanding the step-by-step process of layering textures, arranging functional items correctly, and adding personal touches that reflect your style. By following a systematic approach, you can easily design a table that is both visually stunning and highly functional for your guests.
Gather Your Tableware and Decor Essentials
Before you begin laying out your design, it is essential to gather all your components to ensure a smooth, uninterrupted workflow. Having everything within arm’s reach prevents you from running back and forth to the kitchen once you start styling. Start with your core tableware: dinner plates, salad plates, soup bowls, and the appropriate cutlery for your planned menu.
Products mentioned in this guide

40 Lazada user ratings
received in good condition well packed nice design perfect for upcoming holidays
Perfect for Christmas events, Exquisite festive decoration,
Lifelike American-style design, Durable and long-lasting,

25 Lazada user ratings
Unique design piece, Durable and heavy duty, Creative abstract shape, Fast shipping service, Modern Nordic style, Great for home decor, than…Read full reviewShow less
Unique design piece, Durable and heavy duty, Creative abstract shape, Fast shipping service, Modern Nordic style, Great for home decor, thankyou seller & Lazada.
Great for home decor, Fast shipping service, Durable and heavy duty,
small but ok
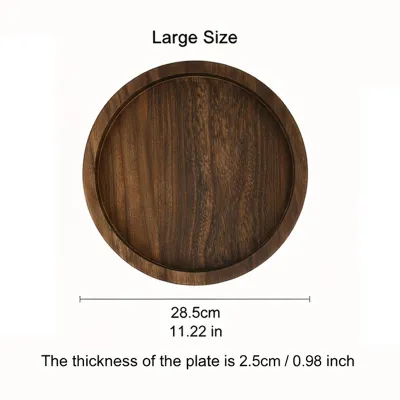
7 Lazada user ratings
The item was packed securely it’s so nice! The size is as expected. It’s quite dutable even if it is only laminated. It’s ok to engamce my t…Read full reviewShow less
The item was packed securely it’s so nice! The size is as expected. It’s quite dutable even if it is only laminated. It’s ok to engamce my table

59 Lazada user ratings
This is my second time buying this vase, and it's a solid choice for the value.
The vase is really nice; it would be even better if it had a unique shape.
It definitely looks very classy and is perfect for the living room.
It's really nice and goes well with the flowers I got from IKEA.
The vase is great, this is my second purchase!
Prices are valid at publication and may change. Please refer to the product page for the latest price.
Next, select your glassware, ensuring you have options for water and any other beverages you plan to serve. Your textile base is equally crucial; tablecloths, runners, and placemats form the canvas of your design. For decorative accents, gather charger plates, cloth napkins, and your chosen centerpiece elements.
Take a few minutes to inspect each item under good lighting. Look for chips in the ceramic, water spots on the glassware, or stubborn stains on the linens. Polishing your cutlery with a clean microfiber cloth and steaming your linens beforehand will instantly elevate the final look. Finally, verify your guest list count to ensure you have enough matching pieces and comfortable seating for everyone.
Step 1: Lay the Foundation with Linens and Chargers
The foundation of your table settings styling defines the visual theme and protects your dining surface. Begin by draping your tablecloth or laying down a table runner. If you are using a tablecloth, ensure it hangs evenly on all sides, typically with an overhang of 8 to 12 inches for a balanced look.

In warm, humid climates, choosing breathable, high-quality fabrics like linen or cotton-canvas prevents a heavy, stifling feel and keeps the table looking fresh. Smooth out any stubborn creases with a handheld steamer once the cloth is on the table. If you prefer to showcase the natural beauty of a wooden table, a simple table runner down the center offers an elegant compromise.
Once your base fabric is smooth, position your charger plates or placemats to anchor each seat. Chargers are larger decorative plates that remain on the table throughout the meal, serving as a frame for your dinnerware while protecting your linens from heat and accidental spills. If you prefer a more organic, tropical aesthetic, woven abaca or rattan placemats add beautiful natural texture.
Visual symmetry is key to a professional-looking table. Space each charger plate or placemat evenly around the table, leaving about 24 inches from the center of one plate to the center of the next. This spacing ensures your guests have ample elbow room to dine comfortably without feeling cramped. Align the bottom edge of each charger or placemat about one inch from the edge of the table to create a clean, uniform perimeter.
Step 2: Arrange the Plates, Cutlery, and Glassware
With your foundation set, you can begin the precise arrangement of your dining essentials. This step balances classic etiquette with practical functionality, ensuring your guests can navigate their meal with ease. Start by placing the dinner plate directly in the center of the charger plate or placemat. If you are serving a starter course, place the salad plate or soup bowl directly on top of the dinner plate.
Cutlery placement follows a simple, logical rule: work from the outside in. The utensils used first should be placed on the far outer edges, while those used for the main course sit closest to the plate. Place your forks on the left side of the plate, with the salad fork on the outer edge and the dinner fork closer to the plate.
On the right side, place your dinner knife with the blade facing inward toward the plate, followed by the soup spoon to its right. If you are serving a dessert course, you can place a small dessert spoon or fork horizontally above the dinner plate, or bring it out later with the dessert. Keeping all utensils aligned one inch from the bottom edge of the place setting maintains a neat, cohesive line.
Glassware sits on the upper right side of the place setting. Position the water glass directly above the dinner knife. If you are serving wine or other specialty beverages, place the corresponding wine glass to the right of and slightly below the water glass, creating a neat diagonal line. This arrangement keeps the glasses within easy reach of your guests’ dominant hand while preventing accidental spills when reaching for cutlery.
This arrangement can be easily scaled based on the occasion. For a casual family lunch, a single dinner plate, a fork, a knife, and a water glass are all you need. For a formal multi-course dinner, you will layer the starter plates, add specialized cutlery like fish forks or soup spoons, and include multiple glasses to match each course’s beverage pairing.
Step 3: Add Napkins and Personalized Details
Napkins and personalized details are the elements that transform a standard table setting into a highly curated experience. They offer an excellent opportunity to introduce accent colors, unique textures, and a sense of warmth. When it comes to napkin placement, you have several elegant options. You can fold the napkin neatly and place it in the center of the dinner plate, lay it to the left of the forks, or tuck it into the water glass for a dramatic, vertical look.
For a polished finish, consider using decorative napkin rings that complement your overall theme, such as polished brass for a classic look or natural wood for a rustic vibe. If you prefer a minimalist approach, a simple trifold napkin draped elegantly over the edge of the table under the charger plate creates a modern, clean line. Ensure your cloth napkins are thoroughly washed and pressed, as wrinkled fabric can quickly detract from your styling efforts.
To make your guests feel truly special, incorporate personalized details. Hand-written place cards placed just above the dessert spoon help guide seating and spark conversation. For formal gatherings, a beautifully printed menu card resting on the dinner plate adds an air of anticipation for the meal ahead.
Whether you are working with a modest budget of ₱1,500 for local market flowers or styling an elaborate feast, small touches make a big difference. You can tuck a small sprig of fresh rosemary, eucalyptus, or a local tropical leaf into the napkin ring to add a touch of organic beauty and a subtle, natural fragrance to each seat.
Step 4: Style the Centerpiece and Ambient Lighting
The centerpiece and lighting serve as the visual crown of your table settings styling, establishing the mood and tying your design elements together. However, a common mistake is creating an arrangement that is too tall or bulky, which can isolate guests on opposite sides of the table. To prevent this, always follow the height rule: keep all floral arrangements, candles, and decorative objects below eye level—typically no higher than 12 inches from the table surface—so guests can maintain clear sightlines and converse effortlessly.
Build your centerpiece by layering different heights and textures along the center of the table. Start with a base of low greenery, such as eucalyptus runners or local ferns, and nestle in small floral arrangements. Instead of one massive bouquet, opt for a series of small bud vases scattered down the center of the table. This approach distributes the visual weight evenly and allows you to showcase individual blooms.
Lighting is essential for creating an inviting atmosphere. Integrate safe, low-heat lighting options like battery-operated LED taper candles or delicate fairy lights woven through your greenery. When using LED lighting, verify that the products carry local safety certifications, check the battery compartment for secure seals, and choose a warm white color temperature (around 2700K to 3000K) to mimic the cozy glow of real flame without the risk of open flames near dry foliage.
Always avoid strongly scented candles or highly fragrant flowers like lilies or jasmine on the dining table. Strong artificial or natural scents can clash with the aromas of the food, altering your guests’ taste perception and potentially causing discomfort for those with sensitivities. Stick to unscented candles and neutral greenery to keep the focus on the culinary experience.
Step 5: Final Checks for Comfort and Visual Balance
Before you open the dining room doors to your guests, take a few minutes to perform a thorough walk-around and quality check. This step ensures that your table is not only visually stunning but also highly functional and comfortable for everyone seated.
Sit down in a few different chairs around the table to experience the setting from your guests’ perspective. Check the sightlines across the table to confirm that no candle holders or floral stems block your view of the person sitting opposite you. Next, verify that the chairs have enough clearance to be pulled out easily without hitting nearby walls or furniture, and ensure that individual place settings do not feel overcrowded.
Walk slowly around the perimeter of the table to make minor adjustments. Straighten any crooked cutlery, align the glassware so it forms a consistent angle at every seat, and smooth out any linens that may have shifted while you were styling. Light your candles or turn on your LED lights just ten minutes before guests arrive so the table is glowing and ready to welcome them the moment they step into the room.
Frequently Asked Questions (FAQ)
How do I adapt table settings styling for a small dining table?
Styling a smaller table requires a thoughtful edit of your decor to maximize space without sacrificing elegance. Instead of a full tablecloth, which can look bulky in a tight space, use individual placemats or a single narrow table runner to expose the natural wood or glass of your table. This creates an illusion of openness.
For your centerpiece, skip large arrangements and opt for a single, low-profile bowl or a few scattered bud vases. Finally, streamline your place settings by removing unnecessary glassware or extra cutlery. You can always bring out dessert spoons or additional glasses later in the meal as they are needed, keeping the table clean and clutter-free.
What is the difference between casual and formal place settings?
The primary difference lies in the number of courses served and the level of detail required. A casual place setting is designed for relaxed, everyday meals and typically features fewer utensils. It includes a basic dinner plate, a fork on the left, a knife and spoon on the right, a water glass, and a simply folded napkin.
A formal place setting, on the other hand, is structured for multi-course dining. It requires a decorative charger plate as a base, multiple sets of cutlery arranged in the order of use from the outside in, specialized glassware for different beverage pairings, and structured napkin folds or elegant napkin rings. Formal settings also frequently incorporate personalized details like place cards and printed menus to guide the dining experience.
Community discussion
Share your experience or ask a question. Comments are reviewed before publication.