
Living in a modern high-rise condominium in the Philippines offers unparalleled convenience, but it often comes with structural design challenges, most notably low ceiling heights. Many standard condo developments feature structural concrete slab ceilings that limit clearance to between 2.4 and 2.6 meters. In these compact spaces, traditional hanging chandeliers, low-hanging pendant lights, or bulky semi-flush fixtures can make a room feel cramped, visually cluttered, and physically restrictive. Installing recessed downlights is often impractical because it requires constructing a dropped gypsum ceiling, which further reduces precious headroom by several inches.
A slim, high-quality surface mounted led light provides the ideal solution to this spatial dilemma. These fixtures mount directly to the existing ceiling surface, offering a low-profile design that preserves maximum vertical clearance while delivering bright, uniform illumination. However, selecting the right fixture for a tropical condo environment requires careful consideration of technical specifications, heat management, and light distribution. By understanding how to evaluate these factors, you can select lighting that not only fits your ceiling height but also enhances the overall sense of space and comfort in your home.
Understanding Spatial Constraints in Low-Ceiling Condos
When dealing with low ceilings, every millimeter of vertical space counts toward the comfort and openness of your living area. The profile depth of a ceiling fixture—the distance it extends downward from the ceiling surface—directly impacts how spacious a room feels. Standard flush-mount fixtures can protrude up to five or six inches, creating a prominent visual obstacle that draws the eyes downward and emphasizes the low ceiling. In contrast, modern ultra-slim surface-mounted LED panels often feature profiles of less than one inch (approximately 25 millimeters), allowing them to blend seamlessly into the ceiling plane and remain virtually unnoticed when turned off.
Products mentioned in this guide
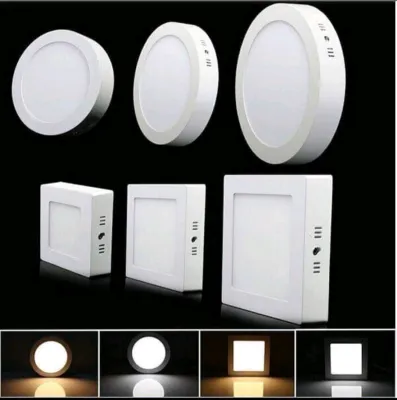
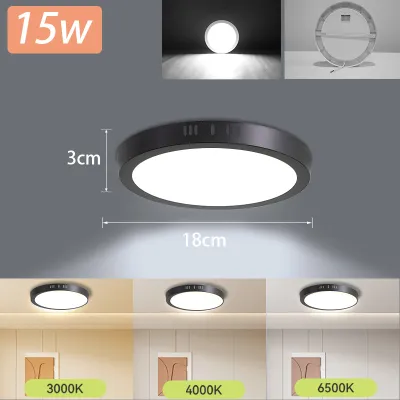
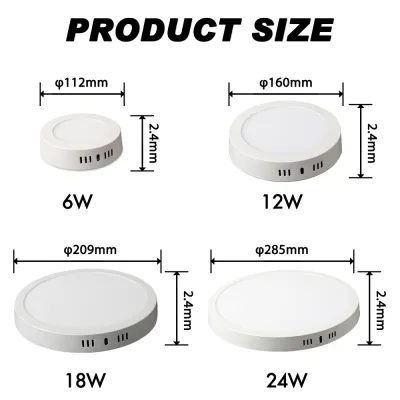
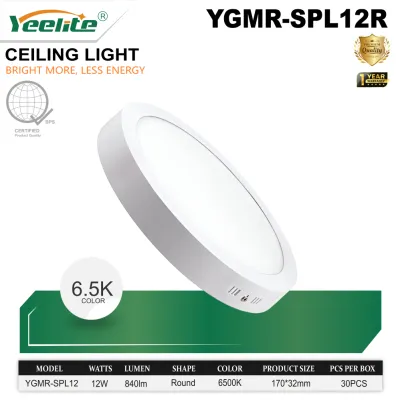
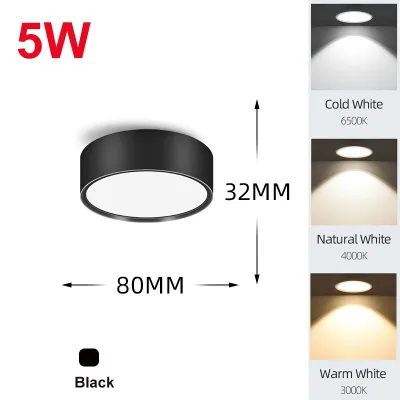
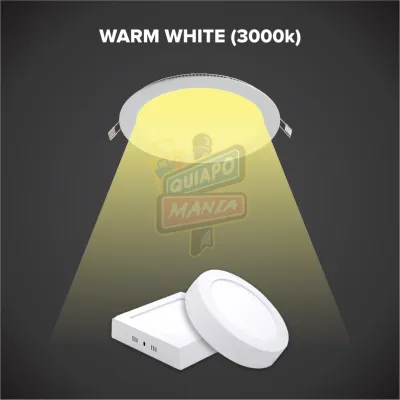
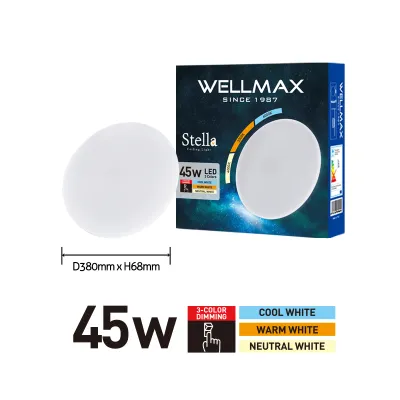
Prices are valid at publication and may change. Please refer to the product page for the latest price.
Beyond physical clearance, the visual weight of a light fixture plays a significant role in spatial perception. Visual weight refers to how heavy or dominant an object appears within a space. Bulky fixtures with dark, heavy metallic frames or intricate decorative elements can make a low ceiling feel as though it is pressing down on the room. Opting for minimalist, frameless, or white-bezeled surface-mounted LEDs reduces this visual weight, creating a clean, uninterrupted ceiling line that makes the entire room feel taller and more expansive.
Another critical factor to consider is heat dissipation, which is particularly challenging in the tropical climate of the Philippines. High ambient temperatures and elevated humidity levels can accelerate heat buildup within compact, enclosed light fixtures. LEDs are highly efficient, but they still generate thermal energy at their junctions. In ultra-slim or flush-mount designs, the limited physical space restricts the size of the aluminum heat sinks used to draw heat away from the delicate LED chips and driver components. Without adequate thermal management, trapped heat can drastically shorten the lifespan of the fixture, cause premature dimming, or lead to driver failure. When shopping, look for fixtures engineered with high-grade aluminum housings or dedicated thermal vents that facilitate passive airflow.
Finally, proper light distribution is essential for eliminating the “cave effect” often associated with low ceilings and compact condo layouts. When light is concentrated solely downward in a narrow beam, the upper portions of the walls and the ceiling corners remain in shadow, making the room feel smaller and more enclosed. To counteract this, select surface-mounted fixtures that offer wide beam angles, typically 110 degrees or broader. This wide distribution ensures that light washes over the upper walls and bounces off reflective surfaces, brightening dark corners and visually expanding the boundaries of your living space.
Critical Specifications to Check Before Buying
Navigating the technical specifications of LED fixtures is crucial to ensure safety, compatibility, and optimal performance within your condo’s electrical system. The first and most critical specification to verify is voltage compatibility. The standard residential electrical grid in the Philippines operates at 220 volts (V) with a frequency of 60 hertz (Hz). Many imported lighting fixtures sold on online marketplaces are designed for 110V grids or 50Hz frequencies. Connecting an incompatible fixture to your condo’s wiring can cause immediate driver burnout, severe flickering, or pose a serious fire hazard. Always check the product label or specification sheet to confirm it is rated for 220V-240V at 50/60Hz.

Next, you must evaluate the relationship between wattage and lumen output to ensure adequate ambient illumination without overloading your circuits. Wattage measures electrical power consumption, while lumens measure the actual amount of visible light emitted by the fixture. Modern LEDs are highly energy-efficient, meaning they can produce high lumen output at very low wattages. For a standard condo living room or kitchen, aim for a fixture that delivers between 800 and 1,500 lumens, which typically requires only 12 to 18 watts of power. Relying on lumen ratings rather than wattage allows you to achieve the desired brightness level while keeping your energy consumption and heat generation to a minimum.
The installation environment within your condo also dictates the required Ingress Protection (IP) rating of the fixture. IP ratings consist of two digits: the first indicates protection against solid particles like dust, and the second indicates protection against liquids. For dry areas such as bedrooms, living rooms, and hallways, a standard IP20-rated fixture is perfectly adequate. However, for areas prone to moisture and humidity—such as kitchen cooking zones, laundry balconies, and bathroom perimeters—you must select fixtures with higher protection. A minimum rating of IP44 is recommended for these damp environments to prevent steam, condensation, and water splashes from penetrating the housing and causing electrical shorts or corrosion.
Lastly, never compromise on electrical safety certifications. Before purchasing any surface mounted led light, locate and verify the local certification marks on the product packaging or the fixture itself. In the Philippines, electrical products must carry either the Philippine Standard (PS) quality certification mark or the Import Commodity Clearance (ICC) sticker. These marks serve as official proof that the product has undergone rigorous safety, quality, and performance testing compliant with national standards. Avoid unbranded or uncertified fixtures, as they often utilize substandard internal wiring and low-grade drivers that present significant safety risks.
Optimizing Light Quality and Visual Space
Achieving the perfect balance of light quality can transform a cramped condo into a warm, inviting sanctuary. One of the primary decisions you will make is selecting the appropriate color temperature, measured in Kelvin (K), for different zones of your home. Color temperature significantly influences both the functionality of a room and its perceived spatial volume. For active areas like kitchens, home offices, and bathrooms, a cool white (4000K) or daylight (6500K) color temperature is highly recommended. These cooler tones provide high contrast, improve focus, and make functional spaces feel clean and bright. For relaxing zones such as bedrooms and living areas, a warm white (2700K to 3000K) temperature creates a cozy, intimate atmosphere. If your condo features an open-concept layout where the living, dining, and kitchen areas merge, consider using fixtures with a uniform neutral white (4000K) temperature to maintain visual consistency across the entire space.
The choice of diffuser material and beam angle also plays a pivotal role in minimizing harsh shadows and glare, which can make low ceilings feel oppressive. Direct, unshielded LED light can be incredibly harsh on the eyes, especially when the light source is positioned closer to eye level due to a low ceiling. Opt for surface-mounted fixtures equipped with high-quality frosted acrylic or polycarbonate diffusers. These materials scatter the light evenly, eliminating hot spots (visible individual LED chips) and casting a soft, glare-free glow across the room. Additionally, fixtures with wide beam angles help distribute light horizontally, illuminating the upper portions of the walls and reducing the contrast between the light source and the surrounding ceiling.
Coordinating the physical finish of the fixture with your ceiling paint is another effective design strategy to maximize visual space. Most condo ceilings in the Philippines are finished with flat or matte white paint to reflect light and create an illusion of height. Selecting a surface-mounted LED fixture with a matching white bezel or a frameless design allows the unit to visually merge with the ceiling surface. This minimizes visual interruptions, keeping the ceiling plane looking as clean and continuous as possible. While black, bronze, or metallic bezels can serve as striking design accents, they also draw the eye upward and highlight the physical boundary of the low ceiling, which can make the room feel shorter.
Finaly, consider your dimmability requirements before finalizing your purchase. Dimmable surface-mounted LEDs offer incredible flexibility, allowing you to transition a single multi-purpose space from a bright, productive workspace during the day to a soft, relaxing environment at night. However, not all LED fixtures are dimmable, and those that are require compatible wall dimmer switches. Standard incandescent rotary dimmers often cause LEDs to flicker, buzz, or fail prematurely. Ensure that both the LED driver inside the fixture and your wall switch are explicitly rated for LED dimming, utilizing compatible technologies such as trailing-edge or triac dimming.
Installation Limits and Safety Boundaries
Before embarking on any lighting upgrade, it is essential to understand the structural characteristics of your condo’s ceiling and establish clear safety boundaries. High-rise residential buildings in the Philippines typically utilize two main types of ceiling construction: solid concrete slabs and suspended drop ceilings. Solid concrete slabs are structural elements that offer immense strength but present challenges for routing wires and mounting fixtures. Suspended drop ceilings, usually constructed from gypsum board or fiber cement board mounted on light metal frames, are designed to conceal plumbing, electrical conduits, and air conditioning ducts. You can easily identify your ceiling type by gently tapping on it; a hollow sound indicates a drop ceiling, while a solid, dull thud indicates a concrete slab.
Regardless of your ceiling type, safety must be your absolute priority during installation. Before touching any electrical wiring or removing an existing fixture, you must disconnect the power supply at the main circuit breaker panel. Simply turning off the wall switch is not sufficient, as some wiring configurations may still carry live current to the fixture box. Once the breaker is switched off, use a reliable non-contact voltage tester at the ceiling outlet to verify that no electrical current is present before proceeding with the installation.
If you are mounting a fixture onto a suspended gypsum or drywall ceiling, you must respect the material’s weight limits. Standard drywall cannot support heavy loads without proper reinforcement. While lightweight surface-mounted LED panels (often weighing less than one kilogram) can be safely secured using specialized drywall toggle bolts or hollow-wall anchors, heavier decorative fixtures must be anchored directly into the underlying metal studs or support channels. Failing to secure the fixture properly can cause the drywall to sag, crack, or fail entirely, leading to falling hazards.
It is equally important to recognize when a project exceeds your capabilities and requires professional intervention. You should immediately halt work and contact a licensed electrician if you encounter any of the following stop conditions:
- Exposed, frayed, or decaying copper wiring behind the old fixture.
- The absence of a proper junction box or mounting bracket in the ceiling cavity.
- Complex wiring configurations, such as three-way switching systems or unidentified wire colors that do not match standard electrical codes.
- Signs of water moisture, dampness, or active leaks on the concrete slab or gypsum board, which must be resolved by building maintenance before any electrical work can safely resume.
Building Your Shortlist: Matching Profiles to Room Needs
To create an effective lighting plan for your low-ceiling condo, you should categorize your lighting needs by room and match them to specific surface-mounted LED profiles. Different areas of your home serve different functions, and selecting the right profile ensures both optimal utility and spatial comfort.
For high-traffic, functional zones like narrow hallways, walk-in closets, and compact kitchens, ultra-slim LED panel lights are the premier choice. These fixtures typically feature an edge-lit design where the LED chips are mounted along the inner frame, directing light through a light guide plate and a diffuser. This technology produces an incredibly flat, uniform light source with a profile depth often measuring less than 20 millimeters. Because they sit almost flush with the ceiling, they provide maximum physical clearance, ensuring that cabinet doors can open freely and tall residents can walk through hallways without feeling obstructed.
For the main living and dining areas, where you want to create a more welcoming and stylish atmosphere, decorative flush mounts with acrylic diffusers are highly suitable. These fixtures may have a slightly deeper profile (around one to two inches) but compensate by offering elegant design details, such as subtle metallic trims, double-ring designs, or textured diffusers that scatter light beautifully. The acrylic cover softens the illumination, preventing the harsh glare that can occur when sitting directly beneath a low-ceiling light source, while still providing ample ambient light to fill the entire room.
If you want to highlight specific features in your condo—such as a gallery wall of artwork, a cozy reading nook, or a decorative display cabinet—directional surface-mounted spotlights are an excellent addition. Unlike flat panels that provide broad ambient light, these cylindrical or box-shaped fixtures feature adjustable heads that allow you to aim the beam of light precisely where it is needed. By directing light toward the walls or specific focal points, you create visual depth and contrast, which draws attention away from the low ceiling and adds a sophisticated, architectural feel to the space.
To help you evaluate and compare different models for your shortlist, utilize the following selection checklist before making your final purchase:
- Profile Depth: Is the fixture thickness under 30 millimeters for maximum headroom?
- Voltage & Frequency: Is the driver rated for 220V-240V at 50/60Hz to match the local grid?
- IP Rating: Is it rated IP44 or higher if being installed in a bathroom or kitchen zone?
- Safety Certification: Does the packaging display the official PS mark or ICC sticker?
- Color Temperature: Is the Kelvin rating appropriate for the room's function (e.g., 3000K for bedrooms, 4000K for living areas)?
- Dimmability: If dimming is desired, is the fixture explicitly marked as dimmable and compatible with LED wall dimmers?
- Diffuser Quality: Does it feature a frosted acrylic or polycarbonate diffuser to eliminate glare and hot spots?
Frequently Asked Questions (FAQ)
Can I install a surface mounted LED light on a concrete condo ceiling?
Yes, you can install a surface mounted LED light directly onto a concrete slab ceiling, which is a common structural feature in many high-rise developments in the Philippines. However, this process requires specific tools and hardware compared to mounting on drywall. You will need a rotary hammer drill equipped with a high-quality masonry drill bit to create mounting holes in the tough concrete. Standard plastic wall plugs (commonly referred to as tox plugs) paired with matching steel screws are generally sufficient to secure lightweight LED fixtures. When drilling, exercise extreme caution to avoid striking embedded electrical conduits or structural steel rebar. It is highly recommended to use a digital stud and wire detector before drilling, or consult your condo’s building administration to obtain the structural and utility layout plans for your unit.
How do I clean and maintain flush-mount LED fixtures?
Maintaining your flush-mount LED fixtures is simple but essential for preserving their brightness and extending their operational lifespan. Over time, dust, airborne grease from cooking, and small insects can accumulate on the diffuser, reducing light output and trapping heat. Before performing any maintenance, always turn off the power switch and allow the fixture to cool completely. Wipe the exterior of the acrylic or polycarbonate diffuser using a dry, clean microfiber cloth to remove loose dust. For stubborn grime or kitchen grease, slightly dampen the microfiber cloth with water and a drop of mild, non-abrasive dish soap. Never use harsh chemical solvents, alcohol, or abrasive scouring pads, as these can scratch, cloud, or yellow the plastic diffuser over time. Regular dusting every few months ensures optimal heat dissipation from the integrated heat sinks, keeping the internal LED chips running cool and efficiently.
Community discussion
Share your experience or ask a question. Comments are reviewed before publication.