
Choosing the right fixtures for rooms with limited overhead space requires a careful balance of physical dimensions, light distribution, and visual design. To light a room with a low ceiling without making it feel cramped or dark, the best options are ultra-low-profile surface-mounted tracks, recessed magnetic track systems, and flat-faced or shallow cylindrical spotlight heads. These systems minimize physical drop while maximizing vertical clearance. When selecting low ceiling lights, prioritizing compact profiles, wide beam angles for ambient washes, and strategic layout placement ensures the space feels open, bright, and visually balanced.
Selecting Low Ceiling Lights: Why Height Dictates Your Track and Spot Options
In many modern homes, particularly high-rise condominiums and contemporary residential developments in the Philippines, ceiling heights often hover around 2.4 to 2.6 meters. Standard, bulky track fixtures can hang down 15 to 30 centimeters, significantly reducing headroom and creating an oppressive, cramped atmosphere. Visual weight plays a critical role here; large, heavy fixtures draw the eye upward in a way that emphasizes the lack of vertical space, making the ceiling feel even lower than it physically is.
Glare and eye-level proximity present another major challenge in low-clearance environments. Because the light source is physically closer to standing or sitting eye levels, unshielded bulbs or deep, conical spotlight heads can cause severe direct glare. This ruins visual comfort and can make a living room or kitchen feel harsh and uninviting. To prevent this, fixtures must feature proper shielding, recessed light sources, or specialized lenses that control the spread of light.
Products mentioned in this guide
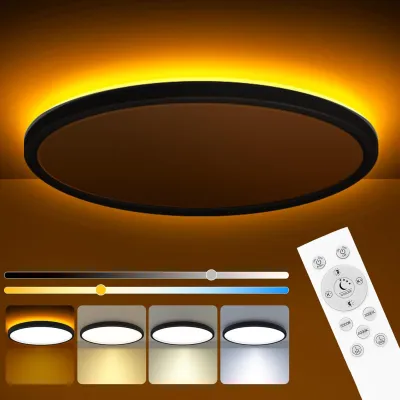
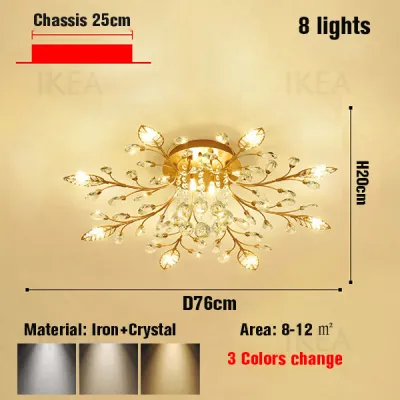
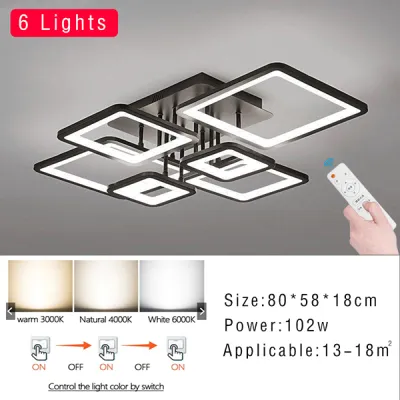
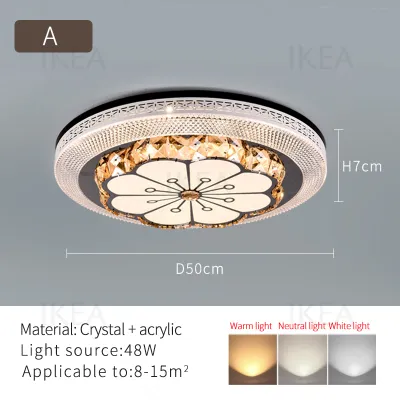
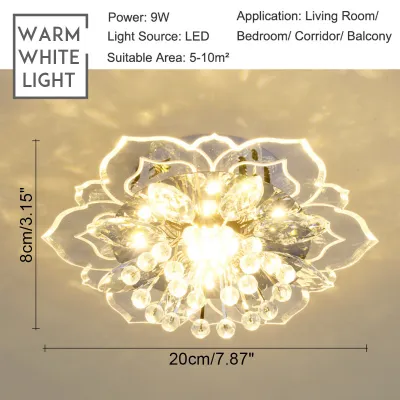
Prices are valid at publication and may change. Please refer to the product page for the latest price.
Furthermore, heat dissipation constraints must be addressed in shallow ceiling spaces. Tight surface-mount setups or shallow ceiling plenums naturally trap heat. In tropical climates characterized by high ambient temperatures and humidity, heat buildup around LED drivers can accelerate component degradation, leading to flickering or premature failure. Efficient LED thermal management is critical; you must select fixtures with robust aluminum heat sinks designed to dissipate heat away from the ceiling structure and the internal electronics.
Best Track Light Profiles for Low Clearances
To minimize physical drop and visual bulk, you must select track profiles that integrate seamlessly with your ceiling plane. Standard track systems can be too intrusive, but several low-profile alternatives offer excellent functionality without sacrificing headroom.

Surface-mounted low-profile tracks are minimalist aluminum extrusions that screw directly into the concrete slab or gypsum board ceiling. High-quality low-profile tracks have a depth of only 15mm to 20mm. By sitting almost flush against the ceiling, they provide a clean, continuous line that does not disrupt the visual flow of the room. They are highly versatile and relatively simple to install, making them a popular choice for retrofitting existing spaces.
Recessed track lighting offers a completely seamless look by integrating the track channel directly into the ceiling plane. Flanged recessed tracks cover the rough edges of cut gypsum board, while trimless profiles are plastered over to make the track look like a natural slot in the ceiling. This system eliminates physical drop entirely, but it requires a ceiling plenum depth of at least 40mm to 50mm. Before choosing this option, you must verify that your ceiling joist spacing and depth can accommodate the recessed channel without compromising structural integrity.
Magnetic track systems represent a highly flexible, modern solution. These systems operate on low-voltage DC power (typically 24V or 48V) and feature ultra-thin surface tracks that can be as shallow as 5mm to 10mm. Spotlights and light bars click magnetically into the track without the need for bulky mechanical twist-locks. Because magnetic tracks are so thin, even the surface-mounted versions look almost entirely recessed, providing a high-end architectural aesthetic with minimal visual weight.
When comparing these profiles, surface-mounted tracks are the most accessible and cost-effective but still present a minor physical protrusion. Recessed tracks offer zero physical drop but demand careful structural planning and plastering work. Magnetic systems provide the ultimate low-profile flexibility but require an external LED driver (transformer) that must be housed in an accessible, well-ventilated location, such as an access panel or utility closet.
Spot Light Types That Prevent a Cramped Feel
Once you select a track profile, the design of the spotlight heads themselves will determine how open or confined the room feels. Heavy, dangling fixtures will quickly crowd a low ceiling, so compact and optically precise heads are essential.
Shallow and flat-faced spotlight heads are highly recommended for low clearances. Instead of choosing long, conical or heavy cylindrical heads, opt for flat-disc designs or ultra-compact cylinders that measure under 8 to 10 centimeters in length. These compact shapes provide high lumen output and excellent adjustability while keeping the light source as close to the ceiling plane as possible, preserving precious vertical space.
If a track system is not viable due to structural constraints, recessed spotlights—such as adjustable gimbals—serve as excellent alternatives. Gimbal spotlights sit flush with the ceiling surface but allow you to tilt the internal lamp holder (often up to 30 degrees) to direct light toward walls or features. This provides the directional flexibility of a track spotlight without any hardware protruding into the room.
Beam angle selection is another critical factor in preventing a cramped feel. Wide flood beams (36 to 60 degrees) spread light across a larger surface area, creating soft, ambient washes that make a room feel wider and more open. Conversely, narrow spot beams (15 to 24 degrees) should be reserved strictly for highlighting artwork, architectural features, or specific task areas. Relying solely on narrow beams in a low-ceiling room creates a highly uneven “cave” effect, characterized by harsh, bright pools of light on the floor and dark, shadowy upper walls.
When purchasing, always verify the fixture’s voltage compatibility (typically 220V–240V in the Philippines), base or interface type, maximum wattage limit, physical dimensions, and dimming method (such as TRIAC or 0–10V). Ensure the product carries recognized electrical certifications, such as the Philippine Standard (PS) mark or Import Commodity Clearance (ICC) sticker, to guarantee safety and compliance. While decorative styles, perceived color temperatures (such as cozy warm white versus alert cool white), and specific spatial effects are valuable design tools, they should be treated as conditional preferences based on personal taste and room function, rather than universal performance facts.
Layout Strategies to Enhance Spatial Perception
How you position and aim your fixtures is just as important as the physical design of the lights. Strategic layouts can visually trick the brain into perceiving a low ceiling as significantly higher than it actually is.
Wall-washing is one of the most effective techniques for low-clearance rooms. By angling your track spotlights toward the walls rather than pointing them straight down, you illuminate the vertical surfaces of the room. This draws the eye horizontally and upward, creating an optical illusion of height and making the entire space feel broader and more airy.
To maximize this effect, prioritize perimeter placement over central grids. Avoid running track rails down the exact center of the room or creating a dense grid of lights in the middle of the ceiling. This central concentration draws attention to the low ceiling plane and creates a cluttered look. Instead, install your tracks along the perimeter of the room, roughly 60 to 90 centimeters away from the walls. This keeps the center of the ceiling clean, open, and visually unobstructed.
Proper spacing of track heads is also vital to avoid visual clutter and uneven light distribution. Space your track heads evenly, generally aiming for one head every 80 to 120 centimeters depending on the wattage and beam angle. This prevents overlapping hotspots and ensures a smooth, continuous wash of light along your walls.
Finally, avoid common layout errors, such as pointing spotlights directly down over seating areas, sofas, or beds. Direct downward lighting from a low height causes harsh facial shadows, creates uncomfortable glare for anyone looking up, and highlights minor imperfections in flooring or tabletop surfaces. Always angle the fixtures slightly away from direct seating positions to maintain a comfortable, glare-free environment.
Installation Clearances and Safety Boundaries
Installing low-clearance lighting requires careful attention to physical measurements, thermal safety, and electrical standards to ensure a long-lasting and hazard-free setup.
Before beginning any installation, measure your ceiling joist depth and plenum space carefully if you plan to use recessed tracks or spot lights. Ensure there is adequate physical clearance behind the plasterboard. Most recessed fixtures require at least 10mm to 20mm of free air space around them to prevent heat from trapping, unless the fixture is explicitly rated for direct contact with ceiling insulation (IC-rated).
Verify the heat dissipation requirements for your specific LED drivers and fixtures. When drivers are installed in tight, enclosed cavities, they must have sufficient ventilation to prevent overheating, which is a common cause of premature driver failure and can pose a fire hazard in dry ceiling spaces. Always check the manufacturer’s official installation manual for the exact clearance distances required for your specific model.
It is crucial to understand the boundary between simple DIY tasks and professional electrical work. For any fixed wiring, work at height, or handling of suspended loads, always isolate the power at the main circuit breaker before starting. Strictly follow the manufacturer’s installation instructions. If your installation involves cutting structural ceiling joists, running new electrical lines through concrete slabs, or modifying an older electrical panel, stop and consult a qualified professional or a licensed electrician. Ensuring your installation complies with the Philippine Electrical Code (PEC) guarantees the safety of your home and keeps your product warranties intact.
Frequently Asked Questions (FAQ)
Can I use pendant-style track heads on a low ceiling?
Pendant-style track heads are generally unsuitable for general lighting on low ceilings because they hang down into the physical walking path, reducing headroom and creating visual clutter. However, you can use them safely over fixed furniture obstacles where people do not walk, such as directly over a kitchen island, a dining table, or a sideboard, provided they do not obstruct sightlines.
Do low-profile track lights provide enough brightness for a kitchen?
Yes, modern low-profile LED track lights can deliver excellent brightness suitable for kitchen tasks. When selecting fixtures for task areas, check the product label for lumen output (aim for at least 800 to 1000 lumens per track head in work zones) and choose a wider beam angle to ensure even, shadow-free illumination across your countertops.
Community discussion
Share your experience or ask a question. Comments are reviewed before publication.