
Proper illumination is the backbone of any great game of pool. Without the right lighting, distracting shadows cast by the cushions and balls can easily throw off your aim, obscure the pockets, and lead to eye strain during long sessions. To properly light a billiard table, your light fixture should generally measure between two-thirds and three-quarters of the length of the table’s playing surface.
Selecting the correct billiard table lights requires balancing physical dimensions, the number of individual light shades, and the spatial constraints of your room. Whether you are setting up a casual bar-size table or a professional tournament layout, matching your fixture’s scale to your table ensures even, glare-free coverage across the entire slate. Beyond aesthetics, you must also account for practical factors like ceiling height, weight limits, and electrical compatibility to ensure a safe and functional setup.
General Sizing Rules for Billiard Table Lights
The foundational rule for choosing billiard table lights relies on proportional scaling. A fixture that is too small leaves the head and foot of the table in deep shadow, while an oversized fixture spills blinding light into the players’ eyes. To find the sweet spot, measure the length of your table’s actual playing surface—from cushion nose to cushion nose—rather than the outer wooden cabinet. Your light fixture’s total length should span approximately two-thirds to three-quarters of this playing surface length, ensuring the light beam spreads evenly across the entire field of play.
Products mentioned in this guide
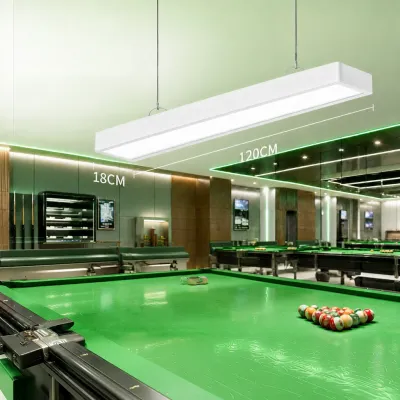
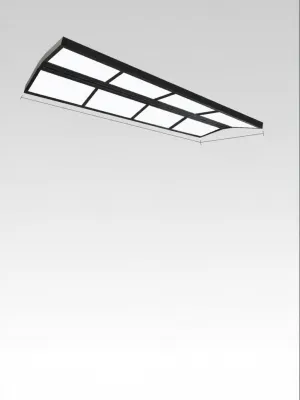
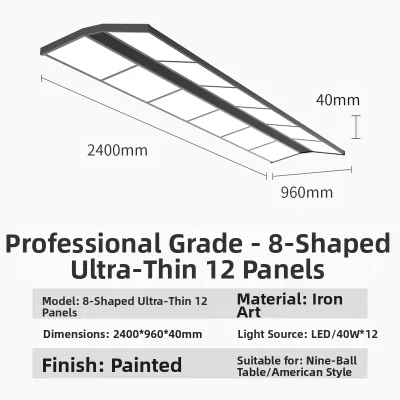
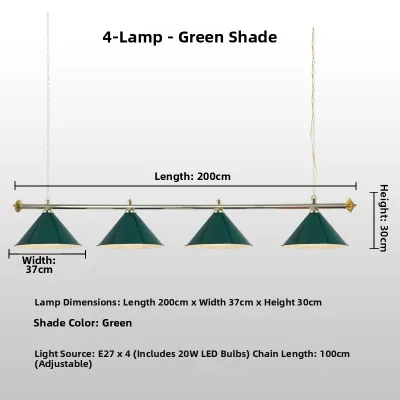
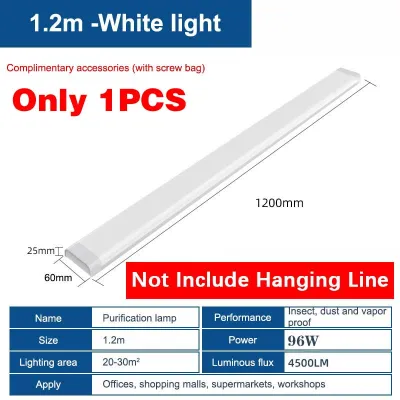
Prices are valid at publication and may change. Please refer to the product page for the latest price.
The configuration of individual shades within the fixture plays a critical role in how light is distributed. Multi-light fixtures, typically featuring three-light or four-light configurations, are engineered to overlap light beams. This overlap minimizes harsh shadows directly under the balls and ensures a consistent level of brightness across the felt. A three-light setup is highly effective for shorter tables, while a four-light configuration provides the necessary lateral spread for longer playing surfaces, preventing the ends of the table from looking dim.
While these spatial guidelines serve as an excellent baseline, physical compatibility must always come first. Before purchasing any fixture, you must verify its weight, mounting requirements, and electrical specifications against your home’s ceiling structure. Always check the manufacturer’s specific lighting manual for your table model, and ensure the fixture’s weight does not exceed the load capacity of your ceiling box. Additionally, verify that the fixture’s socket type (such as the standard E27 base) and wattage limits match your intended bulbs, especially when planning to use high-output LEDs.
Recommended Light Dimensions by Table Size
Pool tables are not standardized to a single dimension, meaning a light that works perfectly in one game room will fail in another. To achieve optimal visual balance and flawless illumination, you must match the fixture’s length directly to the class of table you own.

7-Foot Pool Tables (Bar Size)
A standard 7-foot pool table typically features a playing surface measuring approximately 38 inches by 76 inches. Applying the two-thirds to three-quarters rule, the ideal length for a 7-foot table light fixture ranges from 50 to 57 inches, though compact multi-shade fixtures between 36 and 48 inches are also highly effective. For this table size, a classic 3-light configuration is the industry standard, providing ample coverage without overwhelming the compact playing field.
In the Philippines, 7-foot tables are incredibly popular for residential entertainment rooms and bar areas due to space constraints. Because these rooms are often multi-purpose, it is vital to select a fixture that does not visually dominate the ceiling or interfere with surrounding walkways. Keep the overall profile of the shades slim, and ensure that players moving around the table have plenty of physical clearance to walk and stroke their cues without knocking into the light. In humid tropical environments, open-shade pendants are highly recommended as they allow heat from the bulbs to dissipate quickly, though they may require regular dusting to maintain their reflective efficiency.
8-Foot Pool Tables (Standard Home Size)
An 8-foot pool table is the most common size found in dedicated home game rooms, featuring a playing surface of roughly 44 inches by 88 inches. To illuminate this larger area, you should look for a fixture with a total length between 58 and 66 inches. This length ensures that the light reaches all the way to the corner pockets without requiring excessive mounting height, which would otherwise introduce unwanted glare.
When lighting an 8-foot table, you can choose between a robust 3-light fixture with larger individual shades or a sleeker 4-light configuration. This decision should depend heavily on your room’s overall footprint and ceiling height. If your ceiling is lower, a 3-light fixture with wider, shallower shades can keep the ceiling area looking clean and spacious. For rooms with higher ceilings, a 4-light fixture adds a pleasing visual weight and fills the vertical void beautifully while delivering exceptionally even light distribution across the table’s center and rails.
9-Foot Pool Tables (Tournament Size)
A 9-foot table is the standard for professional tournaments and serious enthusiasts, boasting an expansive playing surface of 50 inches by 100 inches. To light this large area properly, you require a substantial fixture measuring between 66 and 75 inches in length. A 4-shade configuration is highly recommended here, as a 3-shade fixture will struggle to throw light to the far ends of the table, leaving the head and foot spots in dim light where crucial shots are often made.
Because 9-foot table fixtures are physically larger, they are also significantly heavier, often featuring solid metal frames, heavy glass shades, or decorative wrought iron. Before purchasing, you must confirm that your ceiling joists can safely support this suspended load. In tropical climates where high humidity can affect building materials over time, securing heavy fixtures directly to solid wooden ceiling joists—rather than relying on standard plasterboard or drywall—is a critical safety step to prevent structural failure and ensure the fixture remains level over years of use.
How High Should You Hang Your Billiard Light?
Hanging your billiard light at the correct height is just as important as choosing the right size. The general industry standard is to position the bottom of the light shades between 30 and 36 inches above the table’s playing surface (the felt). This height range balances two competing needs: it keeps the light low enough to prevent direct glare from shining into the players’ eyes when they stand up, yet high enough to provide a clear, unobstructed view of the entire table when leaning in for a shot.
However, several real-world variables may require you to adjust this height. If you have exceptionally tall players in your household, you may need to hang the light closer to the 36-inch mark to prevent them from bumping their heads when leaning over the table. Additionally, if your room features a sloped ceiling or a ceiling fan, you must carefully calculate the clearance. In the Philippines, ceiling fans are a staple for managing tropical heat and humidity; ensure your light fixture is positioned far enough away from any fan blades to avoid a dangerous physical hazard or a highly distracting strobing light effect on the table.
When preparing for installation, safety must be your top priority. Always turn off the power at the main circuit breaker before touching any electrical wiring. Verify that your electrical junction box is rated for the weight of your new fixture, and check that the voltage (typically 220V/60Hz in the Philippines) and bulb base match your local electrical standards. For fixed wiring, working at heights, or if you need to install a new junction box, always hire a licensed professional electrician to complete the work safely and in compliance with building codes.
Common Sizing and Installation Mistakes to Avoid
One of the most common mistakes is choosing a fixture that is too short for the table. When a light is too short, the light beam cannot reach the end rails and corner pockets, creating dark zones where it is difficult to judge angles. Conversely, a fixture that is too long will spill light past the table’s edges, causing intense glare that can strain your eyes and distract spectators sitting nearby.
Hanging height errors are equally problematic. If you hang the light too high, the light disperses too widely, losing its focus on the table and creating a harsh glare across the entire room. If you hang it too low, you risk obstructing players’ cue sticks during steep shots, such as massé or jump shots, and you increase the likelihood of painful head bumps. Additionally, avoid using bulbs with an unsuitable color temperature; while warm white (3000K) offers a cozy feel, a neutral white (4000K) is often preferred for gameplay as it keeps the green felt looking crisp and mimics natural daylight.
Finally, never underestimate the physical weight of multi-shade billiard lights. A very common and dangerous installation mistake is attempting to mount a heavy metal fixture using standard plastic drywall anchors or simple toggle bolts in thin ceiling boards. Due to the constant vibrations in a home and the sheer weight of these fixtures, they can pull free over time. Always secure the mounting brackets directly into solid wood ceiling joists or use heavy-duty toggle bolts rated specifically for suspended loads, following the manufacturer’s instructions precisely.
Frequently Asked Questions (FAQ)
Can I use a single large pendant instead of a multi-shade billiard light?
While you can use a single large pendant, it is generally not recommended unless the fixture is specifically designed for linear, wide-angle light distribution. Standard single dome pendants cast a cone of light that is highly concentrated in the center of the table, leaving the rails and corners in deep shadow. If you prefer a single-fixture look, opt for a modern linear LED pendant that spans the necessary length (two-thirds to three-quarters of the table) and features a heavy diffuser to soften the light and eliminate harsh shadows.
How do I center the light perfectly over the pool table?
To center your light perfectly, you must measure from the playing surface rather than the outer wooden frame or the walls of the room. Use a measuring tape to find the exact center of the slate (the playing felt) by measuring both the length and the width. Once you find the center point on the table, use a plumb bob or a laser level to project this exact point up to the ceiling, marking it with a pencil. This ensures your light is centered over the actual field of play, which is crucial for balanced, shadow-free illumination.
Do I need a dimmer switch for my pool table light?
A dimmer switch is an excellent addition to a billiard room, allowing you to transition the space from a bright, focused gaming environment to a relaxed, low-light social lounge. However, before installing a dimmer, you must verify that your light fixture, your light bulbs (especially if using LEDs), and the dimmer switch itself are fully compatible. Ensure the bulbs are clearly labeled as dimmable, and check that your dimmer switch matches the dimming method (such as TRIAC or ELV dimming, which is standard for 220V systems in the Philippines) required by your fixture to prevent flickering or buzzing.
Community discussion
Share your experience or ask a question. Comments are reviewed before publication.