
Selecting the right ceiling lighting for a condominium unit in the Philippines requires balancing limited vertical space with the need for bright, comfortable illumination. Standard condo units, particularly those in high-rise developments across Metro Manila and other urban hubs, often feature ceiling heights ranging from 2.4 to 2.7 meters. Traditional hanging fixtures, chandeliers, or deep semi-flush mounts can make these compact spaces feel cramped, visually cluttered, and physically restrictive. The most effective solution is the modern, ultra-slim flush mount light, which sits tight against the ceiling surface to maximize headroom while distributing light evenly across the room.
By choosing fixtures designed specifically for low-clearance environments, you can create the illusion of a higher ceiling and a more open, airy living space. Achieving this balance involves evaluating physical dimensions, understanding optical designs, calculating appropriate light levels, and ensuring strict electrical compatibility with local standards. This guide provides a comprehensive framework to help you select, verify, and safely install the best flush mount lights for your condo.
Key Design Features to Maximize Headroom and Comfort
When shopping for flush mount lights for a low-ceiling condo, the physical depth of the fixture is the most critical dimension to consider. Standard flush mounts can protrude anywhere from 10 to 20 centimeters from the ceiling, which significantly encroaches on your vertical clearance. For low ceilings, look for ultra-slim profiles that measure 5 centimeters (about 2 inches) or less in total thickness. Many modern integrated LED disc lights and flat panels feature profiles as thin as 1.5 to 2.5 centimeters, allowing them to blend seamlessly into the ceiling plane and remain virtually unnoticed when turned off.
Products mentioned in this guide
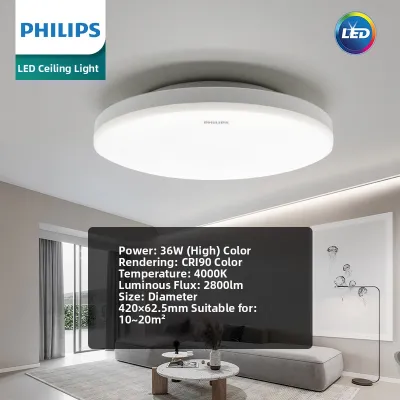
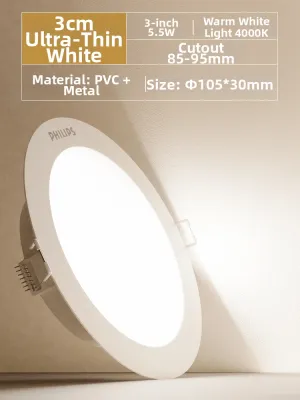
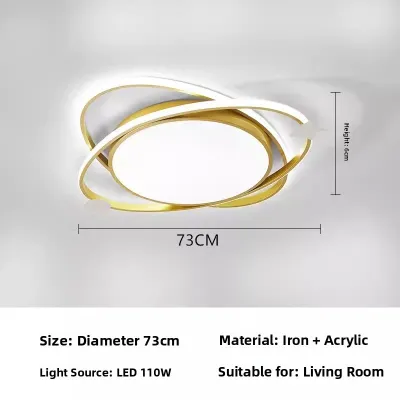
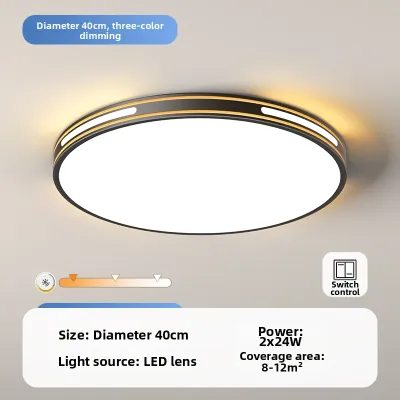
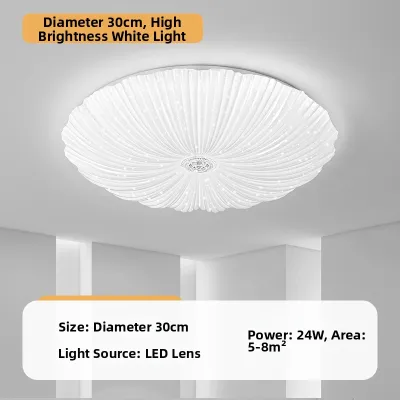
Prices are valid at publication and may change. Please refer to the product page for the latest price.
The optical design of the fixture also plays a major role in how spacious and comfortable the room feels. Flush mount lights generally fall into two categories: edge-lit and direct downlight panels. Edge-lit panels place the LED chips along the inner frame of the fixture, directing the light sideways into a light guide plate that bounces it uniformly downward. This design produces an incredibly soft, even glow with minimal shadows, making the ceiling itself appear brighter and more expansive. Direct downlight panels, on the other hand, feature LEDs pointing straight down behind a diffuser; while they are often highly energy-efficient, they can sometimes create more intense, localized pools of light if the diffuser is not of high quality.
To prevent visual discomfort in spaces with low sightlines, pay close attention to glare reduction features. Because the light source in a low-ceiling room is closer to your natural line of sight, unshielded or poorly diffused LEDs can cause eye strain and headaches. Opt for fixtures equipped with high-quality frosted polycarbonate or acrylic diffusers that scatter the light softly across the space. Additionally, some flush mount designs feature slightly recessed light sources or anti-glare micro-prismatic covers, which shield the direct glare of the LEDs from normal viewing angles while still delivering ample illumination downward.
Finally, consider the physical materials and thermal management of the fixture. High-rise condo units in tropical climates can trap heat, especially near the ceiling where warm air naturally rises. Flush mount lights with aluminum backplates or robust thermal heatsinks dissipate heat much more effectively than entirely plastic models. Efficient heat dissipation not only keeps the fixture running cooler but also significantly extends the lifespan of the internal LED chips and driver components, reducing the frequency of maintenance and replacements.
How to Calculate the Right Brightness and Color Temperature
Achieving the perfect lighting scheme in a compact condo requires moving away from traditional wattage ratings and focusing instead on lumens, which measure the actual light output. To determine the total brightness needed for a specific room, you can use a standard lux calculation based on the floor area in square meters. Lux represents lumens per square meter, and different areas of your home require different lux levels depending on their primary function.

For ambient or general lighting in living areas and bedrooms, a target of 100 to 150 lux is typically sufficient to create a relaxed, welcoming atmosphere. For task-oriented zones such as kitchens, bathrooms, and home study corners, you will want a higher target of 300 to 400 lux to ensure safety and clarity during detailed work. To calculate the required lumens, simply multiply the room’s area in square meters by the desired lux level. For example, a compact condo living room measuring 15 square meters would require approximately 1,500 to 2,250 lumens of total ambient light, which can be supplied by a single large flush mount or a combination of coordinated fixtures.
Color temperature, measured in Kelvin (K), is another crucial factor that influences both the functionality and the perceived temperature of your condo. Warm white light (2700K to 3000K) emits a cozy, yellowish glow that is ideal for bedrooms and dining areas, helping you wind down after a long day. Neutral white light (4000K) mimics natural daylight and is highly versatile, making it excellent for living rooms and multi-purpose spaces. Cool white or daylight (5000K to 6500K) provides a crisp, bluish-white light that enhances focus and visibility, making it the preferred choice for kitchens, bathrooms, and workspaces. In tropical climates, cooler color temperatures can also make an indoor space feel visually fresher and cleaner, though warm tones remain essential for creating a relaxing evening ambiance.
To maximize the utility of a single fixture, consider choosing flush mount lights with dimmable capabilities or smart controls. Dimmable fixtures allow you to adjust the brightness levels dynamically, transitioning a single room from a bright, productive home office during the day to a soft, intimate space for evening relaxation. If you opt for dimmable lights, always verify that the LED driver in the fixture is compatible with your wall dimmer switch. Standard triac dimmers often require specific dimmable LED drivers to prevent annoying flickering, buzzing, or premature component failure. Alternatively, smart flush mounts allow you to adjust both brightness and color temperature via a mobile app or voice commands without requiring specialized wall switches.
Electrical Compatibility and Ceiling Installation Checks
Before purchasing any flush mount light, you must verify that its electrical specifications match the local standards in the Philippines. The standard residential electrical system in the country operates at 220V to 240V at a frequency of 60Hz. Many imported lighting fixtures sold online are designed for 110V systems (common in North America) or 220V systems at 50Hz (common in Europe). While some 50Hz drivers can operate on a 60Hz grid, they may run hotter, flicker, or fail prematurely. Always look for fixtures explicitly rated for 220V-240V at 50Hz/60Hz or those with universal voltage drivers (100V-240V) to ensure safe, stable, and long-lasting operation.
Next, assess the structural material of your condo ceiling, as this dictates the mounting method and the type of hardware required. Most high-rise condos feature structural concrete slab ceilings, which are solid, dense, and cannot accommodate recessed junction boxes or hidden wiring paths. If you are mounting directly to a concrete slab, you must use a surface-mounted flush mount fixture that has enough interior clearance to house the wire connections and the LED driver. Alternatively, if your condo has a suspended drop ceiling made of gypsum board or fiber cement board on metal furrings, you have more flexibility. Drop ceilings allow you to install ultra-slim recessed panel lights that sit completely flush with the ceiling surface, though you must ensure the lightweight ceiling frame can support the weight of the fixture.
Safety is the absolute priority when dealing with fixed electrical wiring. Before attempting any installation, locate your condo’s main distribution panel and turn off the circuit breaker dedicated to the lighting zone you are working on. Use a reliable non-contact voltage tester at the ceiling wires to confirm that the power is completely isolated before touching any bare copper. If your existing setup lacks a proper junction box, or if the wires are degraded, do not attempt a DIY fix. This is a clear boundary where you should hire a licensed electrician to install a code-compliant junction box and ensure all connections are secure.
Furthermore, drilling into structural concrete ceilings carries inherent risks. Structural slabs often contain embedded PVC conduits carrying live electrical lines, as well as high-tension steel rebars. Accidentally drilling into a live conduit can cause severe electrical shock, short circuits, or localized power outages. If you must drill holes for concrete anchors (commonly known as tox plugs), use a shallow depth setting on your rotary hammer drill and proceed with extreme caution. If you are unsure of the conduit paths, consult your condo’s property management office for the structural and electrical layout plans, or leave the drilling and mounting to a qualified professional.
Building Your Shortlist: Filtering and Verifying Products Online
Finding the right flush mount lights often involves browsing local home improvement centers and online marketplaces. To streamline your search on e-commerce platforms, use highly specific search terms rather than broad categories. Instead of searching for “ceiling lights,” use precise keywords such as “ultra-thin LED flush mount,” “surface mount ceiling panel 220V,” or “tri-color slim dome light.” Apply filters for color temperature, dimmability, and fixture height to eliminate bulky pendant lights or incompatible low-voltage fixtures from your search results.
Because product listings online can sometimes feature exaggerated claims or misleading stock photos, you must verify the actual quality of the fixtures through user-generated content. Scroll down to the customer reviews section and filter for reviews that include real-world photos and videos. These images will give you a much more accurate representation of the fixture’s true thickness, the quality of the plastic or aluminum housing, and how the light actually spreads across a room. Pay close attention to reviews that mention the ease of installation, driver reliability, and whether the light produces any noticeable flickering or humming during operation.
Additionally, evaluate the seller’s credibility, warranty terms, and after-sales support before finalizing your purchase. Reliable manufacturers and authorized distributors typically offer a warranty of at least one to two years on integrated LED fixtures. Verify that the seller has a clear return policy in case the fixture arrives damaged or does not fit your ceiling setup. Ensure that all transactions, including shipping fees and local taxes, are clearly calculated in Philippine Pesos (₱) to avoid unexpected international transaction fees on your credit card or mobile wallet.
Finally, plan your purchase to align with your overall condo renovation timeline. If you are hiring an electrician to install multiple fixtures across your unit, it is highly efficient to have all the lights delivered and inspected beforehand. Unbox each fixture upon arrival, check for any physical damage to the diffusers or housing, and temporarily connect them to a test plug if possible to verify that all LED segments and drivers are functioning perfectly before the professional installer arrives on-site.
Frequently Asked Questions (FAQ)
Can I install a flush mount light directly on a concrete condo ceiling?
Yes, you can install a flush mount light directly on a concrete condo ceiling, but the process requires specific fixtures and tools. Because structural concrete slabs do not have recessed cavities to hide wiring or bulky drivers, you must select a surface-mounted flush mount light. These fixtures are designed with a shallow built-in chassis or bracket that provides just enough clearance behind the diffuser to house the wire connectors and the slim LED driver safely.
To mount the fixture, you will need a rotary hammer drill equipped with a masonry drill bit to create holes for plastic wall plugs (commonly referred to as tox plugs). Before drilling, always turn off the main circuit breaker and use a non-contact voltage tester to ensure no live wires are nearby. Be extremely careful not to drill too deeply, as you want to avoid hitting embedded PVC conduits or structural steel rebar. Secure the mounting bracket to the concrete using the plastic plugs and screws, connect the wires using insulated wire nuts or terminal blocks, and then secure the fixture body to the bracket. If you are uncomfortable drilling into structural concrete or handling fixed wiring, hire a professional electrician to complete the installation safely.
Are integrated LED flush mounts better than fixtures with replaceable bulbs?
Integrated LED flush mounts and bulb-based fixtures each have distinct trade-offs regarding profile thickness, light distribution, and long-term maintenance. Integrated LED flush mounts are generally superior for low-ceiling condos because they eliminate the physical space required for a traditional bulb socket. This allows manufacturers to design incredibly slim profiles, often under 2 centimeters, which maximize physical headroom and provide a sleek, modern aesthetic. Furthermore, integrated LEDs offer highly uniform light distribution across the entire surface of the panel, eliminating the dark spots or uneven lighting common in bulb-based fixtures.
However, the primary drawback of integrated LED fixtures is their long-term maintenance. Because the LED chips and the driver are permanently built into the fixture, you cannot simply replace a bulb when the light stops working. If the internal driver or the LED board fails, you will need to replace the entire fixture. In contrast, flush mounts that use standard replaceable bulbs (such as E27 LED bulbs) are much thicker—usually 8 to 15 centimeters deep—but offer the convenience of cheap, instant bulb replacements. If maximizing vertical space and achieving a clean, modern look are your top priorities, integrated LEDs are the ideal choice, provided you purchase high-quality fixtures with reliable thermal management to ensure a long operating life.

Community discussion
Share your experience or ask a question. Comments are reviewed before publication.