
Selecting the right LED flush mount light for a low-ceiling condo in the Philippines requires balancing physical clearance with effective illumination. Standard high-rise residential units in metropolitan areas often feature ceiling heights of 2.4 to 2.7 meters, leaving little room for hanging fixtures. To maximize vertical space and prevent a cramped atmosphere, homeowners should prioritize ultra-low-profile fixtures that sit flush against the ceiling surface. These modern fixtures provide wide, even light distribution while preserving valuable headroom, making rooms feel larger and more open.
In tropical climates, lighting choices also interact with indoor temperature and humidity. Traditional incandescent or halogen bulbs emit significant heat, which can strain air conditioning systems in compact condo units. Transitioning to energy-efficient LED technology not only reduces power consumption but also minimizes heat output, contributing to a cooler and more comfortable living environment. By understanding the key design styles and technical specifications, you can select fixtures that enhance both the functionality and aesthetic appeal of your home.
Key Selection Criteria for Low-Ceiling Condos
When shopping for ceiling lights, the physical thickness of the fixture is the most critical factor for maintaining a comfortable living space. For condos with low ceilings, aim for a profile height of 5 centimeters or less. A fixture that hugs the ceiling closely prevents the visual field from feeling cluttered and eliminates the risk of taller residents or guests accidentally bumping into the light. This low profile is especially important in high-traffic areas like hallways and entryways where clearance is already limited.
Products mentioned in this guide
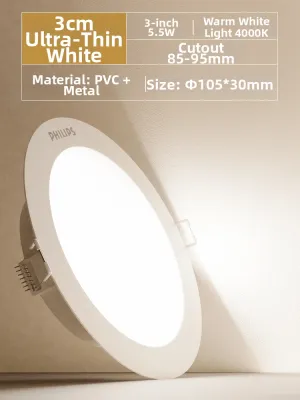
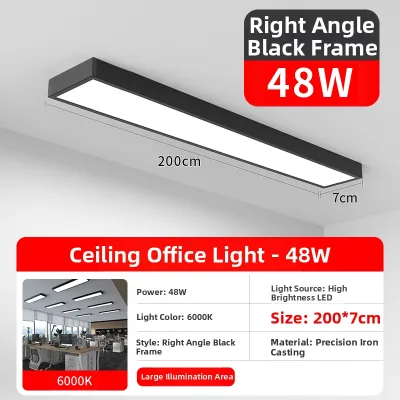
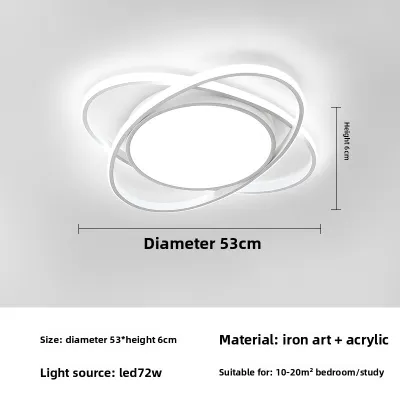

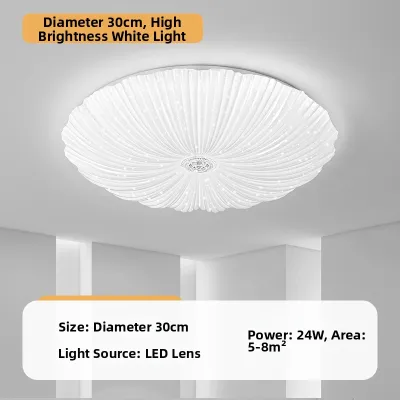
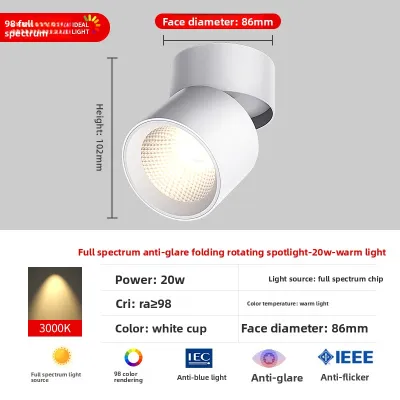
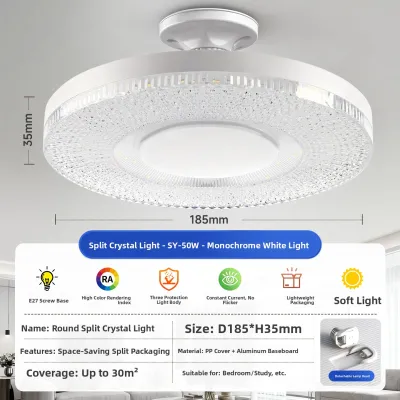
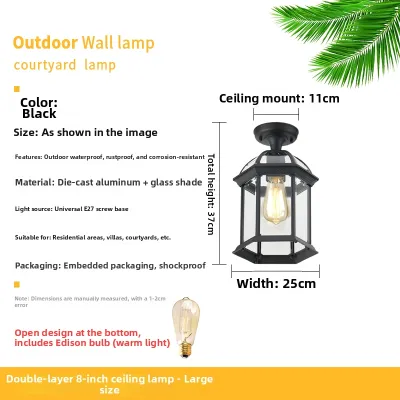
Prices are valid at publication and may change. Please refer to the product page for the latest price.
Illumination needs must be carefully matched to the room’s square footage and primary function. Instead of relying on wattage to estimate brightness, look at the lumen output listed on the product packaging. A higher lumen rating indicates a brighter light, allowing you to achieve sufficient illumination with a single, slim fixture. Additionally, consider the color temperature, measured in Kelvins. Warm white light (2700K to 3000K) creates a cozy, relaxing ambiance suitable for bedrooms, while cool white (4000K) or daylight (6500K) is better for task-oriented areas like kitchens and home offices.
Electrical compatibility is another vital consideration for safety and longevity. In the Philippines, the standard residential electrical supply operates at 220V to 230V at a frequency of 60Hz. Always verify that the LED fixture and its integrated driver are rated for this specific electrical standard. Using fixtures designed for other regions without verifying compatibility can lead to flickering, buzzing, or premature driver failure. Furthermore, look for recognized safety certifications, such as the Philippine Standard mark or the Import Commodity Clearance sticker, to ensure the product has undergone rigorous safety testing.
Dimming capabilities offer valuable flexibility in multi-functional condo spaces. If you plan to adjust the light levels throughout the day, verify whether the LED fixture is explicitly labeled as dimmable. Non-dimmable LED lights can flicker or buzz when connected to a dimmer switch, which can damage the internal circuitry over time. It is equally important to ensure that your wall dimmer switch is compatible with LED technology, as older dimmers designed for incandescent bulbs often do not work correctly with low-wattage LED drivers.
Recommended Flush Mount Styles for Compact Spaces
Ultra-thin and edge-lit LED panels are among the most effective solutions for low-ceiling condos. These fixtures utilize edge-lit technology, where the LEDs are positioned around the frame and direct light inward through a light guide plate. This design results in an incredibly slim profile, often less than 2 centimeters thick, and produces a soft, even glow without visible hot spots or harsh glare. They blend seamlessly into modern, minimalist interiors, providing a clean and unobtrusive look that makes the ceiling appear higher than it actually is.

Drum or disc fixtures equipped with integrated diffusers offer a slightly more decorative option while maintaining a low profile. These fixtures typically feature a shallow circular or square housing with a frosted acrylic or glass cover that scatters the light evenly across the room. The diffuser softens the output, reducing eye strain and creating a welcoming atmosphere in living and dining areas. Look for designs with a depth of no more than 7 centimeters to ensure they do not protrude too far into the living space.
Recessed-style surface mounts provide the architectural look of recessed downlights without the need for a deep ceiling cavity. Because many condos in the Philippines are constructed with solid concrete slab ceilings, installing traditional recessed cans is structurally impossible without building an expensive dropped ceiling. Surface-mounted downlights or disc lights mimic this clean, modern aesthetic by mounting directly to the surface of the concrete, offering a streamlined appearance that keeps the ceiling plane visually uninterrupted.
To maintain a spacious feel, there are several lighting styles you should actively avoid in low-clearance rooms. Heavy, multi-tiered chandeliers and deep semi-flush mounts drop too low into the room, creating physical hazards and making the space feel claustrophobic. Similarly, fixtures with exposed bulbs should be avoided, as the close proximity of the light source to eye level can cause intense, uncomfortable glare. Stick to flat, diffused, or shielded designs that distribute light outward rather than focusing it directly downward in a harsh beam.
Room-by-Room Lighting Strategy
In the living and dining areas, your lighting strategy should focus on versatility and comfort. Since these spaces are used for entertaining, relaxing, and sometimes working, a layered lighting approach is ideal. A central, low-profile flush mount light can serve as the primary ambient light source, complemented by secondary lighting like slim floor lamps or wall sconces. Opt for a neutral white color temperature (around 4000K) to keep the space feeling bright and energetic during the day, or use a dimmable warm white fixture to set a cozy mood in the evening.
Bedrooms require a softer, more intimate lighting scheme that promotes relaxation and sleep. Choose flush mount fixtures with warm light tones (2700K to 3000K) and high-quality diffusers that eliminate harsh shadows. When planning the layout, ensure the fixture’s placement does not interfere with other ceiling fixtures, such as ceiling fans, which are essential for air circulation in the tropical Philippine climate. If your bedroom features bunk beds or lofted sleeping areas, select ultra-thin panel lights to prevent accidental contact from occupants.
Kitchens and dedicated workspaces demand high-performance task lighting. These areas require higher brightness levels and uniform light distribution to ensure safety during food preparation and clarity during work tasks. Look for fixtures with a high Color Rendering Index of 80 or above, which ensures that colors—especially those of fresh food and ingredients—appear accurate and vibrant. A cool white (4000K) or daylight (6500K) fixture is highly recommended here, as it enhances focus and helps reduce eye fatigue during extended tasks.
Installation and Safety Checklist
Before beginning any installation work, safety must be your top priority. Always turn off the main power supply at the circuit breaker panel rather than relying solely on the wall switch. Use a reliable non-contact voltage tester to verify that the wires at the ceiling junction box are completely dead before touching them. Additionally, inspect the existing junction box to ensure it is securely anchored to the ceiling structure and free from signs of heat damage, corrosion, or loose wiring connections.
The structural material of your condo ceiling dictates the mounting hardware and techniques you must use. If you are mounting the fixture directly onto a solid concrete slab—a common construction method in Philippine high-rises—you will need a hammer drill, masonry drill bits, and appropriate concrete anchors or expansion shields to secure the mounting bracket. For suspended drywall or gypsum board ceilings, ensure you use heavy-duty toggle bolts or anchor the fixture directly into the underlying metal or wooden ceiling joists to prevent the light from sagging or falling over time.
Recognizing the boundaries of safe DIY work is crucial for preventing electrical hazards and maintaining building compliance. While replacing an existing fixture on a pre-installed junction box is often manageable for confident homeowners, more complex tasks require a licensed electrician. If your condo lacks a junction box in the desired location, if the existing wiring is outdated or damaged, or if you need to run new electrical conduits across a concrete ceiling, always hire a qualified professional. This ensures the installation complies with the Philippine Electrical Code and local building regulations.
Buying Guide: What to Verify Before Checkout
When browsing online marketplaces or physical lighting stores, carefully match the product specifications against your home’s requirements. Confirm whether the fixture features an integrated LED module or requires separate bulbs. If it uses replaceable bulbs, check the socket type (such as E27) and the maximum wattage rating allowed by the fixture to prevent overheating. For integrated LED models, pay close attention to the rated lifespan, which is typically expressed in hours, and ensure the physical dimensions match your ceiling’s layout.
Warranty terms and after-sales support are essential indicators of product reliability, especially for integrated LED fixtures. Because integrated LEDs cannot be easily swapped out like traditional lightbulbs, a failure of the LED chip or driver usually requires replacing the entire fixture. Look for reputable brands or retailers that offer at least a one-to-two-year warranty. Review the seller’s return policy and customer feedback regarding defective items to ensure a smooth resolution process if you encounter any issues after purchase.
Finally, prioritize quality indicators over low prices to ensure the safety of your home. Unusually cheap, unbranded fixtures often cut corners on materials, using thin plastics that can degrade under the tropical heat and humidity of the Philippines. High-quality fixtures feature robust aluminum or flame-retardant polycarbonate housings that dissipate heat effectively, extending the life of the LEDs. Always look for clear specification labels, manufacturer contact details, and recognized safety marks to protect your condo from potential electrical fires and hazards.
Frequently Asked Questions (FAQ)
Can I install a flush mount light directly on a concrete condo ceiling?
Yes, you can install a flush mount light on a concrete ceiling, but it requires specific tools and hardware. You will need a hammer drill equipped with a masonry drill bit to create holes for plastic wall plugs or expansion anchors, which secure the fixture’s mounting bracket. Before drilling, it is critical to check the layout of your room and, if possible, consult building plans to avoid hitting embedded electrical conduits or structural steel rebar. If there is no pre-existing junction box cast into the concrete, you should hire a licensed electrician to safely install surface-mounted conduits, such as PVC molding or metal pipes, to route the wiring without compromising the structural integrity of the slab.
How do I calculate the right amount of light for my condo space?
To estimate the required brightness for your condo, you can use a simple formula based on the room’s area in square meters and the recommended illuminance level, measured in lux. First, calculate the area of the room by multiplying its length by its width. Next, multiply this area by the target lux level for the room type: typically 150 to 200 lux for living rooms and bedrooms, and 300 to 400 lux for kitchens and study areas. For example, a 15-square-meter living room would require approximately 2,250 to 3,000 lumens of total light output. You can adjust this calculation upward if your condo has dark walls or limited natural light, or downward if the space features large windows and light-colored finishes that reflect light efficiently.
Are integrated LED fixtures worth the investment compared to replaceable bulb models?
Integrated LED fixtures are highly recommended for low-ceiling condos because they offer a significantly slimmer profile than traditional socket-based fixtures. Because they do not need to accommodate bulky bulb sockets, integrated designs can be manufactured with a thickness of less than two centimeters, maximizing your vertical headroom. They also provide more uniform light distribution and superior energy efficiency. The primary trade-off is that if the integrated LED chip or driver fails, the entire fixture must be replaced. To mitigate this risk, invest in high-quality fixtures from reputable brands that offer robust warranties and reliable heat dissipation, ensuring the light lasts for its rated lifespan of tens of thousands of hours.

Community discussion
Share your experience or ask a question. Comments are reviewed before publication.