
Finding the right led replacement for ceiling lamp fixtures in a Philippine condominium requires balancing tight vertical clearance with efficient, high-output illumination. Low-ceiling condos, which often feature structural concrete slabs and floor-to-ceiling heights of 2.4 meters or less, benefit most from ultra-thin integrated LED flush mount lights. These fixtures sit nearly flush against the ceiling, eliminating the visual and physical obstruction of hanging pendants or bulky traditional domes while providing bright, even light distribution suited for tropical living spaces.
Measuring Ceiling Clearance and Space Constraints
To select the ideal fixture, start by measuring your exact floor-to-ceiling height. In many modern high-rise developments across the Philippines, structural concrete slabs limit the vertical space, making every centimeter count. Subtract the height of your tallest household member plus an additional safety margin of at least 30 centimeters to establish a comfortable walking clearance. This calculation ensures that residents and guests can move freely without any risk of accidentally bumping into the light fixture.
Next, inspect the ceiling structure to identify potential physical obstructions. Condominiums often feature solid concrete ceilings or shallow drywall drop ceilings designed to hide utility pipes and electrical conduits. Locate your existing junction box and measure its depth; some shallow boxes cannot accommodate bulky drivers or mounting brackets, which will influence the type of low-profile LED you can install.
Products mentioned in this guide
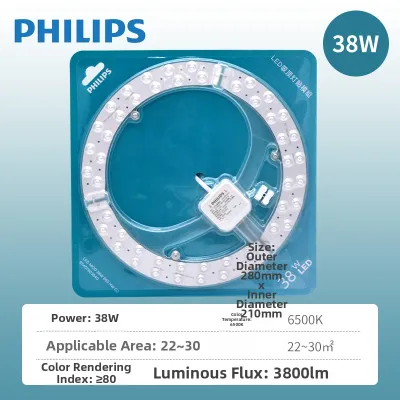
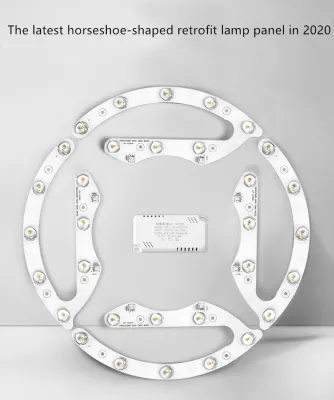
Prices are valid at publication and may change. Please refer to the product page for the latest price.
A common oversight during planning is ignoring the swing paths of nearby doors, high kitchen cabinets, or wardrobe doors. Open every door and cabinet fully to ensure they will not strike the new fixture. Additionally, consider the placement of tall furniture, such as bunk beds or high bookshelves, to prevent the light from casting harsh shadows or creating a physical hazard in those specific zones.
Verifying Electrical Compatibility for Replacements
Before purchasing an led replacement for ceiling lamp, you must verify that your condo’s electrical system matches the specifications of the new fixture. In the Philippines, the standard residential electrical supply is 220V to 240V at 60Hz. Ensure that any integrated LED driver you select is rated for this specific voltage range to prevent premature driver failure, flickering, or electrical hazards.

Examine the existing junction box to assess its structural integrity and weight capacity. While integrated LED flush mounts are generally lightweight, some models with heavy metal frames or glass diffusers can place unexpected stress on older plastic utility boxes. If the existing box is loose, cracked, or poorly anchored into the concrete slab, it must be reinforced or replaced before you mount a new fixture.
Take this opportunity to inspect the condition of the wiring inside the ceiling box. Older condominium units may have aging copper wires with brittle insulation, or they may lack a dedicated grounding wire. If you discover degraded insulation, exposed copper, or a complete absence of grounding in a metal junction box, pause the installation immediately. These conditions pose serious shock and fire risks and require professional remediation before you connect a modern LED fixture.
Matching Light Output and Size to Condo Rooms
Achieving the right balance of light in a compact condo requires calculating your illumination needs based on room area and function. Instead of relying on old incandescent wattage ratings, focus on lumens, which measure the actual light output. For instance, a typical living room or bedroom may require approximately 100 to 200 lumens per square meter, whereas high-task areas like kitchens and bathrooms often need 300 to 400 lumens per square meter to ensure safe and comfortable visibility.
Color temperature plays a critical role in how spacious and comfortable your condo feels. For living areas and bedrooms, warm white tones (around 2700K to 3000K) create a cozy, inviting atmosphere that complements natural wood finishes and tropical decor. For kitchens, home offices, and bathrooms, neutral to cool white tones (4000K to 6500K) provide crisp, clear visibility that reduces eye strain during daily tasks and matches the bright daylight characteristic of the region.
To maintain visual balance, use standard sizing guidelines to match the fixture’s physical diameter to the room’s dimensions. A simple rule of thumb is to measure the width and length of the room in meters, add those two numbers together, and multiply by ten to get a baseline fixture diameter in millimeters. For example, a small 3m x 3m bedroom would suit a fixture with a diameter of approximately 600 millimeters. Choosing a fixture that is too large can make a low ceiling feel lower, while a tiny fixture will look lost and fail to distribute light evenly.
Choosing Low-Profile Designs to Maximize Headroom
When vertical space is at a premium, the physical design of the fixture is just as important as its light output. Ultra-thin integrated LED panels, which often measure less than 2.5 centimeters in thickness, are highly effective for low-ceiling condos. Unlike traditional flush mounts that house separate screw-in bulbs, these integrated units distribute light-emitting diodes across a flat surface, allowing the entire fixture to remain incredibly slim and unobtrusive.
The material of the diffuser—the cover that spreads the light—greatly affects both safety and light quality. Lightweight acrylic diffusers are highly recommended for condo ceilings because they are shatterproof, easy to clean, and distribute light evenly without creating harsh glare or hot spots. Frosted glass diffusers offer a classic look but add significant weight, requiring a more robust mounting setup and careful handling during installation.
To minimize visual clutter on your ceiling plane, opt for fixtures with low-reflectance finishes and streamlined, bezel-free edges. Matte white frames tend to blend seamlessly into standard white condo ceilings, making the fixture virtually disappear when turned off. This seamless integration helps the ceiling appear higher and more expansive, creating an open, airy feel in compact urban living spaces.
Navigating Installation Steps and Safety Boundaries
Safety must be your top priority when replacing any ceiling fixture. Begin by switching off the power at your condo’s main circuit breaker panel, rather than relying solely on the wall switch. Use a reliable non-contact voltage tester directly on the wires inside the ceiling box to confirm that no electrical current is flowing before you disconnect the old lamp.
Mounting a fixture directly onto a solid concrete ceiling slab—a standard construction method in Philippine high-rises—requires specialized hardware. Standard drywall screws will not hold; instead, you must use appropriate masonry anchors and a hammer drill to secure the mounting bracket safely. Ensure you do not drill too deeply into the slab to avoid striking embedded electrical conduits or structural rebar, and always follow the manufacturer’s weight limits for the chosen anchors.
Knowing when to stop and call a licensed electrician is crucial for your safety and the integrity of your home. If you encounter crumbling wire insulation, complex multi-way switch wiring, or an incompatible dimmer circuit that causes your new LED to buzz or flicker, do not attempt to bypass these issues. A qualified professional should handle any structural drilling concerns, main panel modifications, or complex wiring upgrades to ensure compliance with local electrical codes.
Frequently Asked Questions (FAQ)
Can I install a flush mount light directly on a concrete condo ceiling?
Yes, you can install a flush mount light on a concrete ceiling, but it requires careful preparation and the right tools. Because you cannot easily recess wires or bulky drivers into a solid concrete slab, you must ensure the fixture has an integrated driver that fits within the shallow space of the existing surface-mounted junction box. Always verify the weight of the fixture and use high-quality masonry anchors to secure the mounting bracket. If your condo building management prohibits drilling into structural concrete slabs, or if there is no existing junction box, you may need to install surface-mounted plastic raceways to route the wiring safely along the ceiling surface.
Do integrated LED flush mounts work with existing dimmer switches?
Not all integrated LED flush mounts are compatible with older dimmer switches designed for incandescent or halogen bulbs. To avoid issues like flickering, buzzing, or a severely limited dimming range, you must check the product packaging to confirm the fixture is explicitly labeled as dimmable. Additionally, older dimmers often require a minimum wattage load that low-power LED fixtures cannot meet, leading to erratic performance. If you want to dim your new LED ceiling light, you will likely need to replace your existing wall switch with a modern LED-compatible trailing-edge (ELV) dimmer.

Community discussion
Share your experience or ask a question. Comments are reviewed before publication.