
For a standard 2.4-meter ceiling, which is common in many modern condominium units in the Philippines, selecting the right pinlight LED ceiling light requires balancing physical clearance with visual comfort. To prevent the space from feeling cramped or oppressive, look for recessed pinlights with an ultra-slim profile of 10mm to 25mm, or surface-mounted flush fixtures that do not exceed 50mm in thickness. In terms of brightness, a range of 400 to 800 lumens per fixture is generally ideal, allowing you to distribute multiple light sources evenly across the ceiling to achieve comfortable illumination without harsh, concentrated glare.
Why Fixture Thickness Matters for 2.4m Ceilings
A ceiling height of 2.4 meters leaves very little vertical headroom, making the physical profile of your lighting fixtures a critical design consideration. Bulky, protruding light fixtures draw the eye downward, creating a heavy visual weight that can make a compact living room or bedroom feel significantly smaller. Choosing ultra-slim flush mount or recessed pinlight designs helps keep the ceiling plane clean and unobstructed, which visually expands the room and preserves precious vertical space.
Before purchasing any fixtures, it is essential to perform a precise clearance check of your actual ceiling height. Do not rely solely on the developer’s blueprint measurements, as subsequent renovations can alter the space. Take measurements from the finished floor to the ceiling, accounting for the thickness of newly installed tiles, vinyl planks, or laminated flooring, as well as any raised platforms or existing dropped gypsum ceilings. Even a loss of a few centimeters can dramatically change how a fixture sits in the room.
Products mentioned in this guide
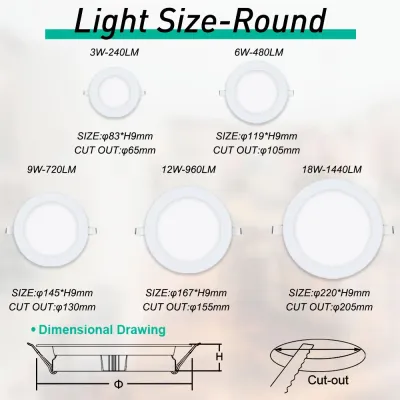
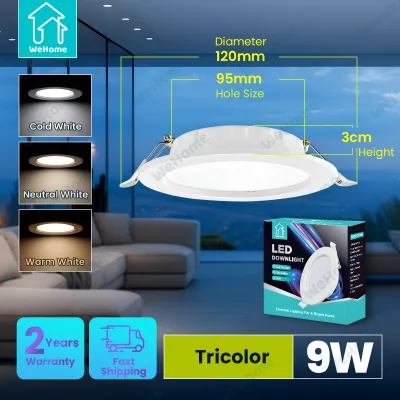
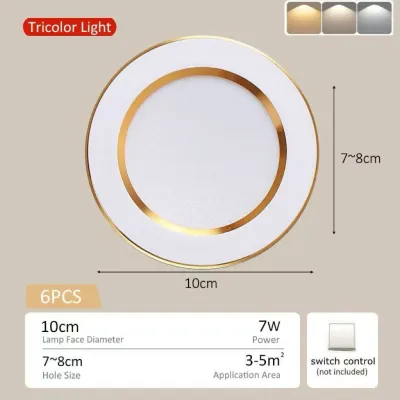
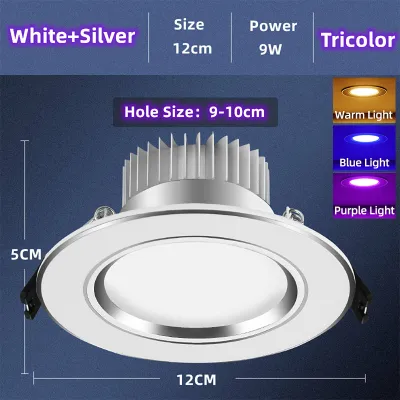
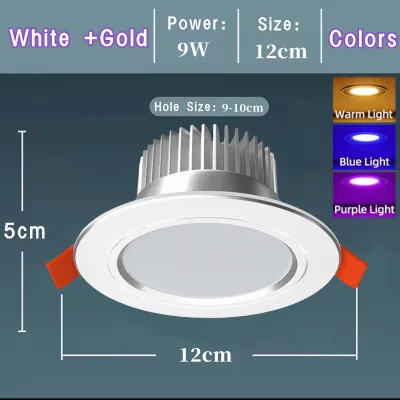
Prices are valid at publication and may change. Please refer to the product page for the latest price.
Your choice between recessed and surface-mounted pinlights will largely depend on your ceiling’s structural limits. Recessed pinlights sit flush with the ceiling surface, but they require a hollow cavity—such as a dropped gypsum board ceiling—to house the fixture body and driver. If your condo has a solid concrete slab ceiling, cutting into it is structurally prohibited, meaning you must opt for surface-mounted flush fixtures. In this scenario, verifying the visible thickness of the surface-mounted housing is vital to ensure it does not protrude excessively into your living space.
How to Determine the Right Lumens for Your Room
Determining the correct brightness for your space requires understanding the difference between lumens and lux. Lumens measure the total amount of light emitted by a source, while lux measures how much of that light actually reaches a specific surface area (one lux equals one lumen per square meter). To estimate your lighting needs, calculate the square meterage of your room and multiply it by the recommended lux level for the space’s primary activity, then divide that total among your planned pinlight locations.

Room function plays a major role in how you should distribute your lumens. For resting areas like bedrooms, a softer ambiance is preferred, meaning a lower lux target is appropriate, and individual pinlights of 400 to 500 lumens are often sufficient. Conversely, task-oriented spaces such as kitchens, study nooks, or bathroom vanities require higher lux levels for safety and focus, making pinlights of 600 to 800 lumens more suitable, especially when positioned directly over work surfaces.
Environmental factors within your condo also influence how bright a room actually feels. Dark accent walls, matte paint finishes, and heavy, dark-colored furniture absorb light rather than reflecting it, which can make a technically well-lit room feel dim. If your unit has limited natural light or features dark interior decor, you may need to select fixtures on the higher end of the recommended lumen range or increase the number of light points to compensate for this absorption.
Beyond Brightness: Other Critical Specs to Verify
Beyond thickness and lumens, color temperature is a key specification that defines the mood and functionality of your living space. Warm white (2700K to 3000K) creates a cozy, relaxing atmosphere suitable for bedrooms and living areas, while cool white (5000K to 6500K) provides crisp, high-contrast light ideal for kitchens and utility zones. For multi-purpose spaces, neutral white (4000K) offers a balanced, natural daylight effect that works well throughout the day.
Light distribution is another critical factor, particularly in low-ceiling environments where fixtures are closer to eye level. Direct-lit LED pinlights project light straight down, which can create intense hot spots and uncomfortable glare when you look up. Edge-lit designs, which bounce light sideways through a diffuser before directing it downward, provide a much softer, more even glow that minimizes eye strain in compact rooms.
Always verify electrical compatibility before finalizing your purchase. In the Philippines, the standard residential voltage is 220V to 240V at 60Hz, so ensure your selected pinlight LED ceiling light is rated accordingly to prevent premature driver failure or safety hazards. Additionally, check if the fixtures are compatible with your existing wall switches, especially if you plan to use dimmers, as non-dimmable LED drivers will flicker or buzz when paired with standard dimming switches.
Installation Constraints and Safety Boundaries
Installing ceiling fixtures in concrete condo structures comes with strict physical and structural boundaries. If you are mounting surface fixtures directly onto a concrete slab, drilling depth must be carefully controlled. Deep drilling risks striking embedded post-tension cables or structural rebar, which can compromise the building’s integrity; always consult your building administration’s guidelines regarding maximum drilling depths before starting.
Heat dissipation is another safety factor that must not be overlooked, even with energy-efficient LEDs. Ultra-thin LED drivers and fixtures still generate heat, and installing them in tight, unventilated ceiling cavities can lead to overheating, reducing the lifespan of the components or creating a fire hazard. Ensure there is adequate clearance around the fixture as specified by the manufacturer’s installation instructions.
For any installation involving fixed electrical wiring, working at heights, or modifying structural ceilings, prioritize safety by isolating the power at the main circuit breaker first. If you are unsure about your condo’s wiring configuration, structural limits, or how to safely mount the fixtures, stop the installation immediately. Consult your building administration or hire a qualified, licensed electrician to complete the work safely and in compliance with local electrical codes.
Frequently Asked Questions (FAQ)
Is a higher lumen output always better for a small condo bedroom?
No, a higher lumen output is not always better for a small bedroom with a 2.4m ceiling. Excessive brightness in a compact space can cause harsh glare, bounce uncomfortably off light-colored walls, and disrupt the relaxing atmosphere needed for sleep. Instead of relying on a single high-lumen ceiling light, it is better to use lower-lumen pinlights (around 400 to 500 lumens) and layer your lighting with bedside lamps or warm accent lights. You can also check for dimmable compatibility to adjust the brightness as needed.
How do I clean an ultra-thin flush mount ceiling light safely?
To clean your ultra-thin flush mount ceiling light safely, always start by turning off the power at the main circuit breaker to eliminate any electrical risk. Use a sturdy step ladder to reach the fixture comfortably, avoiding unstable chairs or furniture. Gently wipe the exterior diffuser with a dry or slightly damp microfiber cloth to remove dust and insect debris. Avoid using harsh chemical cleaners, alcohol, or abrasive pads, as these can degrade or scratch the acrylic or polycarbonate diffuser over time.

Community discussion
Share your experience or ask a question. Comments are reviewed before publication.