
To build an immersive gaming room in the Philippines, choosing the right 12V LED lights requires balancing visual performance with electrical safety and thermal management. Unlike standard mains-voltage lighting, 12V direct current (DC) systems provide a safer, highly customizable, and low-heat alternative that integrates seamlessly behind desks, monitors, and shelving. Selecting the ideal setup involves calculating your power requirements, verifying the control interfaces, and choosing the correct physical format—such as flexible strips, rigid bars, or diffused neon-style tubes—to match your room’s layout and local environmental conditions like high humidity.
By understanding the technical specifications of low-voltage lighting, you can avoid common pitfalls like uneven brightness, overheating, and premature component failure. This guide establishes a clear framework to help you evaluate 12V LED options, size your power supplies correctly, and plan a layered lighting scheme that enhances your gaming experience without compromising safety.
Why 12V LED Systems Suit Gaming Environments
Operating a dense array of gaming hardware, monitors, and peripherals creates a complex electrical environment where safety and heat management are paramount. Low-voltage (12V DC) systems are inherently safer to install and adjust than 220V mains-powered alternatives. Because gaming setups often feature metal desk frames, aluminum monitor mounts, and exposed computer chassis, using a low-voltage light source minimizes the risk of severe electrical shock or short circuits if a cable is accidentally pinched, cut, or exposed during desk reconfigurations.
Products mentioned in this guide
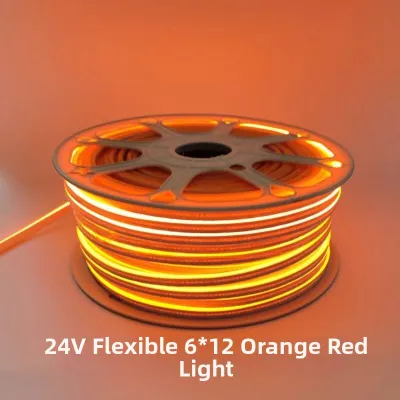
Prices are valid at publication and may change. Please refer to the product page for the latest price.
Thermal performance is another critical factor, especially in tropical climates where ambient room temperatures can already run high. High-performance gaming PCs generate substantial heat, and adding high-voltage incandescent or poorly designed lighting can worsen the thermal load in your room. Quality 12V LED systems operate with high luminous efficacy, converting most of their energy into light rather than heat. This low heat emission helps maintain a comfortable gaming environment and prevents localized heat buildup behind monitors or inside PC cases where sensitive components reside.
Furthermore, 12V LED systems offer a significant performance advantage over common 5V USB-powered alternatives. While 5V strips are convenient for short runs, they suffer from severe voltage drop over longer distances due to the electrical resistance of the thin copper traces. This voltage drop causes the lights to dim, flicker, or shift colors toward the end of the strip. A 12V system carries current more efficiently, allowing you to run longer continuous lengths—often up to five meters—with uniform brightness and consistent color representation from start to finish.
Core Features to Evaluate for Ambient Gaming Lighting
When selecting 12V LED lights, the choice of diode technology directly dictates the visual effects you can achieve. Standard RGB strips feature diodes that must all display the same color simultaneously across the entire length of the strip. In contrast, RGBIC (Independent Control) strips feature built-in addressable integrated circuits, allowing different segments of the strip to display different colors at the same time. This technology enables complex dynamic effects, such as color chasing, gradients, and reactive lighting that syncs with your gameplay. For spaces that double as a home office, consider tunable white LEDs, which allow you to transition from a warm, relaxing white for casual use to a cool, high-contrast white that aids focus during intense gaming or work sessions.

For streamers, content creators, or anyone using a webcam, checking the Color Rendering Index (CRI) on product specifications is essential. CRI measures how accurately a light source reveals the true colors of objects compared to natural light. Many budget LED strips have a low CRI (below 70), which can make skin tones look washed out, gray, or greenish on camera. Selecting LED lights with a CRI of 80 or higher ensures that your face, background decor, and physical collectibles are rendered with natural, vibrant colors on your stream.
Control integration is another key pillar of a modern gaming setup. Evaluate whether a product relies on a basic infrared (IR) remote, a radio frequency (RF) controller, or smart connectivity. Smart 12V LED controllers connect via Wi-Fi or Bluetooth, allowing you to adjust settings through mobile apps or integrate the lights into broader smart home ecosystems. If you want your room lighting to synchronize dynamically with your PC hardware, verify that the LED controller is compatible with open-source lighting software or your motherboard’s dedicated RGB synchronization suite.
Finally, consider the local environment when checking product specifications. High humidity, dust, and accidental spills can damage exposed electronics. If your gaming desk is positioned near an open window, a humidifier, or where you keep drinks, look for strips with an appropriate Ingress Protection (IP) rating. An IP20 rating indicates the strip is open and suitable only for dry, enclosed areas. An IP65 rating means the strip is encased in a protective silicone sleeve, shielding the diodes and solder joints from moisture and dust. Keep in mind that silicone sleeves can slightly reduce heat dissipation, so they should ideally be mounted on heat-conductive surfaces like aluminum channels.
Matching 12V LED Formats to Specific Gaming Zones
A professional gaming room layout relies on layered lighting to create depth and reduce eye strain. This involves combining ambient lighting (overall room glow), task lighting (focused illumination on the desk surface), and accent lighting (highlighting specific design elements). By matching different 12V LED formats to specific physical zones in your room, you can build a balanced, visually dynamic space that avoids harsh glare and dark shadows.
Monitor and Display Bias Lighting
Mounting 12V LED strips directly behind your monitor or television screen creates bias lighting, which is highly effective at reducing eye strain. When you stare at a bright screen in a dark room, your pupils constantly dilate and contract to adjust to the extreme contrast, leading to fatigue. Bias lighting raises the ambient light level directly behind the display, softening this contrast and improving your perceived image depth and black levels.
To achieve clean bias lighting, position the LED strips a few inches inward from the outer edges of the monitor frame to prevent the individual diodes from being directly visible from the front. Because monitor back panels often feature curved surfaces and generate localized heat, standard double-sided tape can degrade quickly, causing the strip to peel off. Look for kits that feature high-bond adhesives, or use supplementary heat-resistant mounting clips. Additionally, verify if the kit includes or supports a frosted diffuser channel; a diffuser blends the individual LED light points into a smooth, continuous halo on the wall, eliminating distracting hotspots.
Desk, Shelf, and Rig Accent Lighting
Accent lighting highlights the architectural lines of your gaming desk, shelving, and PC chassis. For clean, straight lines along desk edges or under shelves, rigid 12V LED bars or flexible strips housed in aluminum channels are highly recommended. The aluminum housing serves a dual purpose: it acts as a highly effective heatsink that draws heat away from the diodes to extend their lifespan, and it holds a frosted diffuser cover that eliminates the harsh “dotted” look of exposed LEDs.
If you plan to install lighting in areas where the light source is directly visible to your eyes, prioritize high-density LED strips. Strips with a high number of diodes per meter (such as 120 LEDs/m or COB LED strips) provide a seamless, continuous line of light even without a deep diffuser channel. Before purchasing, measure the exact dimensions of your desk and shelves. Accent lighting setups often require precise cuts and corner turns, so ensure you have compatible solderless corner connectors or flexible extension cables to navigate bends without twisting or damaging the copper circuitry.
Perimeter and Architectural Cove Lighting
For larger room coverage, such as illuminating ceiling coves, baseboards, or wall panels, 12V LED systems require careful structural planning. First, calculate the total linear length of the perimeter you intend to light. Because 12V systems can experience voltage drop over runs longer than 5 meters, you must plan your power delivery layout to avoid dimming or color shifting at the far end of the installation.
To maintain uniform brightness across a long perimeter run, you may need to implement power injection. This involves running a parallel power wire from the main power supply and connecting it to the far end or middle of the LED strip, ensuring equal voltage distribution. Always install perimeter lighting inside dedicated aluminum diffuser channels to bounce the light evenly off the walls or ceiling. This creates a soft, indirect glow that fills the room without shining directly into your eyes. Always check the manufacturer’s specifications to verify the maximum continuous run length supported by a single power input before finalizing your layout.
Power Supply Sizing and Electrical Safety Checks
A 12V DC LED strip must never be connected directly to standard 220V AC wall outlets. A dedicated 12V AC/DC power adapter is mandatory to safely step down and convert the high-voltage alternating current from your wall into the low-voltage direct current required by the LEDs. Using an incorrect, uncertified, or undersized power supply can lead to flickering lights, overheating, and potential electrical hazards.
To size your power supply correctly, you must calculate the total wattage of your planned LED setup. Locate the manufacturer’s specification for wattage consumption, which is typically listed per meter (W/m) or for the entire roll. Use the following formula to determine your total power load:
$$\text{Total Wattage} = \text{Total Length of Strip (meters)} \times \text{Wattage per Meter (W/m)}$$
For example, if you plan to install 6 meters of an LED strip that consumes 9.6 W/m, your total power load is 57.6 watts. To ensure long-term reliability and safety, always apply a 20% safety overhead margin. This prevents the power supply from running at 100% capacity, which generates excessive heat and shortens its lifespan. Multiply your total wattage by 1.2 to find the minimum power supply rating:
$$\text{Minimum Power Supply Rating} = 57.6\text{ W} \times 1.2 = 69.12\text{ W}$$
In this scenario, you should select a 12V power supply rated for at least 70 watts or higher. Choosing a power supply with a higher wattage rating than required is completely safe; the LED strip will only draw the current it needs. However, using a power supply with a lower rating than required will cause the adapter to overheat and fail.
When choosing a power supply, prioritize enclosed plastic “brick” adapters (similar to laptop chargers) over open-frame metal switching power supplies with exposed screw terminals. Enclosed adapters are much safer for consumer gaming rooms because they protect the user from accidental contact with live AC wiring. Ensure the power adapter carries recognized electrical safety certifications to verify it has undergone rigorous testing. Place the power brick in a well-ventilated area under your desk, away from carpets, fabrics, or enclosed cabinets that can trap heat.
If your lighting installation requires hardwiring the power supply into existing wall switches, running cables inside wall cavities, or modifying fixed architectural wiring, always isolate the mains power at your home’s circuit breaker before beginning work. If you are not fully confident in handling mains electrical wiring, consult a qualified professional electrician to perform the installation safely and ensure compliance with local electrical codes.
Pre-Purchase Verification Checklist for 12V LED Kits
Before completing your purchase on any online marketplace or brand store, use this checklist to verify that the components are compatible, safe, and suitable for your gaming room setup:
- Voltage Match: Confirm that the output voltage of the power adapter is exactly 12V DC. Connecting a 12V LED strip to a 24V power supply will permanently destroy the diodes, while connecting it to a 5V supply will result in extremely dim light or no operation at all.
- Wattage Overhead: Verify that the included power adapter provides at least a 20% wattage overhead above the total calculated wattage of your LED strips.
- Controller Compatibility: Check that the LED controller matches your preferred control method. If you want smart home integration, ensure it supports your specific smart assistant or PC RGB synchronization software.
- Physical Dimensions and Connectors: Measure your installation areas and ensure you have purchased the correct length of LED strips, along with any necessary solderless corner connectors, extension cables, or aluminum diffuser channels.
- IP Rating: Ensure the IP rating of the strip matches the installation environment, opting for IP65 if the lights will be exposed to high humidity or potential liquid spills.
- Seller Reliability and Warranty: Review the return policies and warranty terms on the ecommerce platform. Look for sellers that offer clear warranties covering manufacturing defects, dead LEDs, or faulty controllers.
- Specification Transparency: Compare prices in ₱ across reputable online retailers, but be cautious of extremely cheap, unbranded kits that do not clearly state their wattage, CRI, or safety certifications on the product listing.
Frequently Asked Questions (FAQ)
Can I power 12V LED strips directly from my gaming PC's USB ports? (FAQ)
No, you cannot power a native 12V LED strip directly from a standard USB port on your gaming PC. Standard USB 2.0 and 3.0 ports output 5V DC, which does not provide enough voltage to illuminate a 12V LED strip. Attempting to connect a 12V strip to a 5V USB port without a specialized step-up converter will result in the lights failing to turn on or flickering very dimly. Furthermore, drawing too much current from a motherboard’s USB port can trigger overcurrent protection, causing your PC to shut down or potentially damaging the USB controller. Always use the dedicated 12V AC/DC wall adapter included with your lighting kit to ensure safe, stable, and full-brightness operation.
How do I hide the wires and power bricks in a clean gaming setup? (FAQ)
Achieving a clean, wire-free look requires strategic cable management. Start by routing the thin 12V wires along the back edges of your desk or behind monitor arms using adhesive cable clips or hook-and-loop straps. For longer cable runs, use plastic paintable raceways mounted along the baseboards or the underside of your desk to keep wires completely out of sight. To manage the heavy 12V power brick, mount an under-desk cable management tray or a wire basket to the underside of your desktop. Place the power brick and any excess cabling inside the tray, ensuring the brick is positioned in a well-ventilated spot to allow heat to dissipate safely. If you are renting your space, use non-destructive mounting solutions like damage-free adhesive strips to secure cable trays and clips without drilling into walls or furniture.

Community discussion
Share your experience or ask a question. Comments are reviewed before publication.